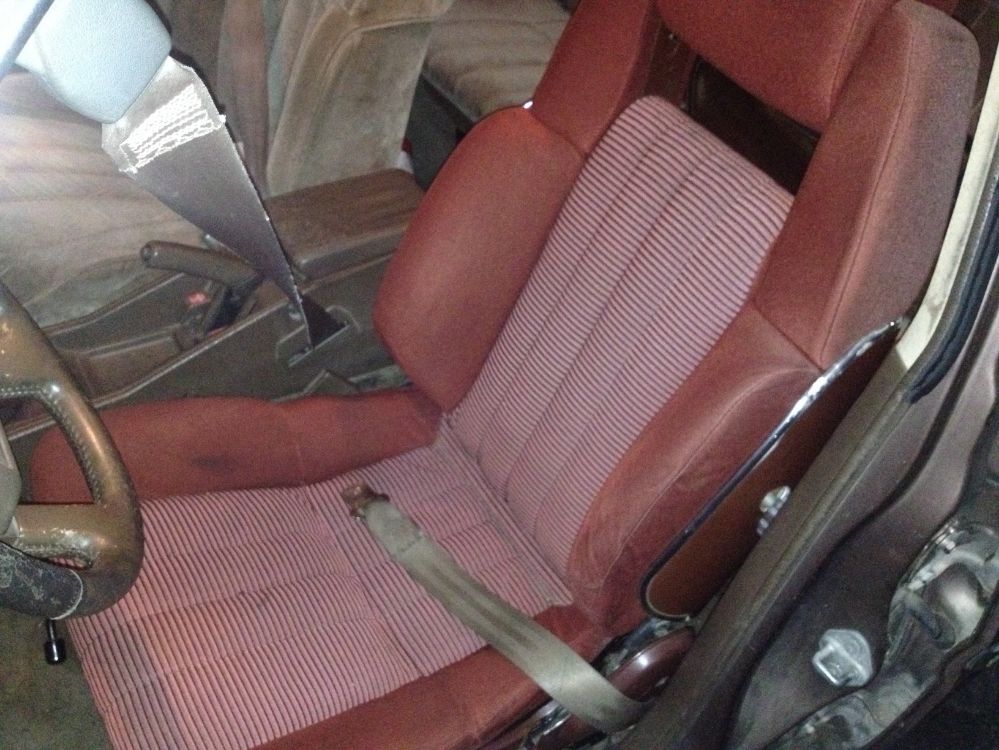
Today I spent a solid 5 hours over at Mitchell's house figuring out how
to fab up a bracket to let me use the Celica-Supra seats. We ended up
getting the driver's seat in and its sah-weet!
It's weird that the wagon has a better drivers' seat than the MR2. I
still need to sort out the seatbelt situation, since I don't like how
it's currently mounted (probably going to use an MR2 part if I can get
one), and I also need to get the little pump-bulb thing hooked up so I
can have functional lumbar support. ALSO I need to look into brown
aerosol fabric paint/dye so I can brown-ify the red seat to sorta match
the rest of the interior.
11/4/13
T3 front suspension components are on the way. Camber plates, bearing
upper hats, weld-on coilovers (with 400lb/in springs), and RCA's.
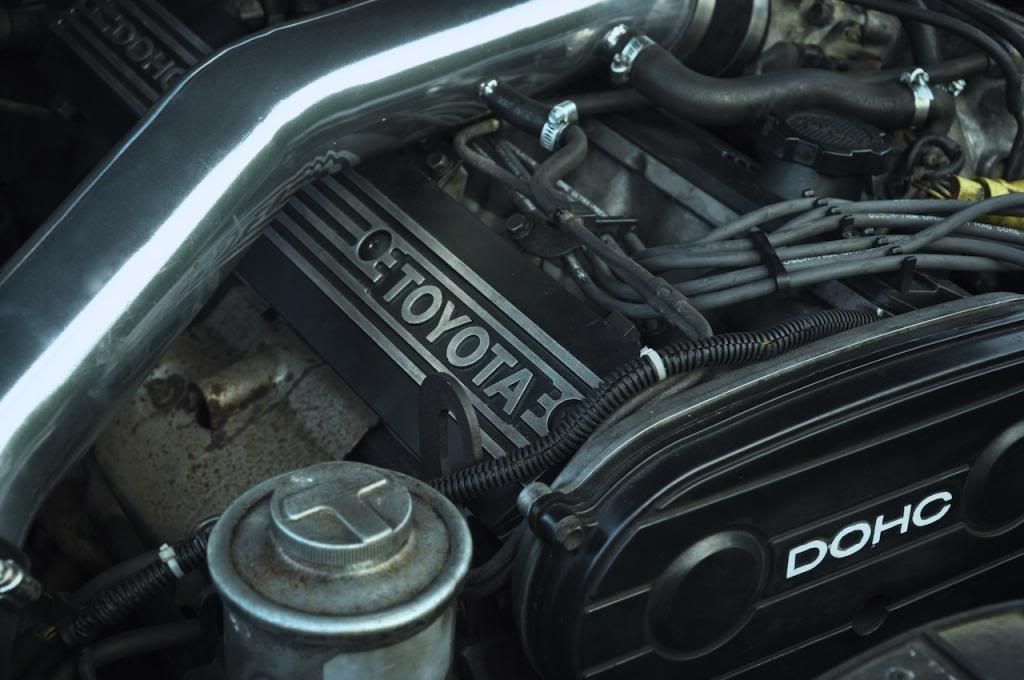
I also thought I'd make an official mod list for the car so far: Engine/drivetrain - MA70 W58 transmission swap -MA60 clutch MC -MA70 clutch SC -MX73 flywheel -Custom one-piece driveshaft -DriftMotion braided steel clutch line -ARP flywheel bolts -AE86 clutch pedal -MA70 speedo cable -MA70 shifter/shift boot ARP 7M-GTE head studs Rabid Chimp intake w/ K&N filter EGR delete Mocal thermostatic oil filter sandwich plate AE86 GTS oil cooler Fuel pulse damper delete
Suspension/chassis: TechoToyTuning heim joint adjustable panhard rod Celica-Supra P-type wheels (14x7, - with 195/70R14 tires
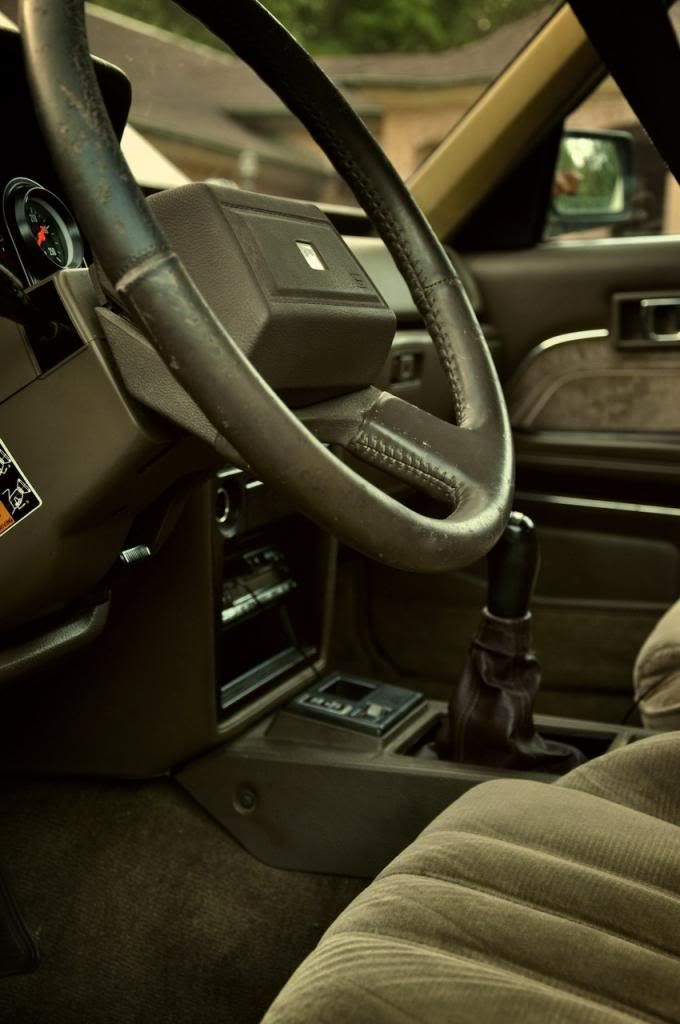
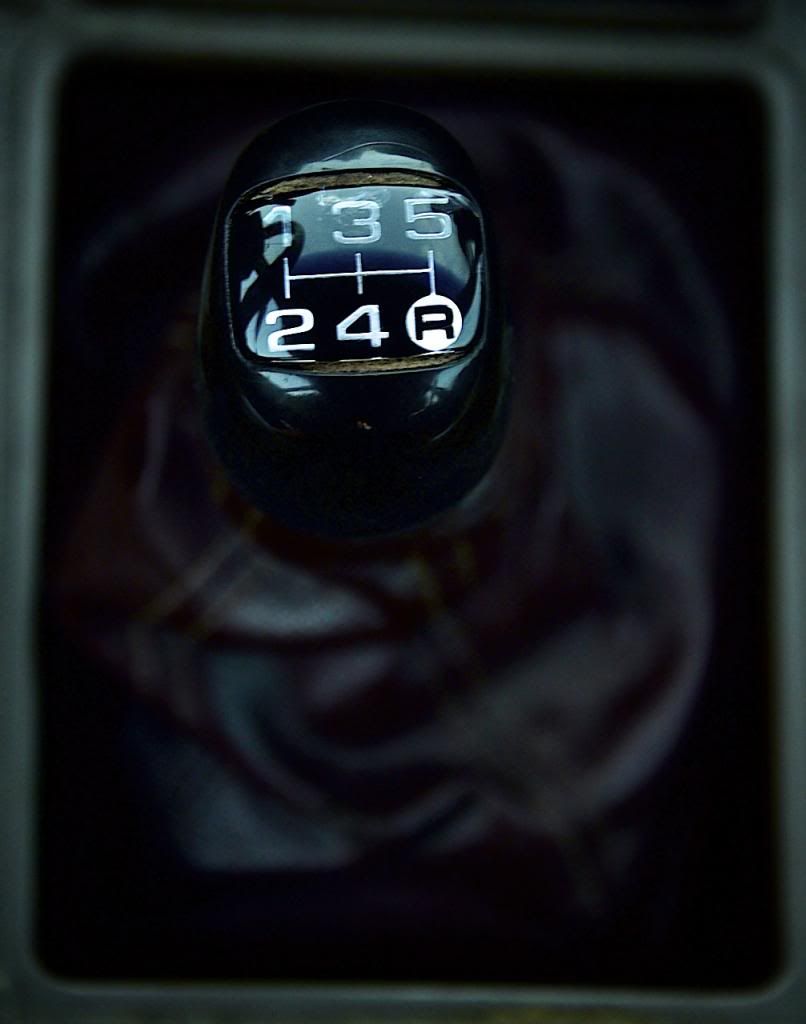
Interior: MA60 Celica-Supra P-Type driver's seat Cheap-o water temp gauge
Soon to come: T3 front suspension overhaul -weld-on coilovers with 400lb/in springs -RCA's -camber plates -bearing upper hats Short stroke front strut conversion -cut/shorten/reweld front housings -SW20 rear KYB AGX shocks Camaro KYB AGX shocks in the rear Cut rear springs until I can find something better
In the future: MA60 P-type passenger seat Aftermarket steering wheel Better rear spring solution Complete exhaust overhaul -RabidChimp header into 2.5" piping -Magnaflow high-flow cat -Magnaflow resonator -Magnaflow muffler 195/60R14 tires Fender roll + more low Rear wheel spacers Tint T3 steering knuckles
11/6/13
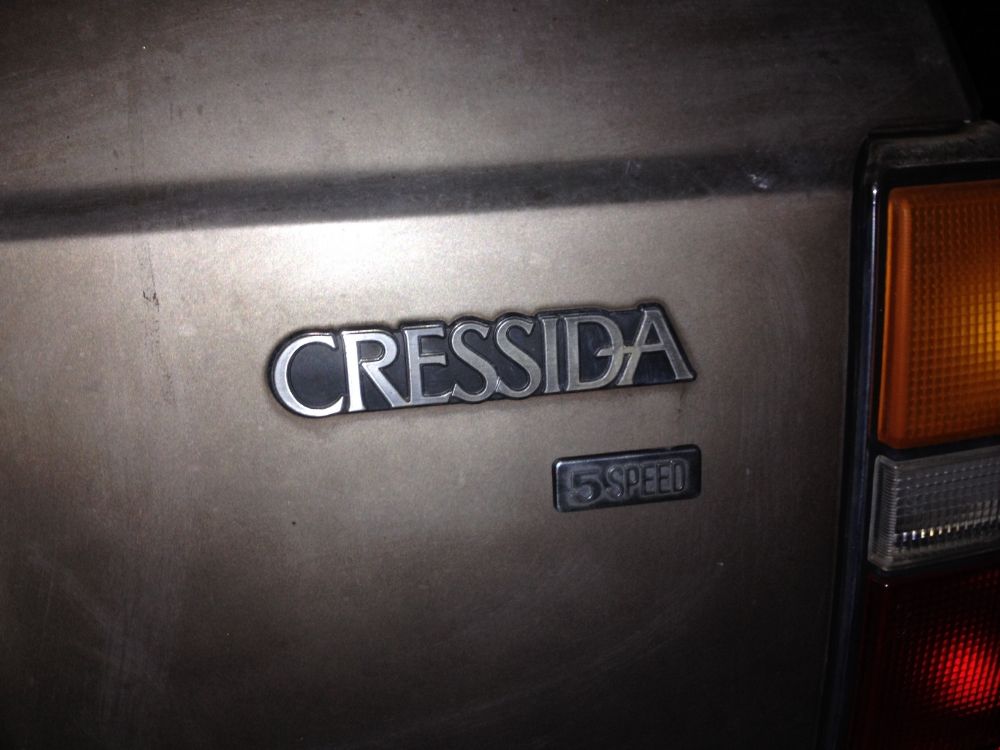
Badge from a 70's Celica.
11/10/13
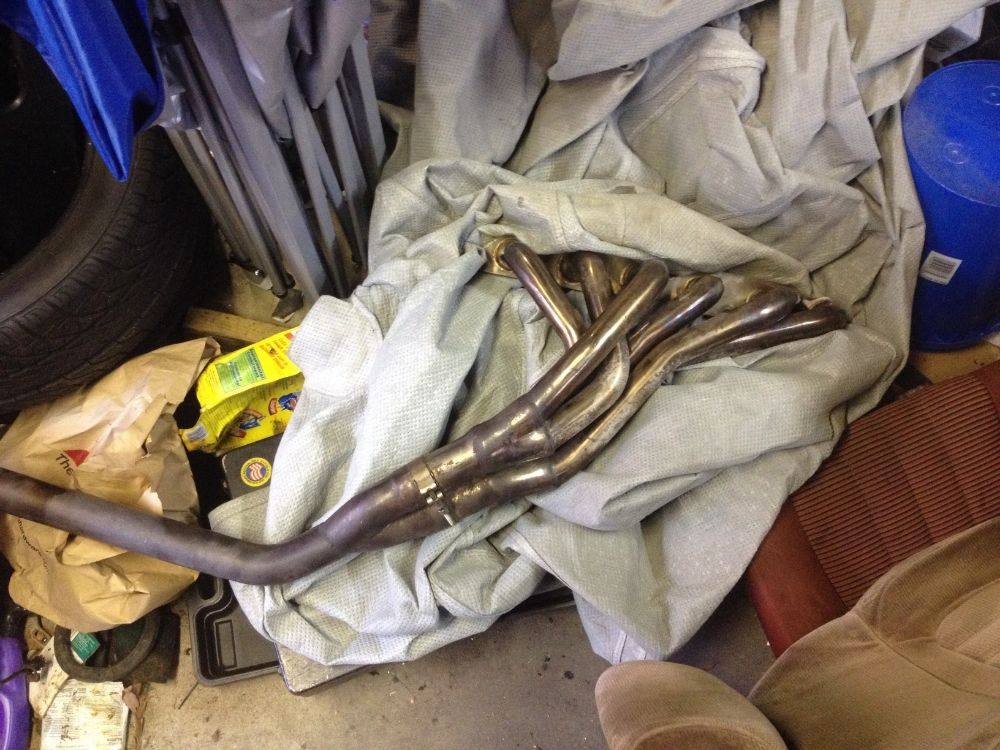
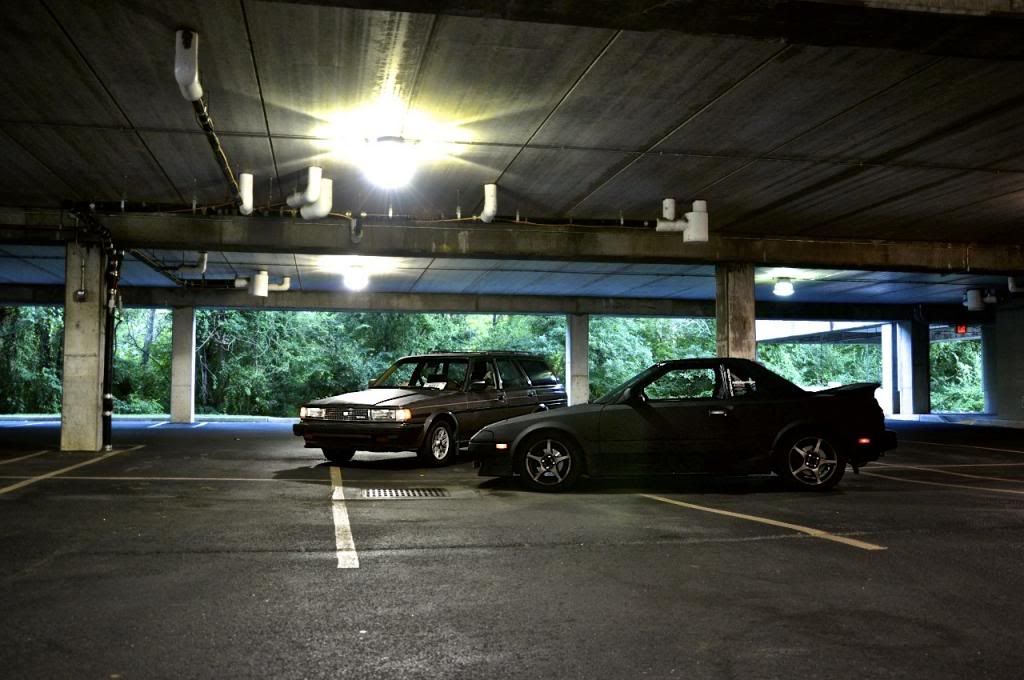
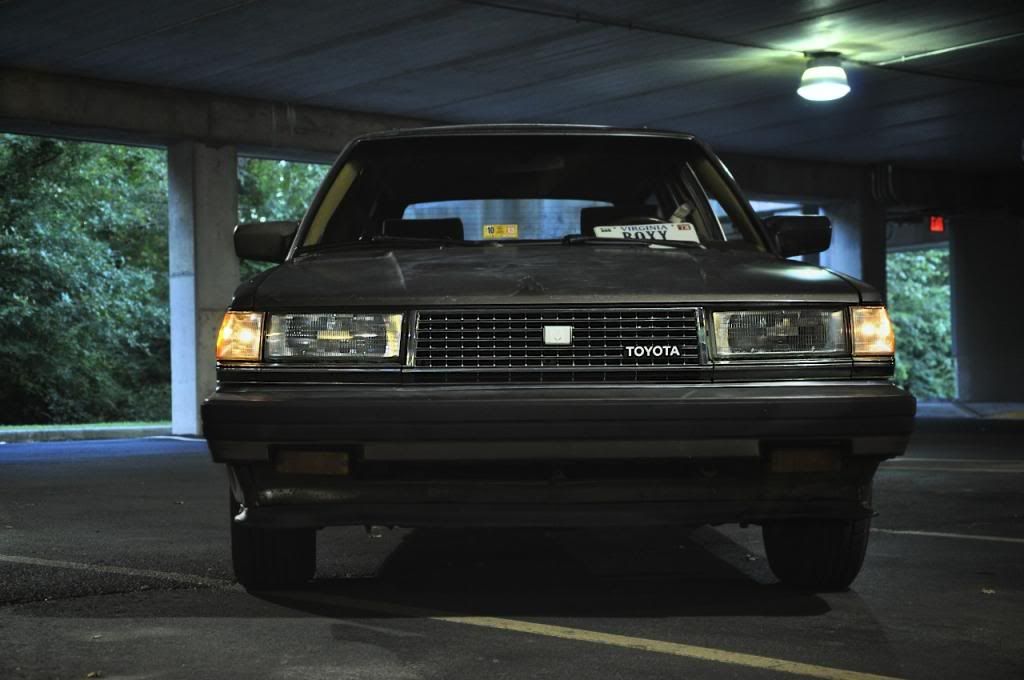
Friday night I picked up this thing.
It's a 7M-GE OBX header for an MA70 Supra. The header itself should bolt
on after a little grinding at the notch on the flange, but I think the
downpipe will require some custom work, including adding the proper O2
sensor bung. No biggie, since the car will eventually be getting a
custom exhaust anyway. I plan on cleaning up this piece, painting it,
and wrapping it. And before everybody get all "merr OBX is teh
suxxorz merr", for the 5MGE you can pretty much do OBX or Pacesetter
since that's all that's available. And this was $75. No complaints here.
Today I got under the rear and took some measurements to start figuring out a rear spring solution This is with weight on the axle, just up on ramps. 9" spring height 5" diameter at the top where it meets the chassis 4" diameter at the bottom where it meets the axle Want to lower around 2" - 2.5" and be MUCH much stiffer Shock absorber length 16"
I
also fixed the little squeeze ball thing for the inflatable lumbar
support on the Supra seat. The bulb came from a friend who works for a
company that sells used medical parts. He found it sitting in a
warehouse somewhere and just gave it to me (free.99 for the win), and I
happened to have a proper-sized hose laying around.
It even stows under the seat for a pretty clean install. And it works great!
11/11/13 Took a spring out, measured it for real, and took it over to
a friend's house to see if the bottom would fit on his spare AE86 axle.
It doesn't. AE86 parts are out. I'm probably gonna grab some Volvo 5"
diameter adjustable perches that should bolt up to the bumpstop mount on
the chassis and work from there with some universal springs.
Inexpensive and effective.
11/12/13 It's so beautiful.......should have....sent.....a poet......
11/18/13
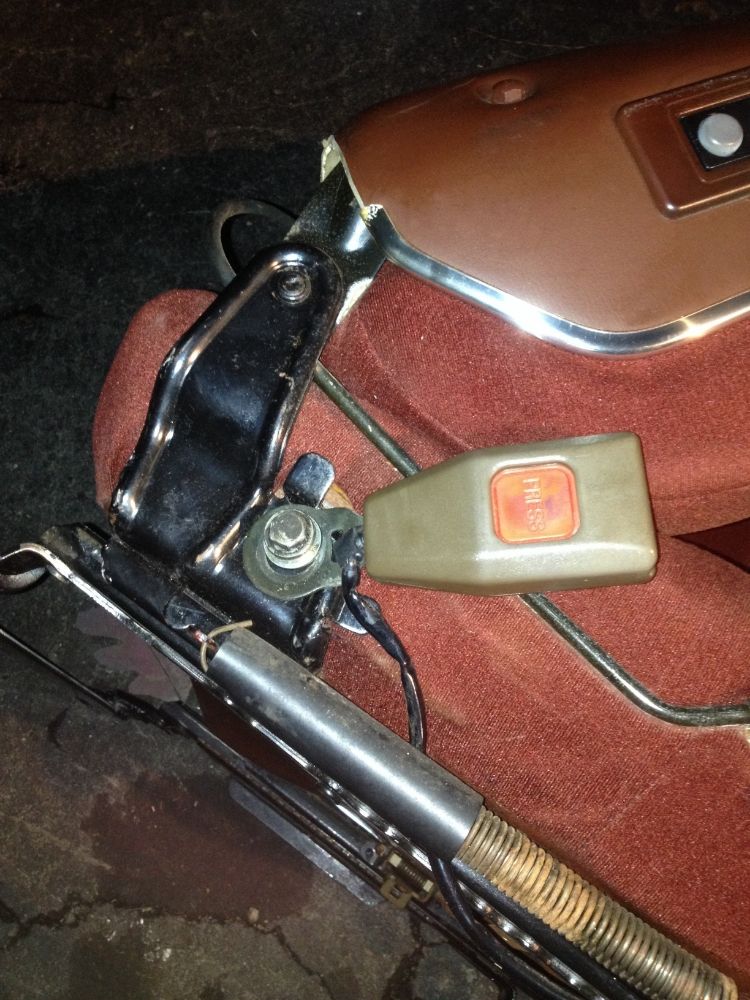
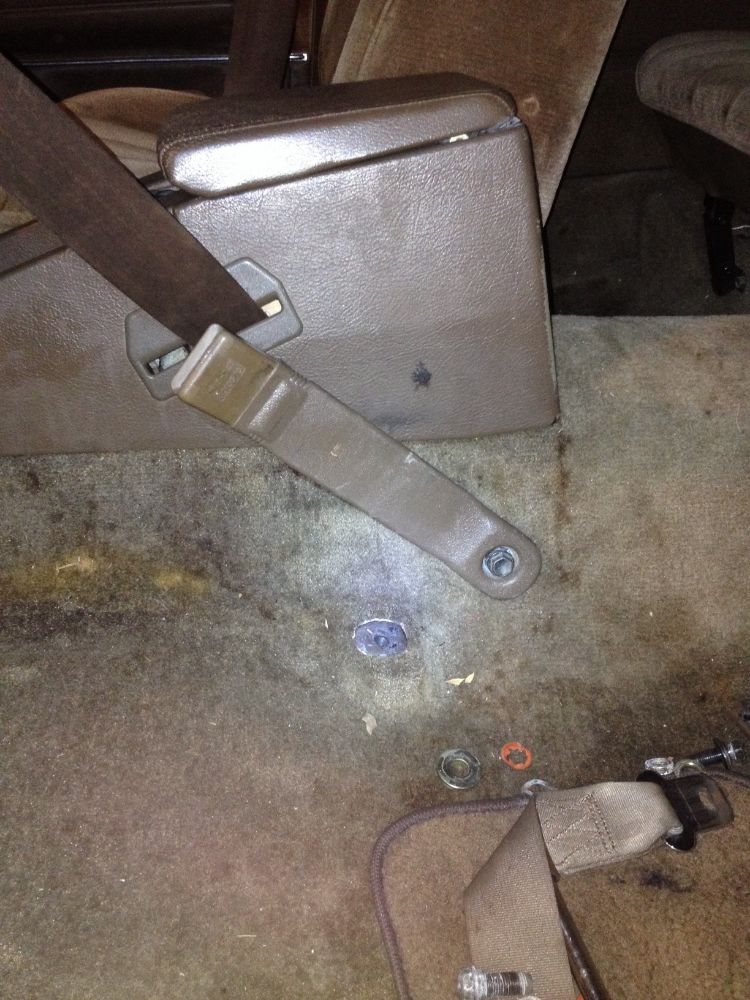
So the stock Cressida seatbelt receiver is attached to the seat, whereas
the Celica-Supra receiver is not. When I put the Supra seat in, I had
to use an elongated bolt and sort of ghetto mount the Cressida receiver
on a less-than-ideal spot on the Supra seat that was using a smaller
bolt on an un-reinforced part of the seat frame. This also put the
receiver at a very awkward angle that made it difficult to use.
Luckily, there is a large 14mm bolt that holds the seat slide guide rail
to the transmission tunnel that would be perfect for mounting a
receiver to. And AW11 MR2's use a chassis mounted receiver that's pretty
long. So I posted a WTB ad on MR2OC and got a hold of a guy parting out
a rare tan interior AW11 and got one of the receivers for like $12 or
something. It works flawlessly and looks like it came from the factory
that way
The only real mod I had to do was jumper the seatbelt warning light plug since the MR2 doesn't have one.
Now to get another receiver for when I do the other side......
8/25/13
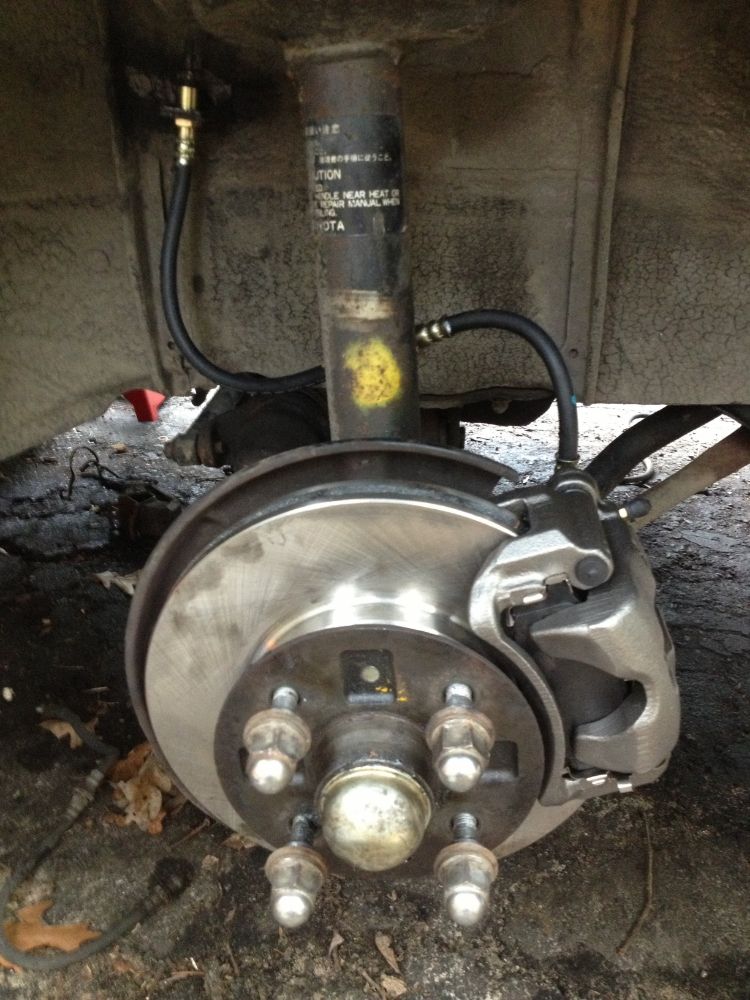
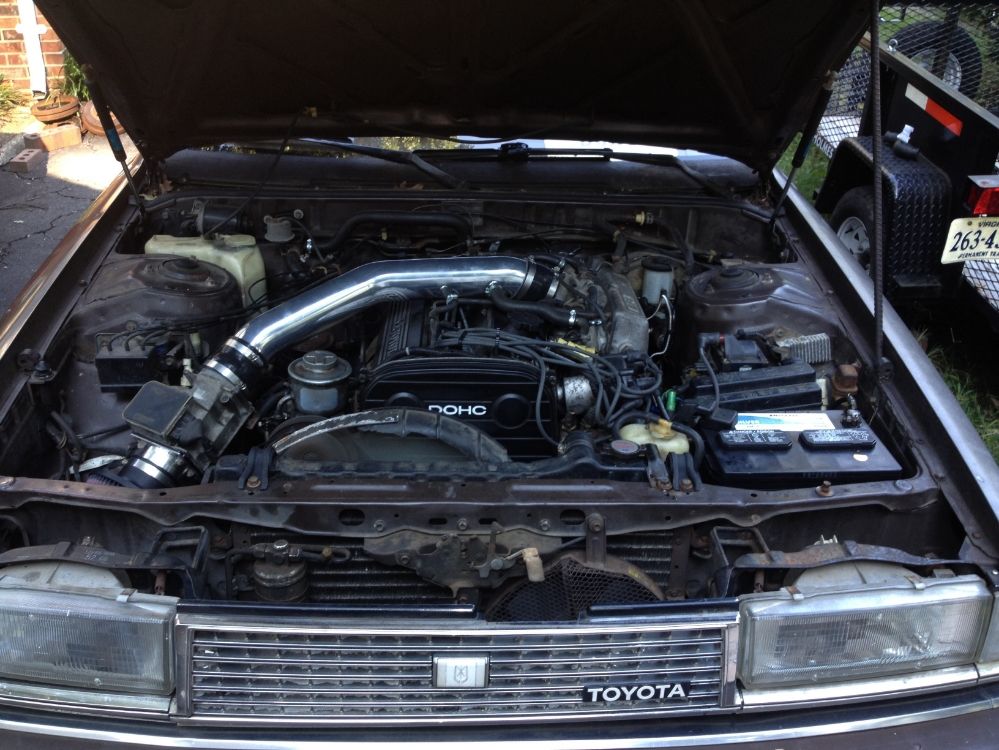
I got everything buttoned up on the motor and it runs sooooooo smooth
(my clutch-activated neutral safety bypass works perfectly). I just
gotta sort out a medium-sized coolant leak from where the heater hose
connects to the top/back of the head and it will be awesome. Both front
rotors have been replaced, along with all the hub bearings and such. I'm
still waiting on calipers and brake lines, should be here tomorrow.
Tomorrow I need to order new caliper slide pin boots at work.
Power steering will need to be bled as well. I also noticed that the
passenger front window will go down but not up. I tested the motor by
itself and it works, so it must be something in a switch. I ALSO need to
get a trim-removal tool so I can get into my rear hatch handle and get
the key lock to work. Right now I can only unlock it electronically. So
basically once I get my brakes done up front I can move on to the rear
axle, then the driveshaft can go in and I can take it for a spin! WOO
HOO!
8/26/13
I made very little progress tonight. The torn steering rack boot has
been replaced, but in the process the threads on my outer tie rod end
were completely mangled so I have one of those coming from Advance
tomorrow. I THINK my coolant leak is fixed but I'm not 100% on that,
time will tell. Tomorrow my calipers/lines/master cylinder should come
in. After that, the front will be back on the ground and I'll move on to
the rear end seals.
As for the future of the rear end, I have
been doing research into axle/diff codes and whatnot and I THINK if I
took out the internal gear-bits out of a MA60 Celica-Supra it SHOULD
bolt into my axle and give me an LSD. I know the ring and pinion are the
same, but I'm not sure about the axle splines and such. So I'll be
hopping over to CAP early Saturday morning and pulling the diff out of
the P-type they have over there just for shiggles.
8/27/13
New calipers and brake lines fit up to the new rotors and pads to complete the front brakes......
.....along with a new master cylinder.
Now we move on to the rear brakes. Drums. Yuck.
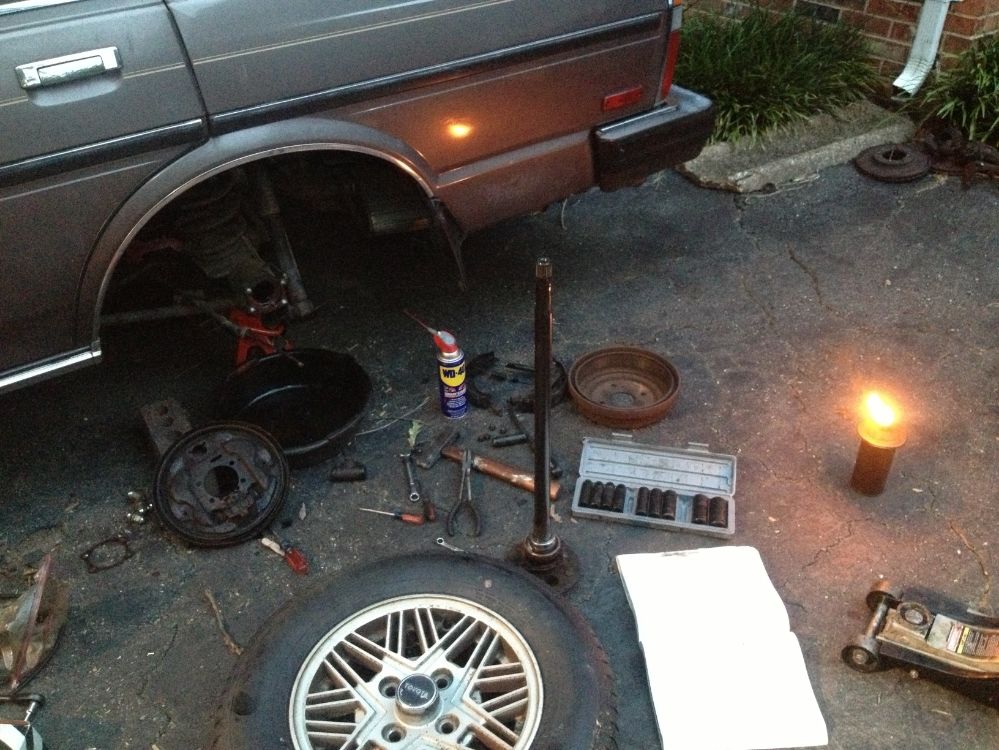
My workspace this evening, complete with mosquito lamp to keep the biters at bay.
I got the axle out, the rear brakes completely disassembled, the back
plate off, the axle oil seal out, only to find that I forgot to order
new seals. *facepalm* Looks like I'll be ordering those tomorrow. I was
able to get the backing plate put on with new shoes and a new wheel
cylinder. Not a big deal about the seals, as the axles have to be out of
the diff for me to pull the "third member" (as the 4Runner guys call
it) to replace the big diff housing gasket. While it's out I may take it
somewhere to have the backlash checked and what not since I have NO
idea how to do that mess.
I also checked my VIN Plate. Looks like the EPC at work was wrong, I
have an E-series diff (7.1"), not an F-series (7.5") so the MA60 diff
will NOT swap
9/2/13
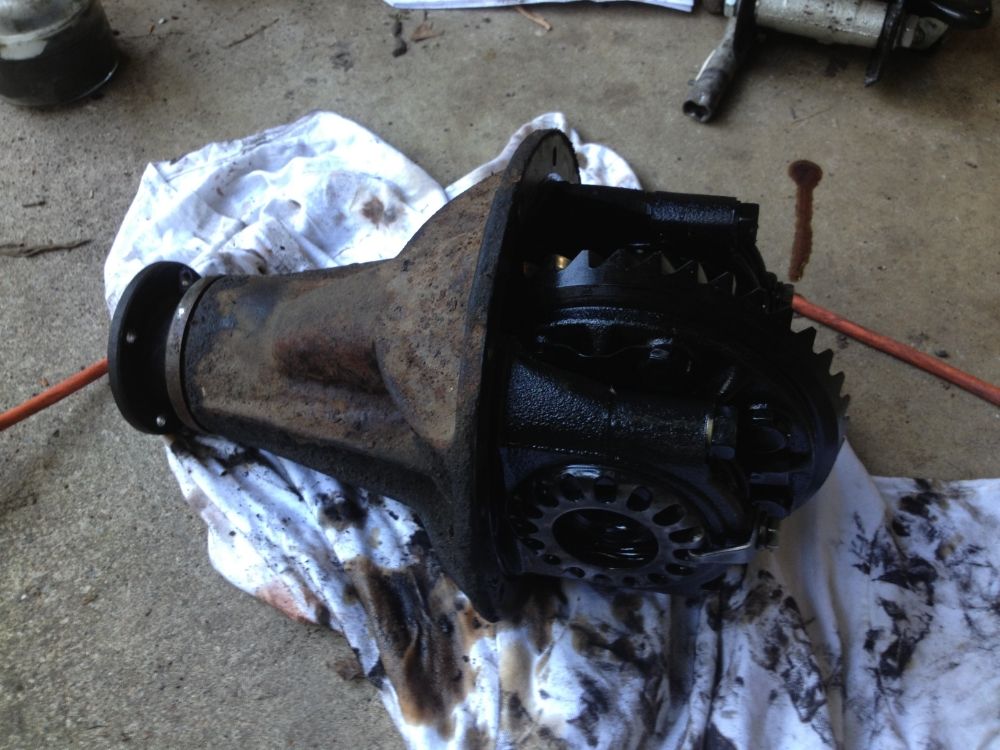
I was in a big hurry today so I only took one pic. Basically today between 3:00 and 9:00 I did the following: -remove right axle shaft -replace right drum brakes -replace both axle oil seals -re-install both axle shafts with fresh end plate gaskets -drain diff oil, replace drain bolt/gasket -remove diff, replace oil seal, replace diff -refill diff, replace fill bolt/gasket (Amsoil gear oil) -drain transmission, replace drain bolt/gasket -refill transmission (Redline MT90) -install shifter -replace rear brake softline -install new custom driveshaft -re-bench bleed brake master cylinder -bleed all brakes -reinstall wheels
As you can see, I was busy. Here's a pic of my super awesome open diff while it was out
It now runs and drives very well, but there are a few issues I need to address soon. -replace radiator hose(s) since they are a tad drippy -replace or rebuild starter since it's kinda spotty when it actually wants to work properly -it
hesitates when you give it lots of throttle. Not sure what that could
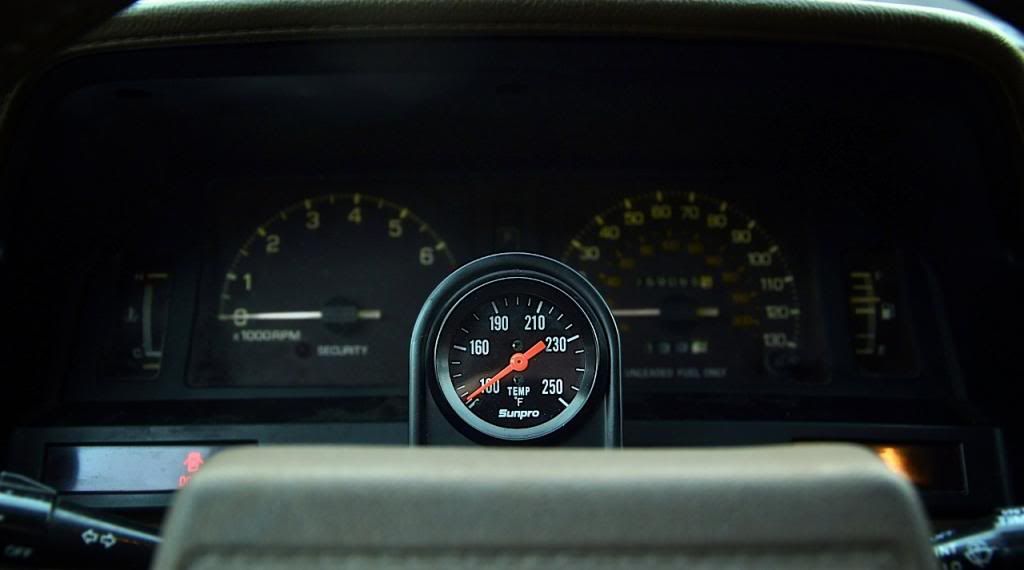
be, maybe TPS? It has all new ignition, so I'm not sure what's up. -front right window needs to be diag'd, goes down but not up, but the motor works fine when you apply power directly to it. -needs rear wiper blades -needs proper coolant temp gauge. The stock one reads in the middle all the time.
But the important thing is that it runs and drives! WOO HOO!
9/9/13
I've put about 150 miles on the car so far and it's been pretty solid. I
put in a cheap-o autozone mechanical water temp gauge just to make sure
I'm not overheating and I'm not. There are still a few issues that need
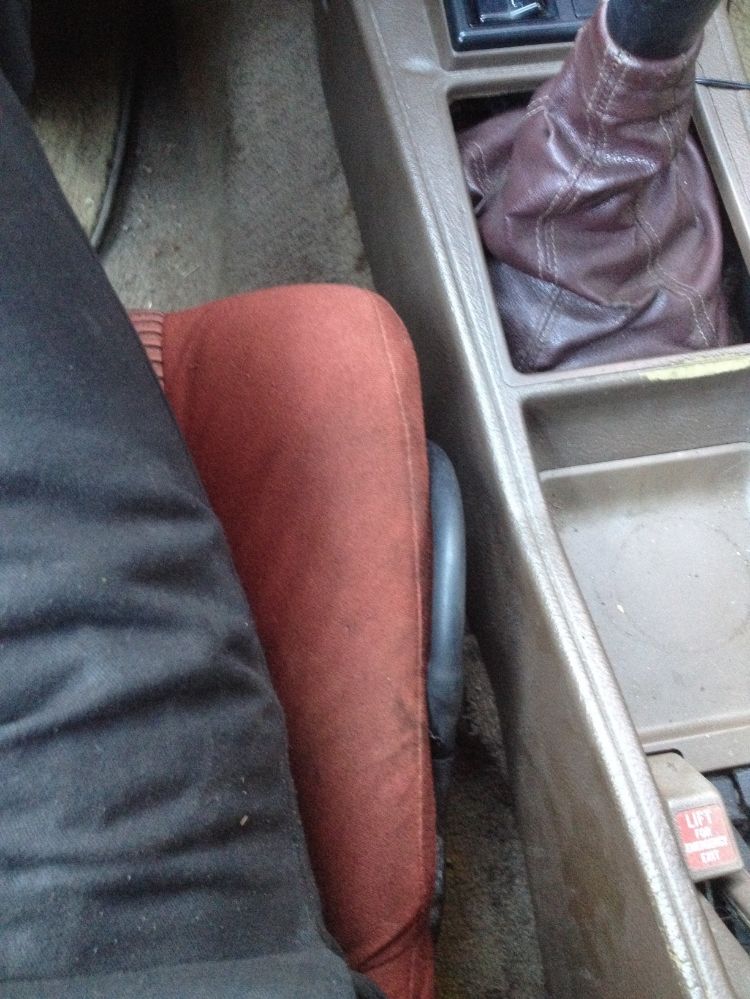
to be addressed: -window still doesn't work -shift boot/center console needs to be properly put together -pedals need adjusting -whenever
the rear suspension is compressed a bit (bump or lots of people in the
car), the now-oversized front u-joint on the driveshaft lightly contacts
the dust shield on the transmission, looks like the black thing in this
picture I found on google:
So I think I may trim that skirt thing a little bit.
Other than
that the car doesn't have any real issues. I do have a list of things
I'd like to do to it in the future, here they are in rough order of
expense/effort: -buy cassette tape to headphone jack adapter so I can listen to my iPod through the awesome 1993-spec aftermarket Pioneer stereo -plumb
in a power steering cooler using either a PS cooler I have yet to
acquire from a car in the junkyard OR using the stock AE86 oil cooler I
have as a PS cooler -plumb in an engine oil cooler using either the
aforementioned AE86 cooler or using another cooler from probably the
junkyard in conjunction with an Earl's Performance oil filter sandwich
w/build in thermostat -finish restoring/polishing the P-Type wheels, get tires, put them on the car -cut springs a bit until I can afford coilovers -electric radiator fan conversion -modify my Celi-Supra seat rails to fit/dye seats to match/fix lumbar ball pump thing/install -complete
suspension overhaul with T3 shortened front coilover housings, BC
racing rear AE86 coilovers (really adjustable shock perches and
adjustable length shocks, not actually "coil-over"), custom T3 panhard
bar, custom length T3 axle links, probably T3 steering arms as well for
quicker steering
9/14/13 Compiling a list of options for future low...
Front: A) Cut springs, stock shocks - free, but hate my life B)
Remove spring perches, cut/shorten/weld housings with SW20 MR2 rear KYB
AGX shock inserts and T3 weld-on kit and camber plates - $610 + welding
costs, $420 without camber plates
Rear: A) Cut springs, Camaro KYB AGX rear shocks, custom T3 panhard bar - $350, but hate my life B) Custom springs, Camaro KYB AGX rear shocks, custom T3 panhard bar - $??? C)
Megan Racing/BC Racing AE86 rear "coilover" (adjustable spring seats,
8k springs, adjustable length shocks), custom T3 panhard bar - around
$650 D) everything from option C, plus all T3 adjustable heim joint links and traction brackets - $1100 ish
I'm thinking B for the front without camber plates for now, and either B or C for the rear
9/17/13 Got
word from T3 that a panhard rod would run me $145 and I just have to
send them measurements and they will make me a nice heim joint
adjustable one. Megan Racing rear AE86 bits would run around $500 (not sure if shipped or not) BC Racing rear AE86 bits would run around $660 shipped
I
think I may just do cut springs with KYB AGX Camaro shocks on the rear.
I'll still probably be doing T3 coilovers/shortened housings/MR2 shocks
on the front, but it's all going to have to wait since it's pretty
expensive to do everything.
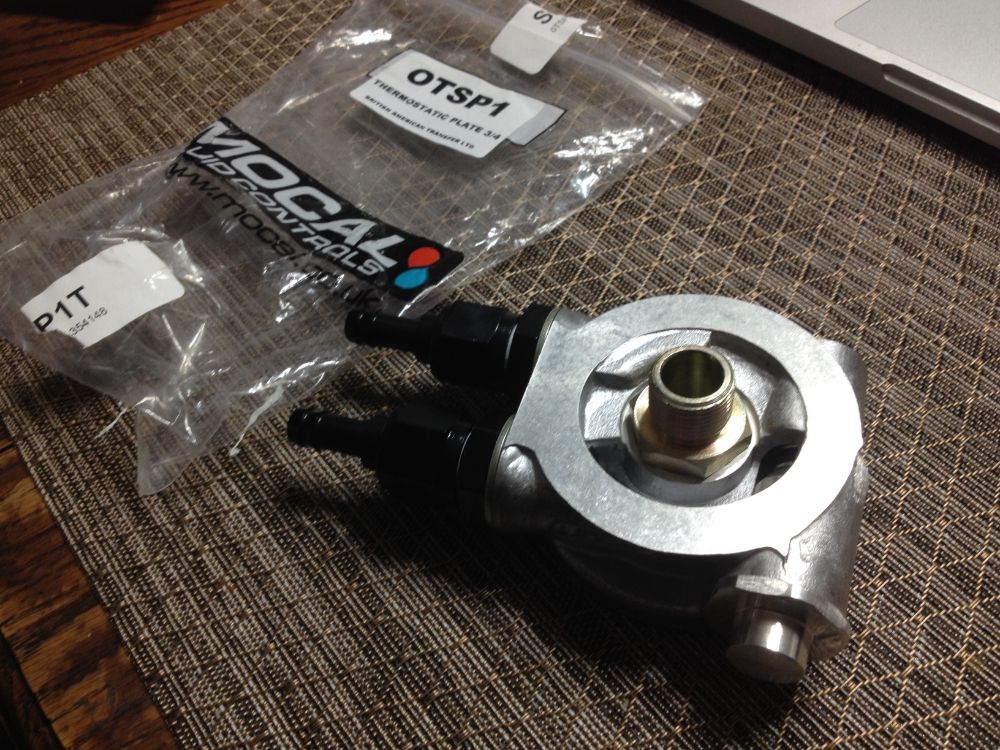
9/19/13 Ordered a Mocal oil filter sandwich plate with built-in thermostat.
It has two 1/2" BSP fittings, so I got 1/2" BSP to -8AN adapters, and
two -8AN to 3/8" hose barb fittings that match the 3/8" barbs on the
AE86 oil cooler. ALSO, the bracketry on the cooler almost perfectly
lines up with the bolts for the hood latch vertical support piece, so
mounting it should be a breeze. Still working on how a power steering
cooler will fit, but we will see.
I also have new radiator hoses
waiting to go in, and I'll probably be getting new belts tomorrow. Every
time I start the car from cold, it squeals really loud for about 20
seconds or so.
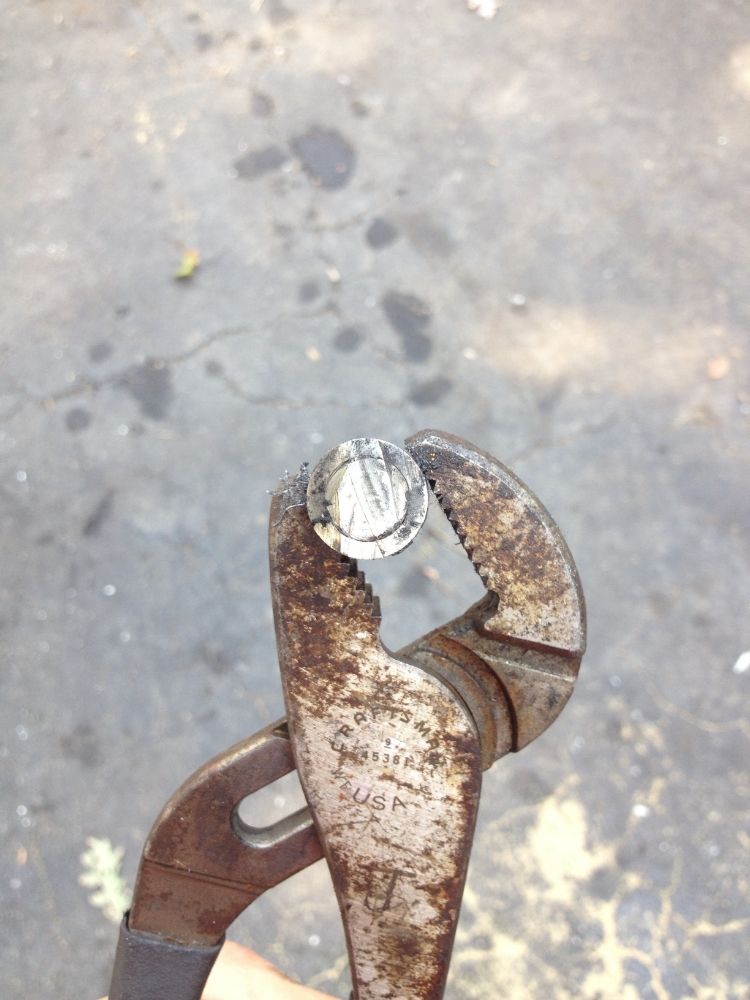
I also started measuring the panhard rod, but the chassis side bolt is
stuck and won't slide out, So I can't measure it's diameter. I think
what I'll end up doing is ordering a new bolt from work, measuring that,
then cutting out the old one. Here are the measurements: Bolt center to bolt center (rod length): 29 1/4" Axle-side end width: 1 3/8" Axle-side hole size: 13/16" Chassis-side end width: 1 3/8" Chassis-side hole size: ????
Oh, and new radiator hoses are in, and new belts are on the way.
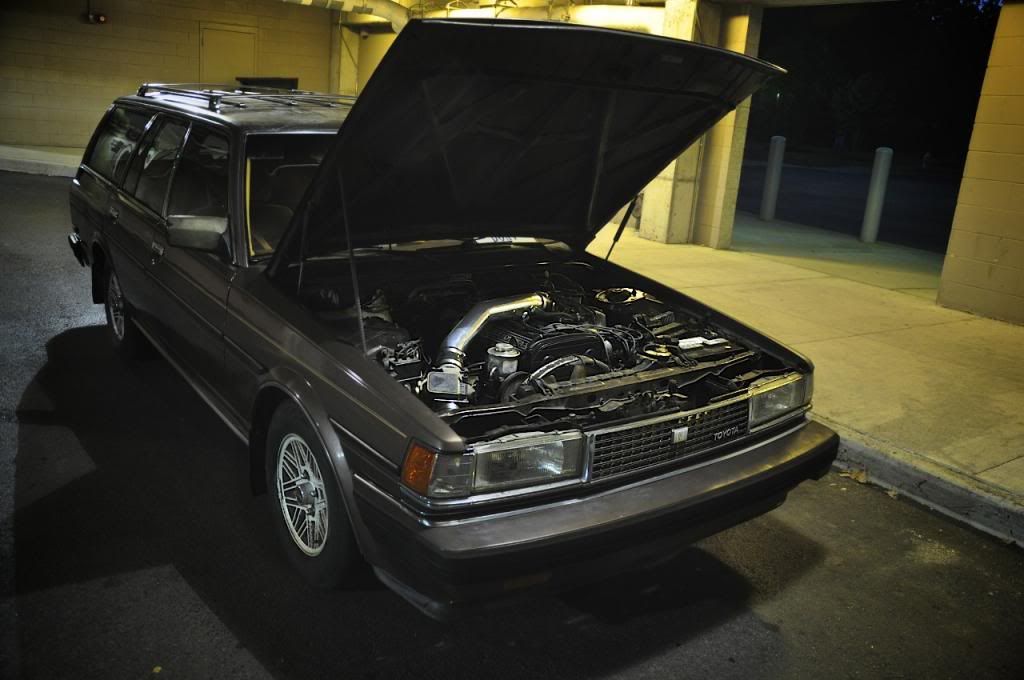
9/24/13
Om nom nom nom.....
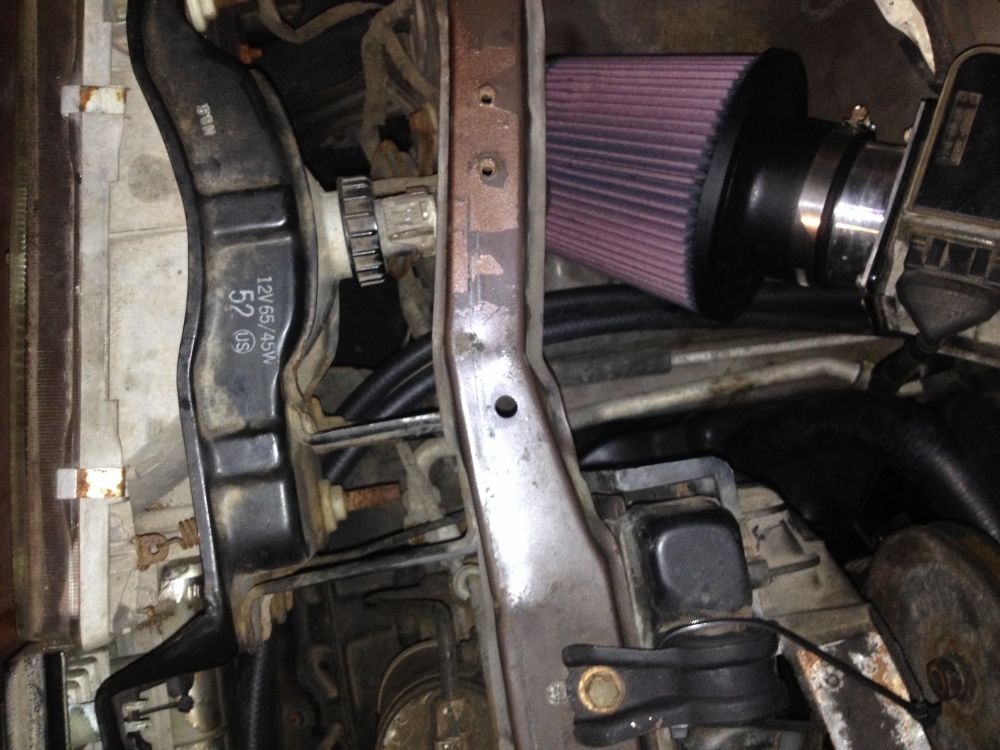
Just gotta get some 3/8" oil hose, mount up the AE86 cooler, and it should be ready to go.
9/25/13
Oil cooler is installed!
The AE86 cooler is ALMOST a direct
bolt-in to the vertical hood latch support bracket. All you have to do
in terms of modification is trim the upper oil cooler bracket like so:
Then it bolts right in!
It's a pretty tight fit around the filter, but it works. That little
stub of hose on the bottom there is covering the end of the long
alternator mounting bolt so the hoses don't rub on it.
9/29/13
Had a photoshoot with Felicia Noelle Photography.
10/6/13
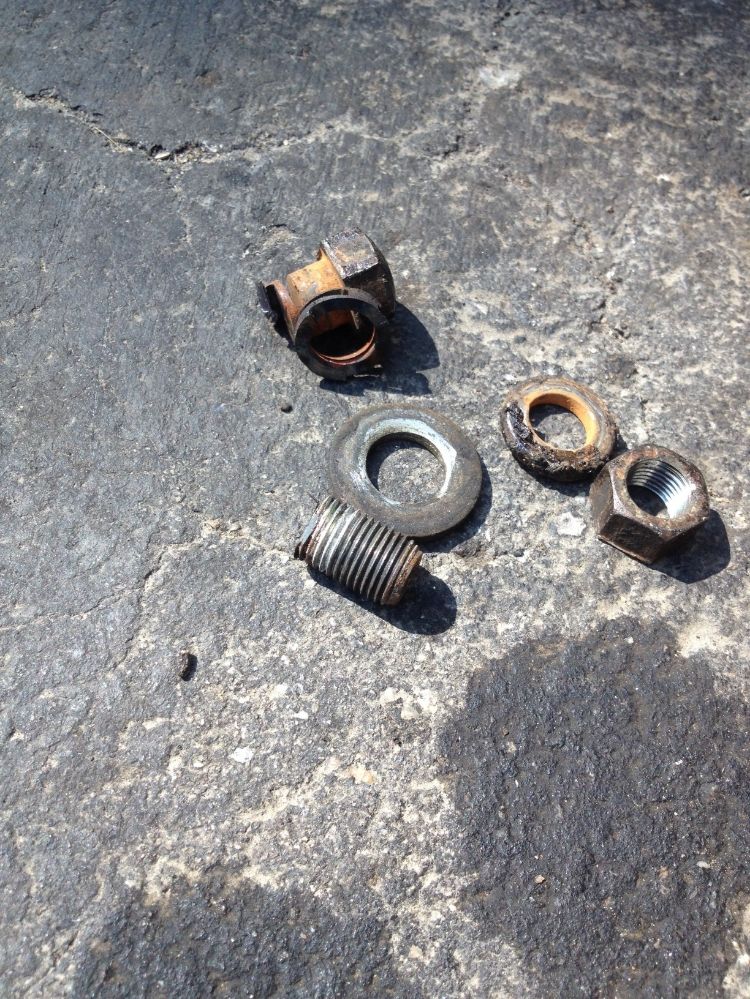
Removed the panhard rod to get the measurements to send to T3. The
chassis side mount bolt was fused to the metal bushing sleeve, so I had
to cut it out.
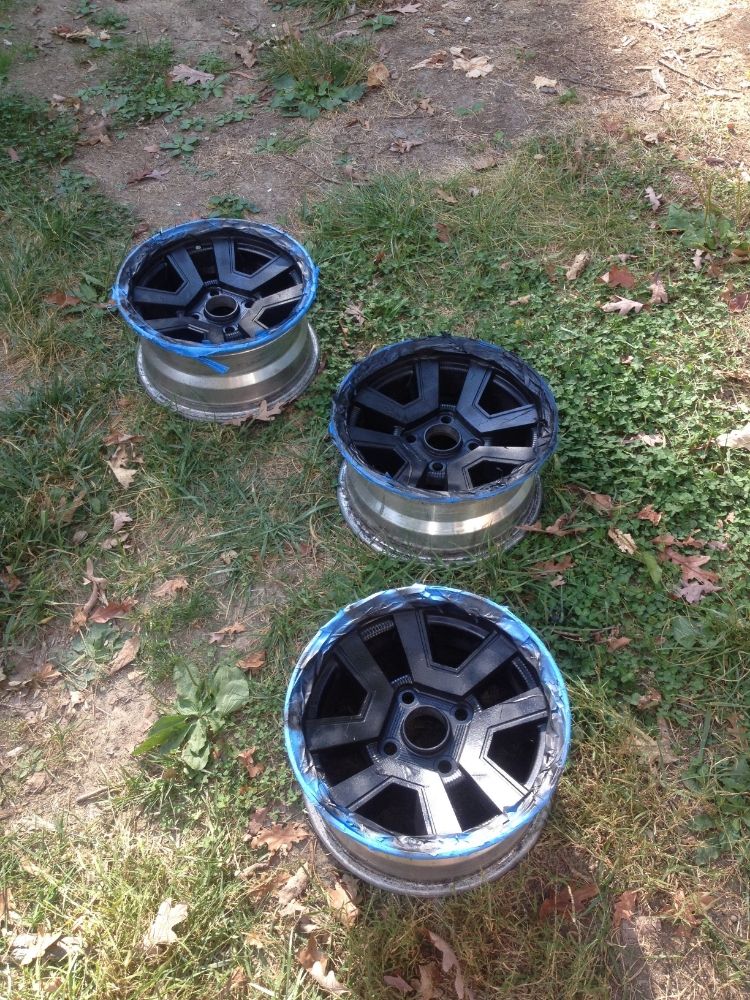
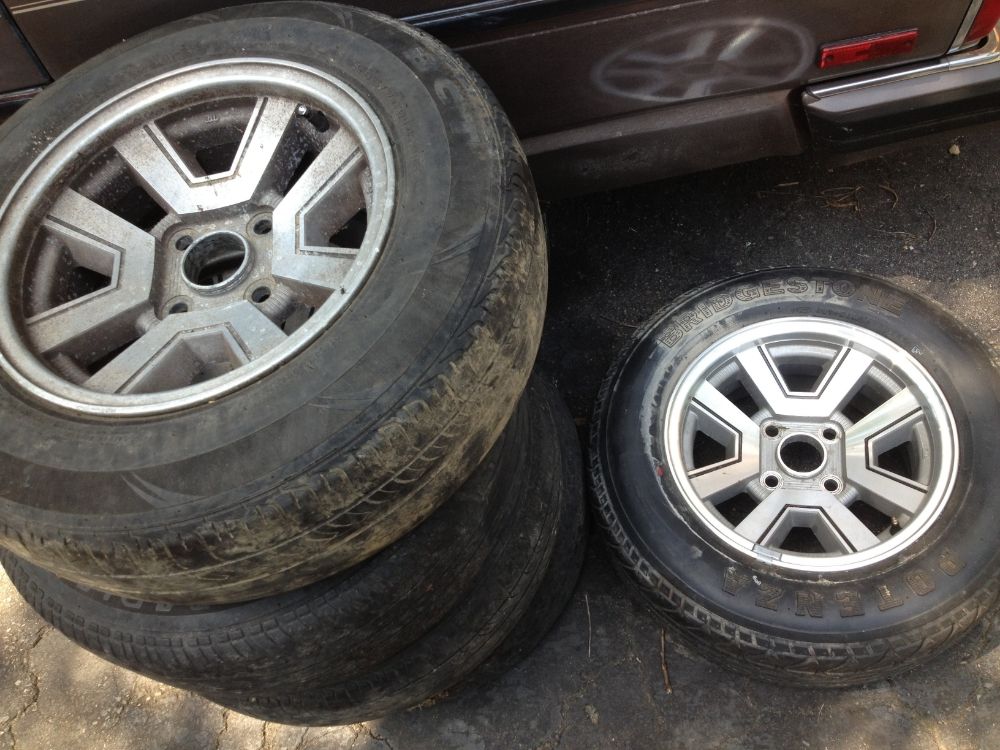
I also finished refurbishing my P-Type wheels!
And just as a reminder, this is what they looked like when I got them (on the left)
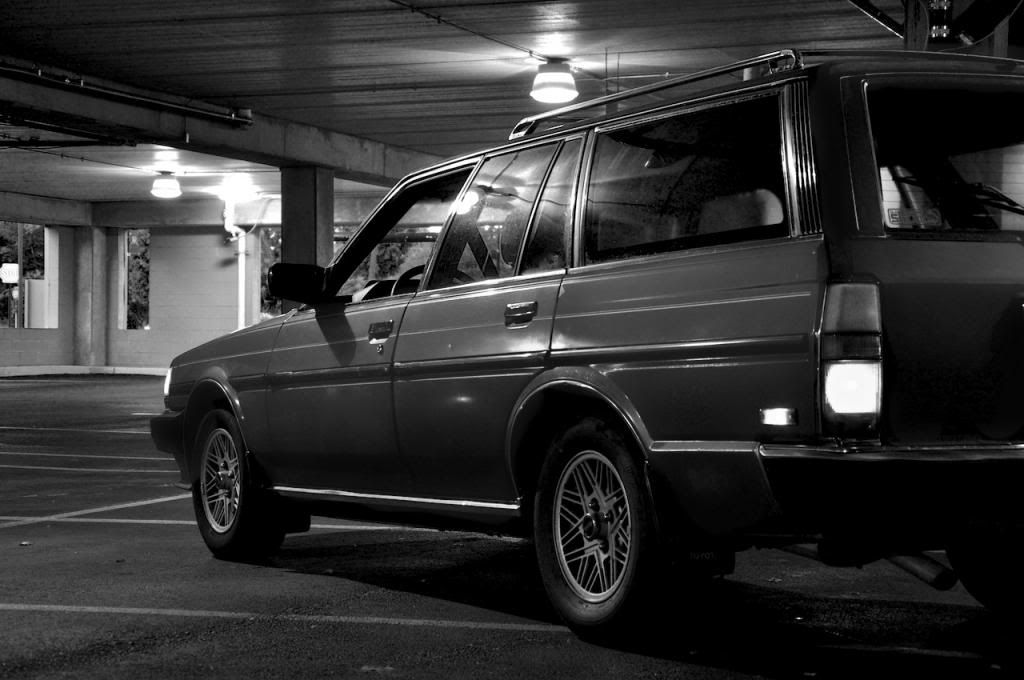
10/7/13 Supra wheels are on the car with tires mounted. Pics will
come once I get the T3 panhard rod in and have the car back on the
ground.
10/8/13 Ordered the panhard rod today. No idea when it
will be here, but it can't be soon enough. Also, I found this picture
on the interwebs (NOT MY CAR):
That's pretty much EXACTLY the stance I want on mine! So seckseh.
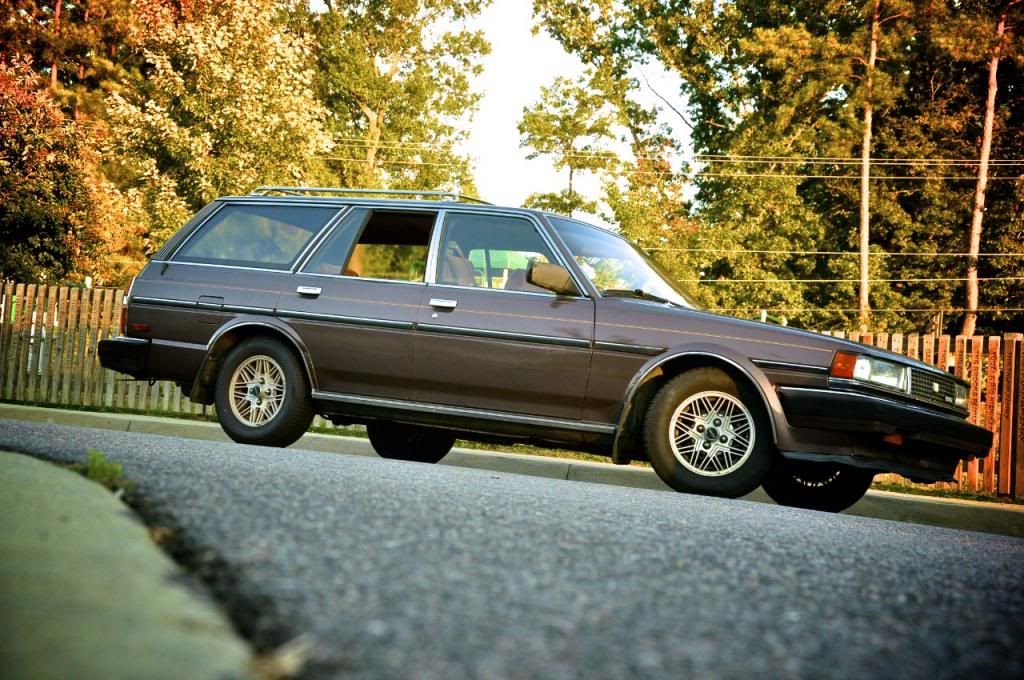
She's still up on jackstands, but here's what the wheels look like on the car
10/15/13
Oppo Sticker!
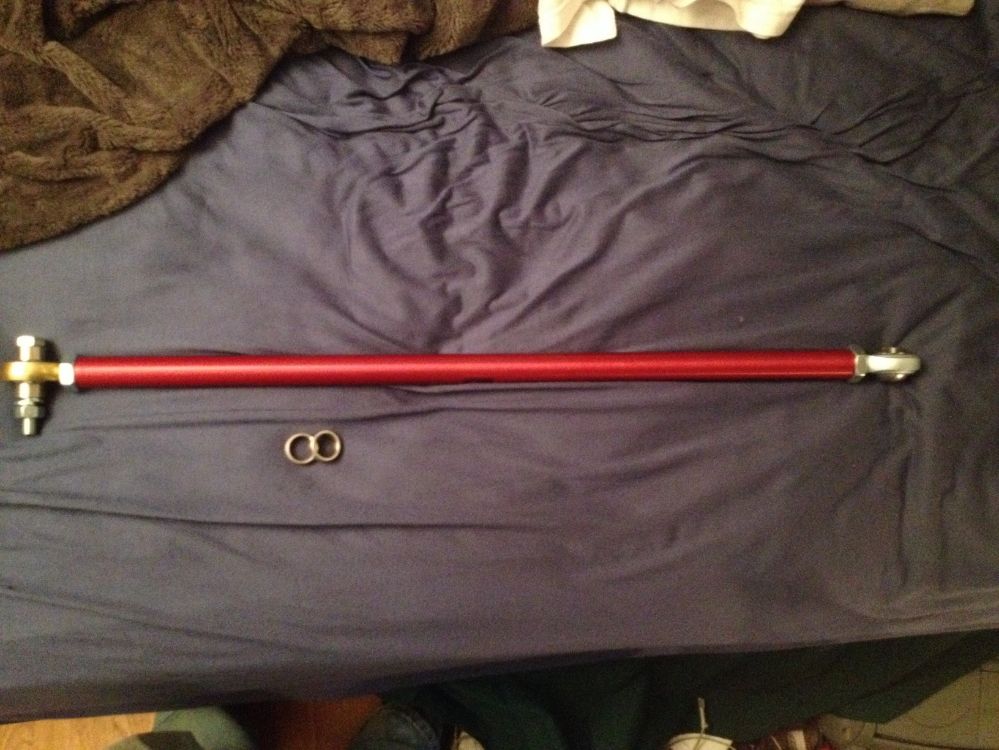
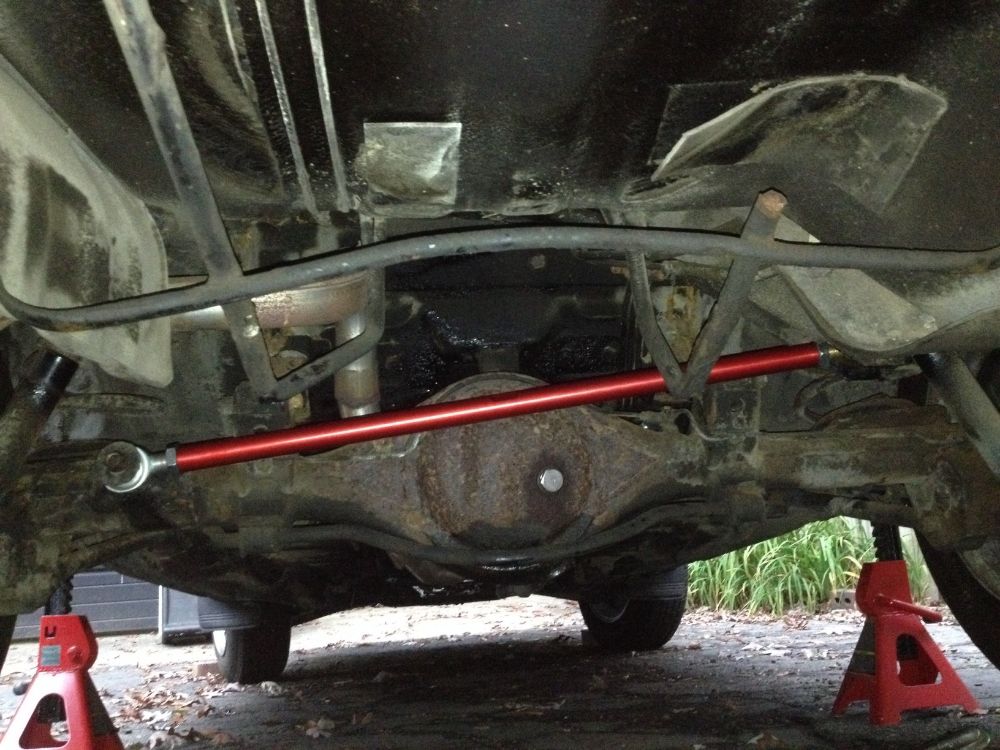
Techno Toy Tuning custom panhard bar came in and it's gorgeous! Also it fits perfectly!
Here it is installed (set to factory length at the moment, given that it's still stock height)
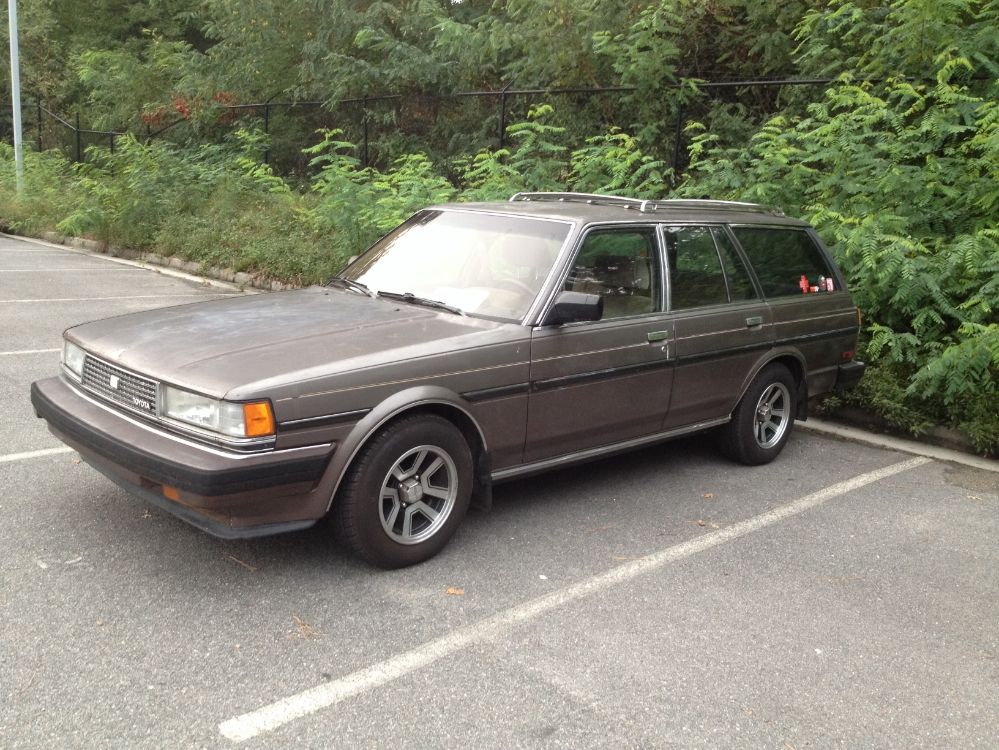
Now I can lower it all I want and still have a centered axle. Also drove
the car for the first time with the P-Type wheels on it. I'm running
the stock 195/70/14's, which, when on the stock 5.5" wide snowflakes had
lots of mushroom in the side wall, but now on the 7" wide P-Types it
has a bit of stretch to it. It seriously feels like it has stiffer
suspension on it. It rides firmer, is much more responsive to steering,
and seems like it handles way better.
Pics of the car on P-Types will come tomorrow
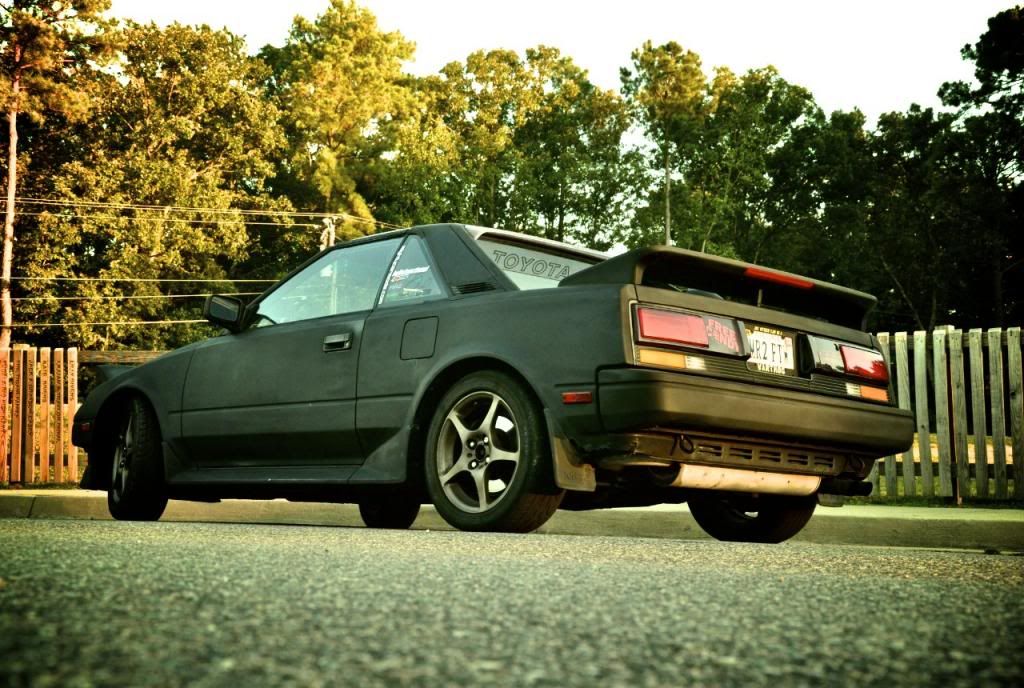
10/16/13
It's off the jack stands and on the P-Types!
10/21/13 Belts re-tightened. New hood struts installed so now it
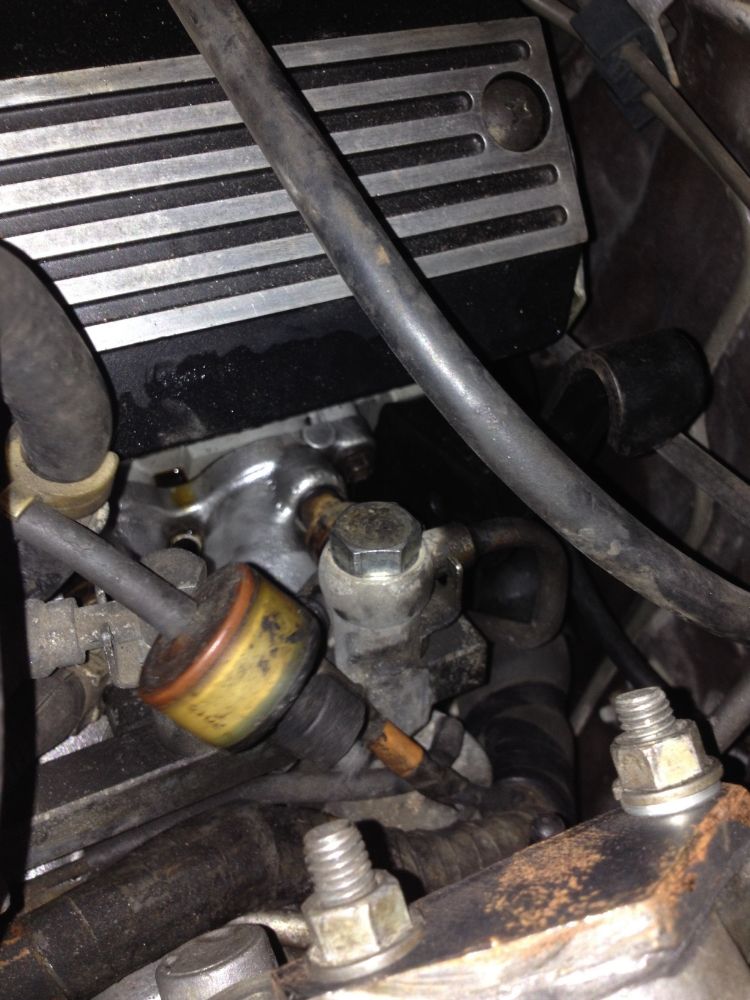
actually stays open without the rebar ghetto prop. Also it's leaking
fuel from around the pulsation dampener, so I need to figure out what to
do about that.
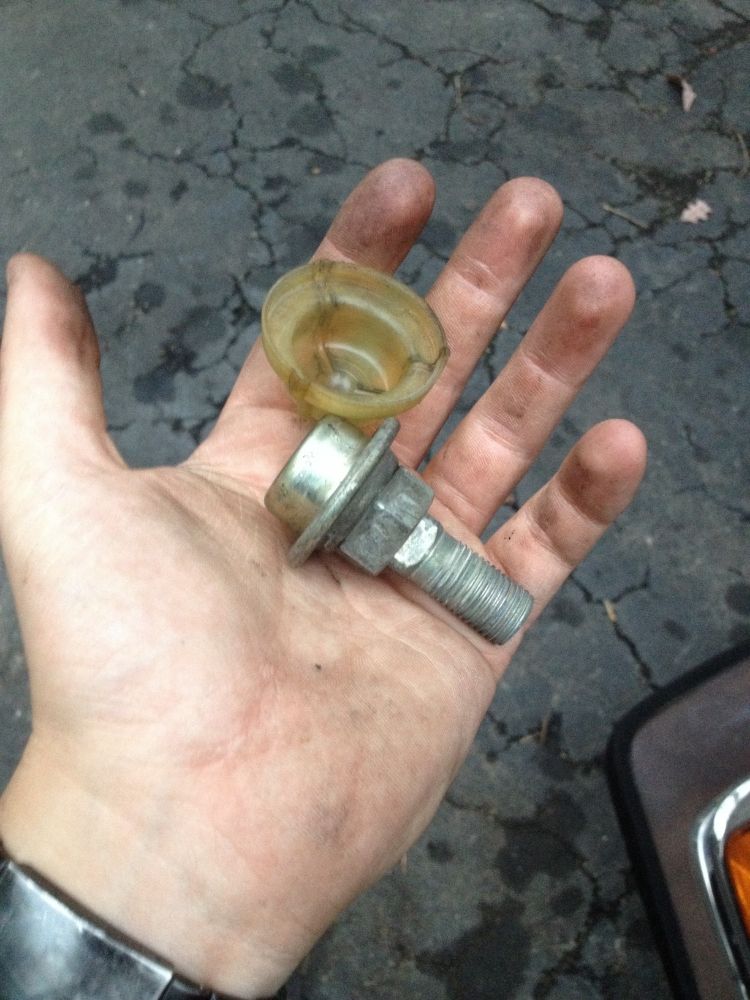
I was actually looking for a 7M bolt, but they are discontinued, and there aren't any 7M-powered cars in any local junk yards.
10/29/13 Got
some banjo bolts from Mitchell's box of spare hardware. Harbor freight
is out of their copper crush washer multi-packs till they get their
shipment on Thursday, so I'll pick that up then. I also posted on
CelicaSupra asking how to adapt A6 Supra seats to the X7 Cressi, and I
got this super helpful response:
TransAmBandit wrote:I had another photo I took somewhere.
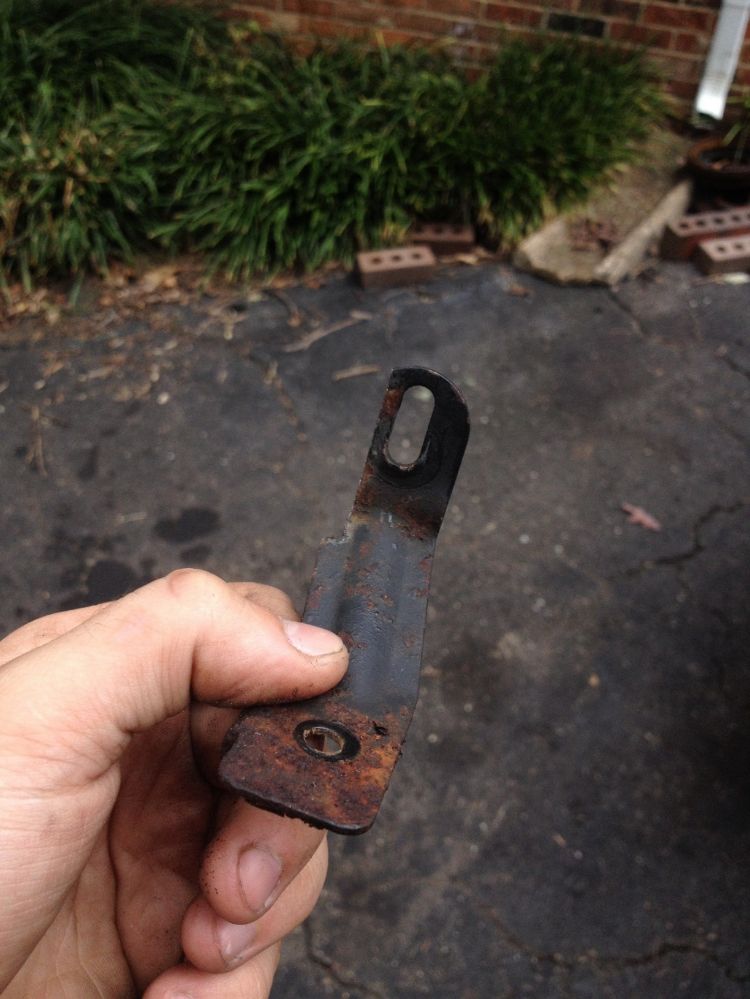
First
off lets paint this photo in your head. If you're sitting in the seat,
The front left bolt hole closest to the driver's side lines up no
problem. The other front bolt, near the shifter needs to have a bracket
with a hole welded to the seat rail. So you can bolt in that side.
The
two rears are easy. You get a piece of steel, run it straight across
the factory bolt holes, mark where the holes are. Drill it out. Then
bolt that to the floor, tack weld the two seat brackets onto the piece
of steel. Then finalize the welding.
I did mine pretty quick.
cause it was cold. And I eye balled the bracket closest to the shifter
console. It's very easy. A lot of people made this too difficult when
they would plan it. However, this didnt hit me until a member here with a
white X7 posted his photos. So I give him credit for enlightening me.
lol
So hopefully I can grab some steel this week and if Ju has the time to weld maybe get some new fancy seats put in this weekend.
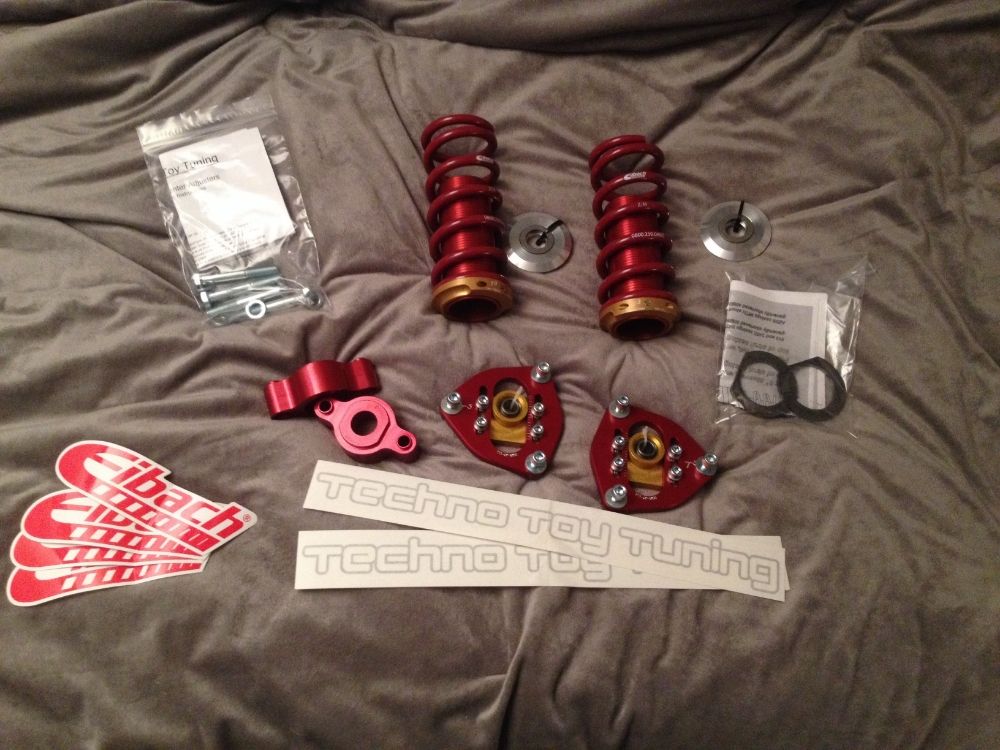
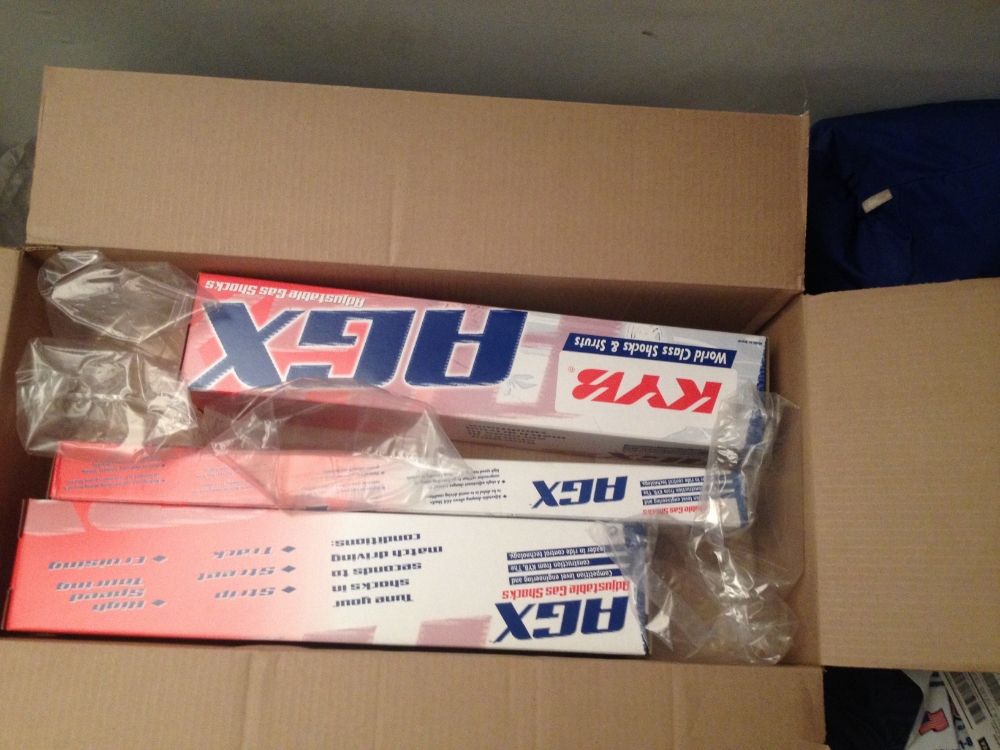
10/30/13 Made
my first order in piecing together suspension: MR2 rear shock inserts
and Camaro rear shocks (both KYB AGX). My goal is to have this car
lowered by 200DoD. Things left to order in the coming weeks: T3 weld-on front coilovers T3 camber plate bearing upper spring hats T3 front camber plates T3 front RCA's
Still
not 100% sure on a rear spring solution. I really just need to get
under the car and start measuring stuff. I have a couple options for
adjustable spring perches, but I may end up going with just universal
springs in a rate I want.
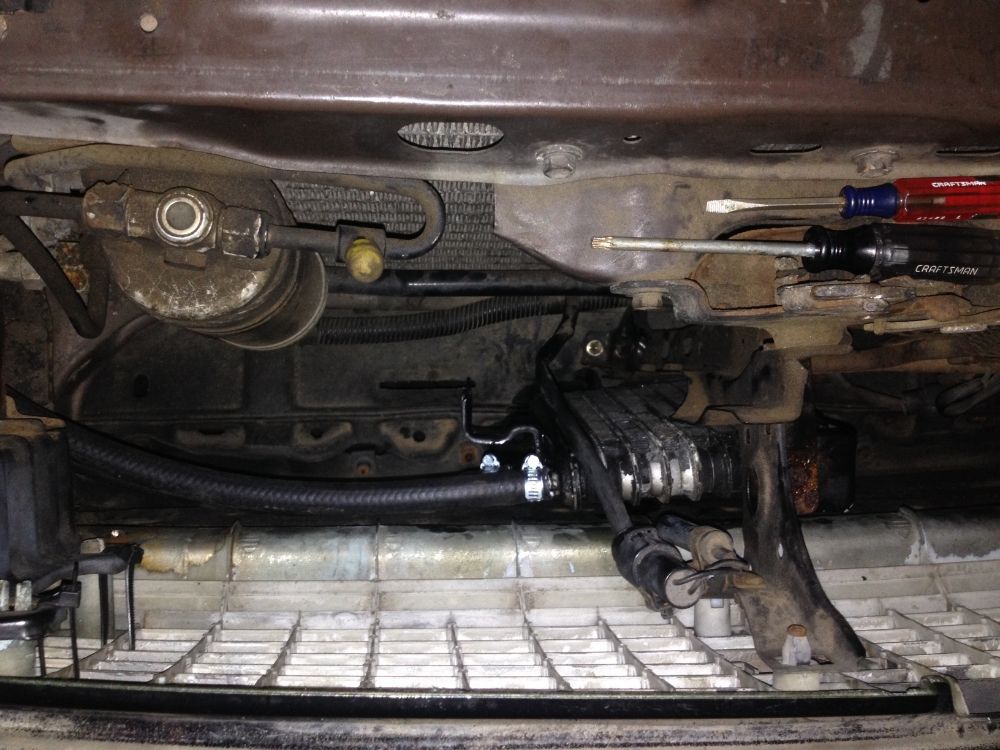
10/31/13 Leaky leaky leaky!
Hefty hefty hefty!
As you can see I replaced the FPD with a banjo bolt (thanks Mitchell). Hopefully this gets rid of the fuel leak. I
also bought some steel to make seat brackets to mount the Supra seats
and some welding wire for Mitchell in exchange for using his welder
 with 195/70R14 tires