Wheels are on

4/5/12
alignment today.
Front:
-2* camber
0 toe
+6* caster
Rear:
-1.5* camber
1/16th toe in
we will see how it feels on Saturday...
4/8/12
the alignment works BRILLIANTLY at the track, and I set fantastic times considering my tires
apparently I had a brain fart when I adjusted my shocks before the race, cuz when I went to reset them at the end of the day, I had apparently turned my right rear shock DOWN....for normal driving I have the fronts at 1/4, and the rears at 1/2, and I increase both by 1/4 for racing....which I did, but on the right rear i had turned it 1/4 the wrong way. DERP
4/10/12
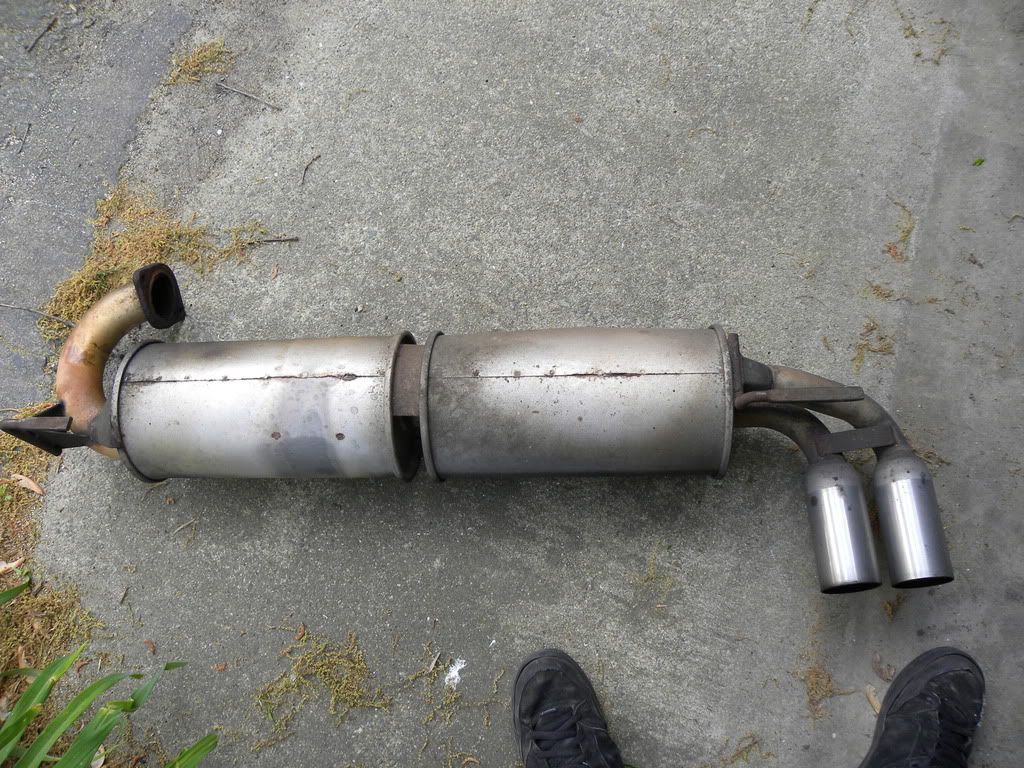
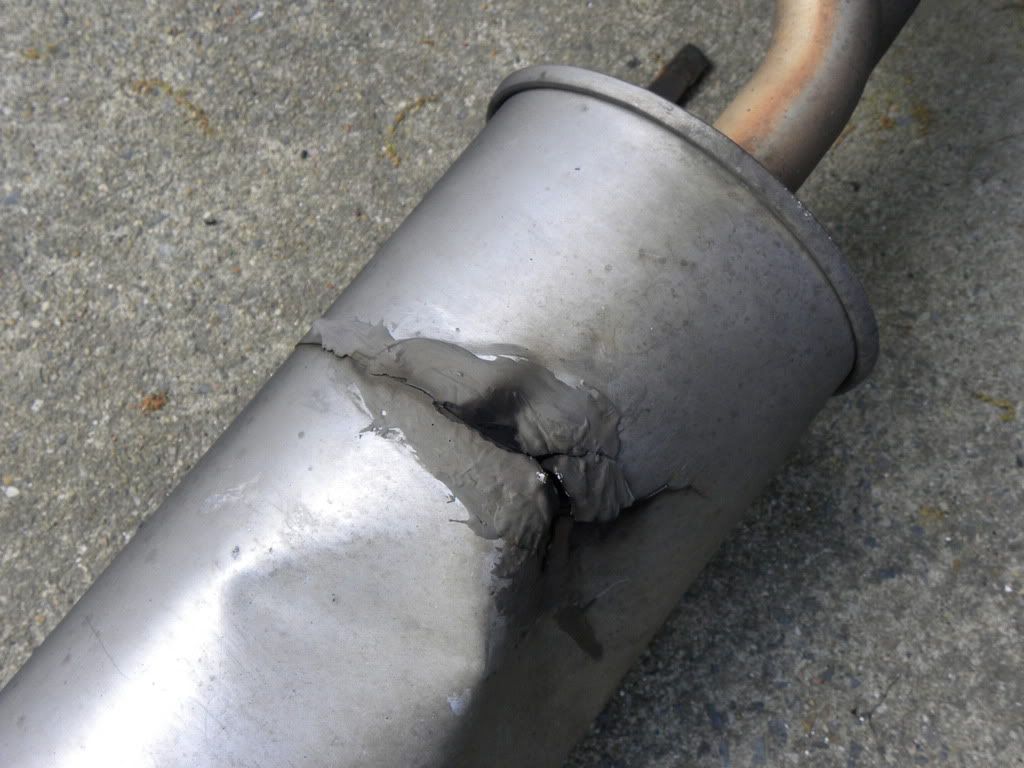
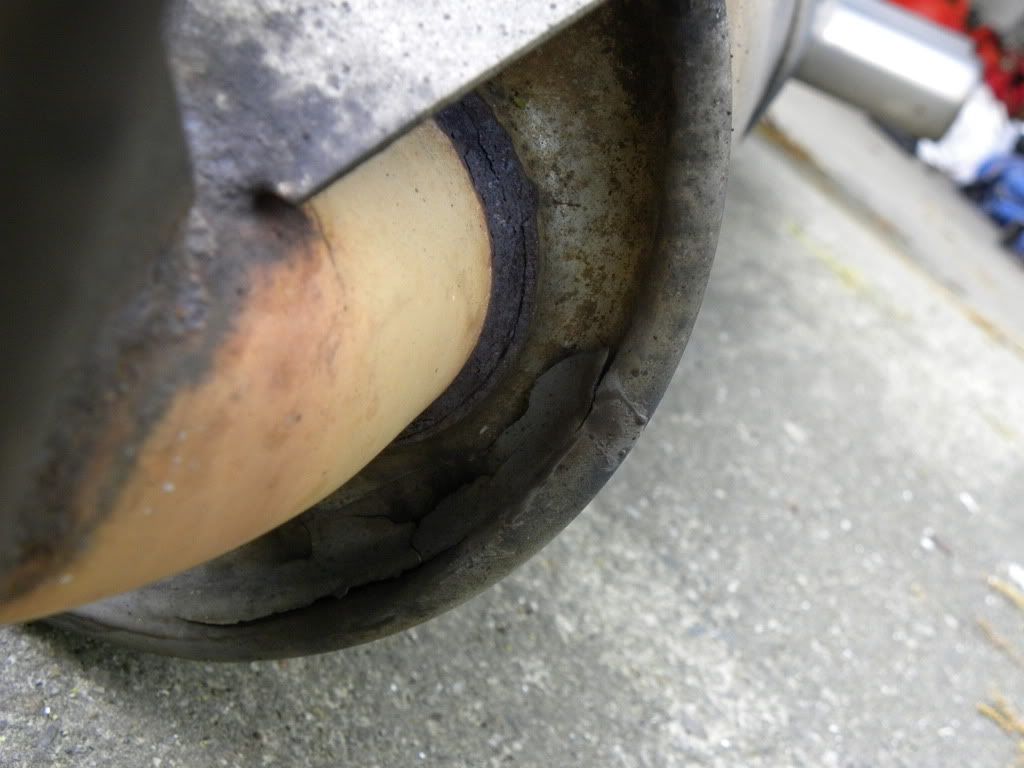
new OEM exhaust came in yesterday. Paint is drying right now (i wanted it darker, as it was WAY too bright for my stealth car)
4/12/12
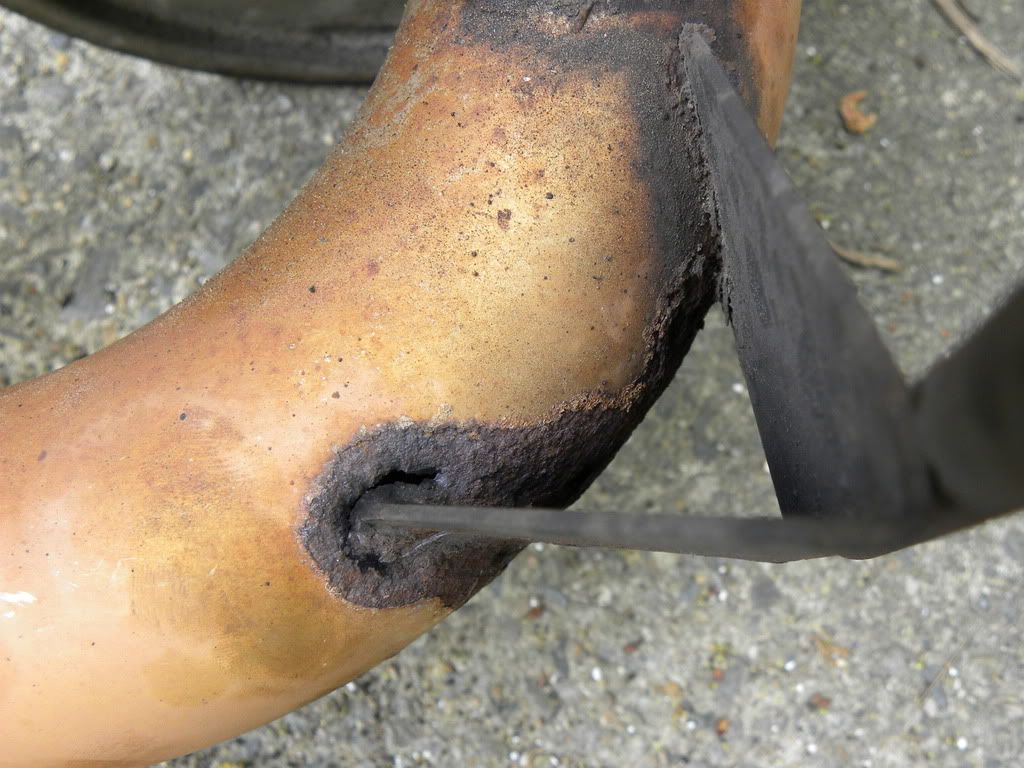
ok with much bolt snapping I got the HKS off. In
my attempt of getting the OEM one on, I found that the flange on the cat
is not flat, so it leaks a bunch there. And of course the cordless
grinder's batteries are both dead....so now we wait.
RIP, HKS cat back.
4/18/12
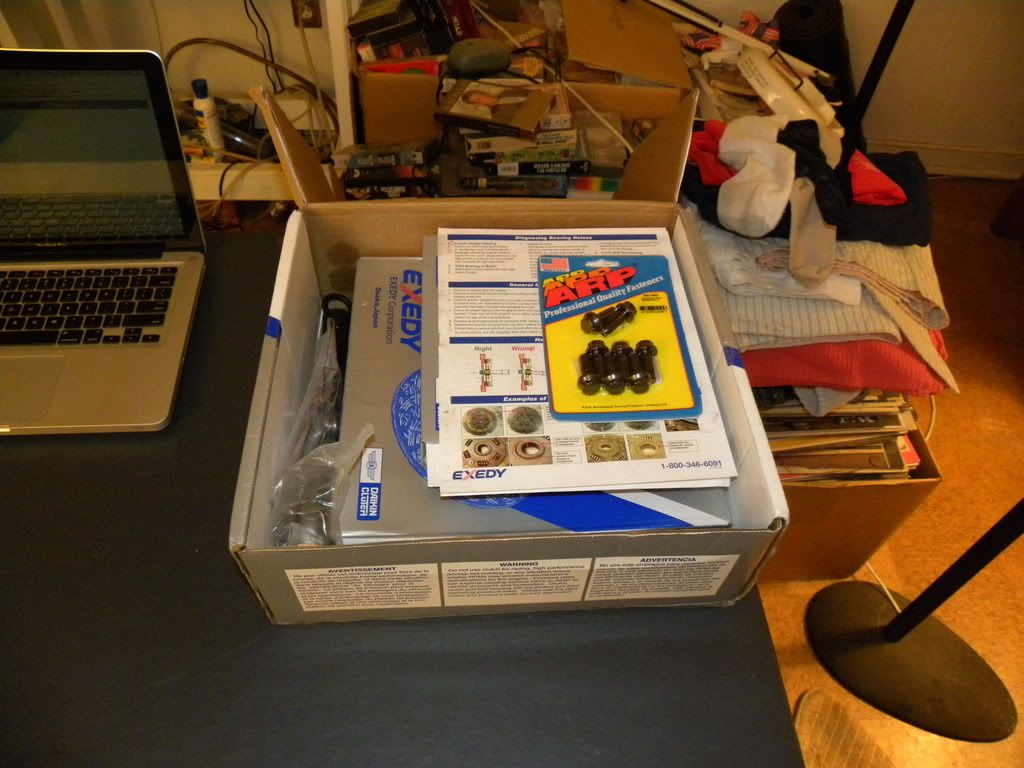
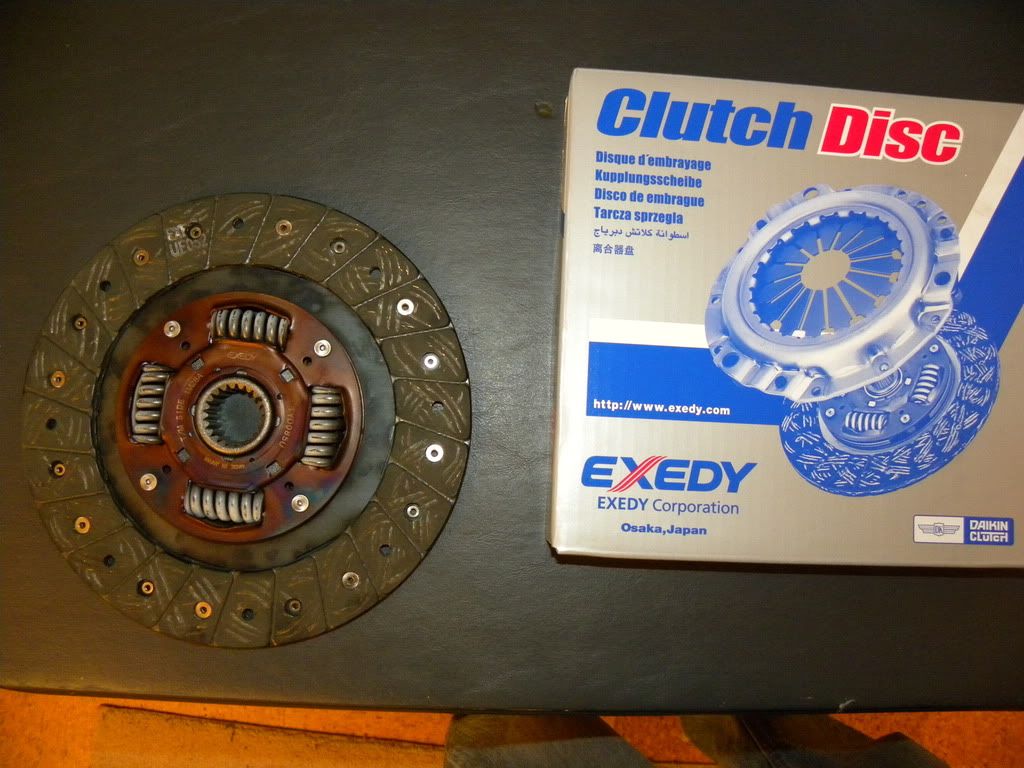
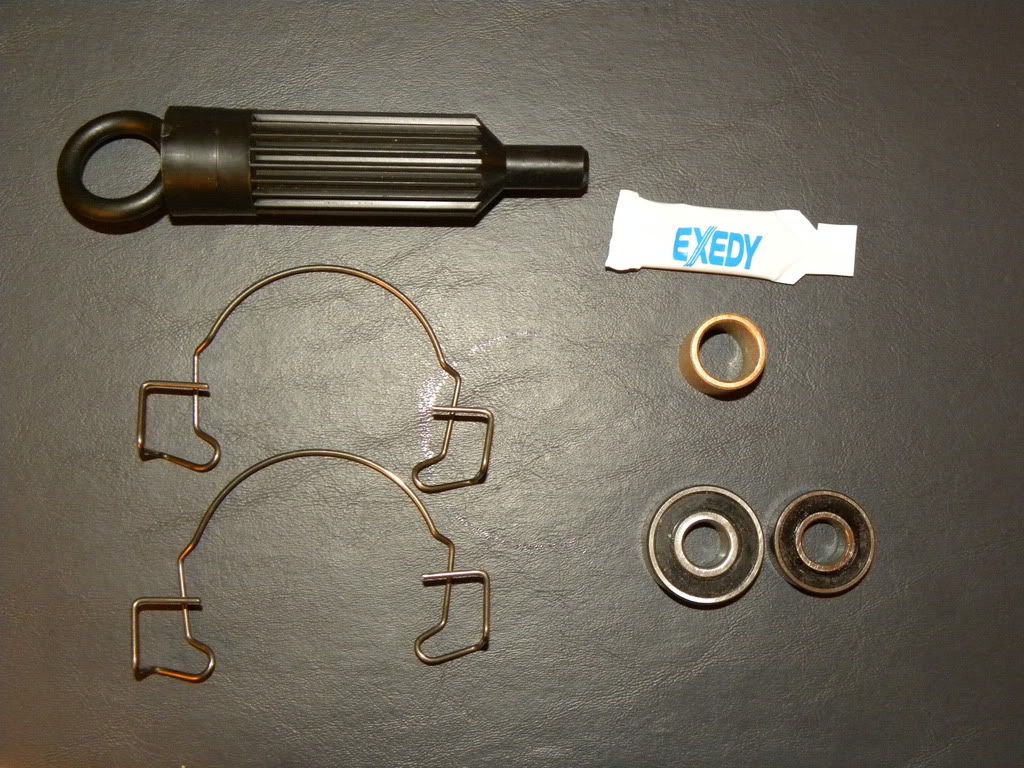
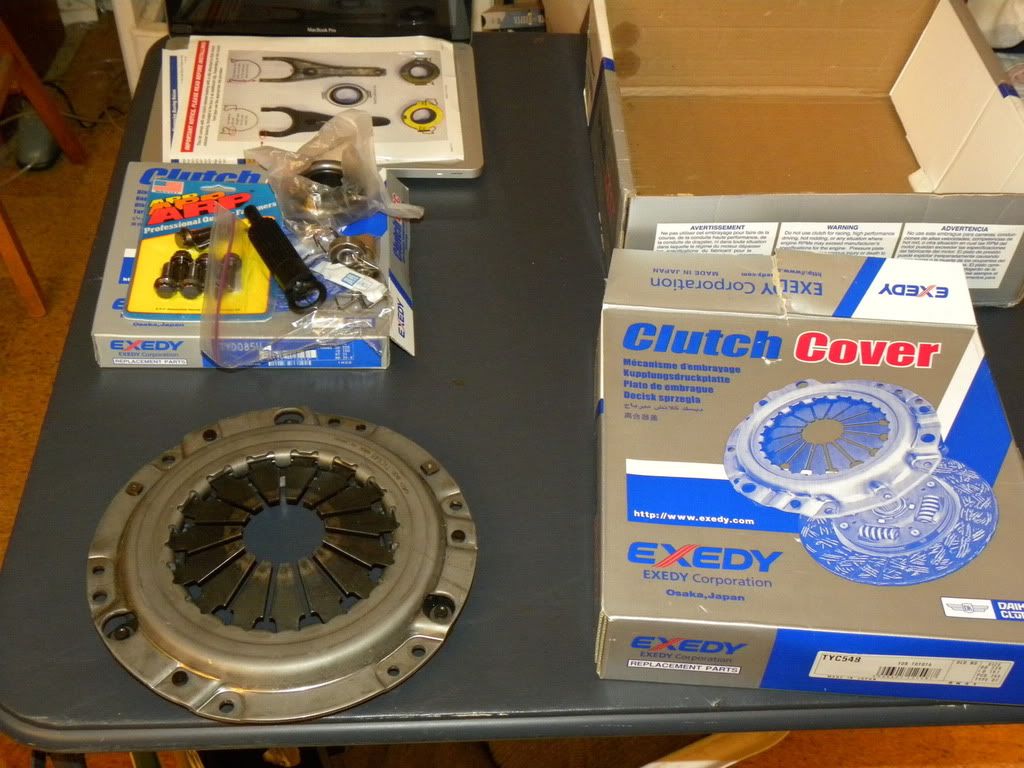
clutch came in. Exedy OEM replacement kit.
Pressure plate, disc, throw-out bearing, alignment tool. Also in the box
were two bearings that look like skateboard wheel bearings and a copper
sleeve thing.....I'm not sure if those are actually part of the kit or
if I'm supposed to use them for something....anyone know? Also the kit
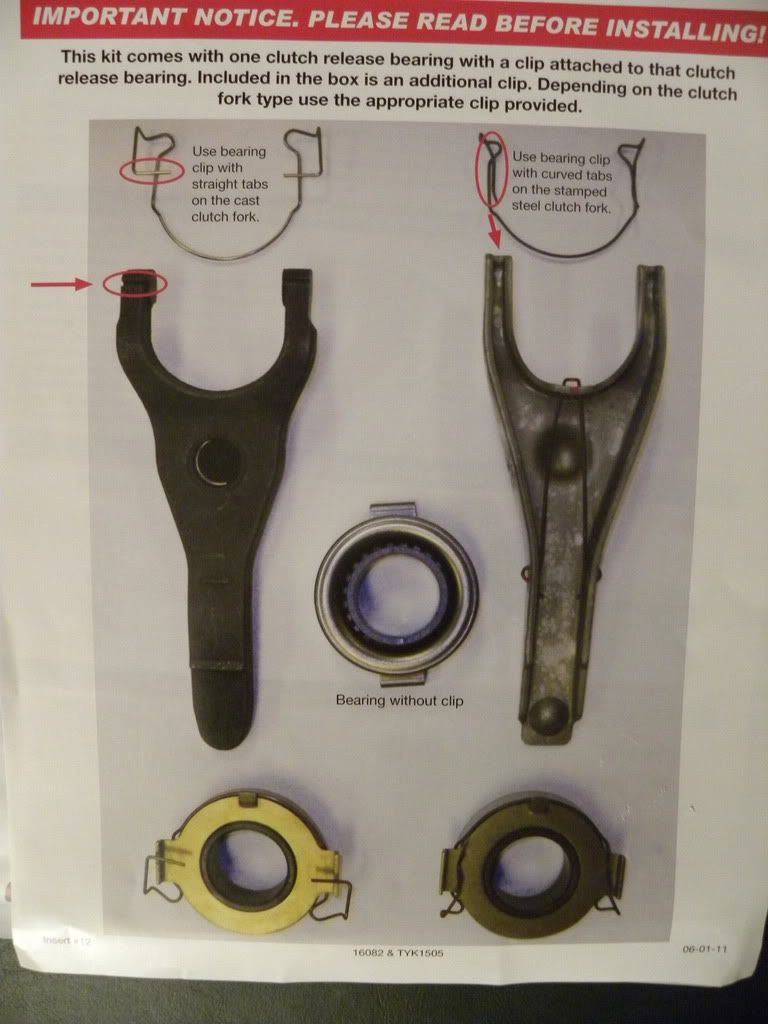
is supposed to come with two different versions of the clip that holds
the TO bearing to the fork, but it came with two of the same one. I hope
my fork is the right one 
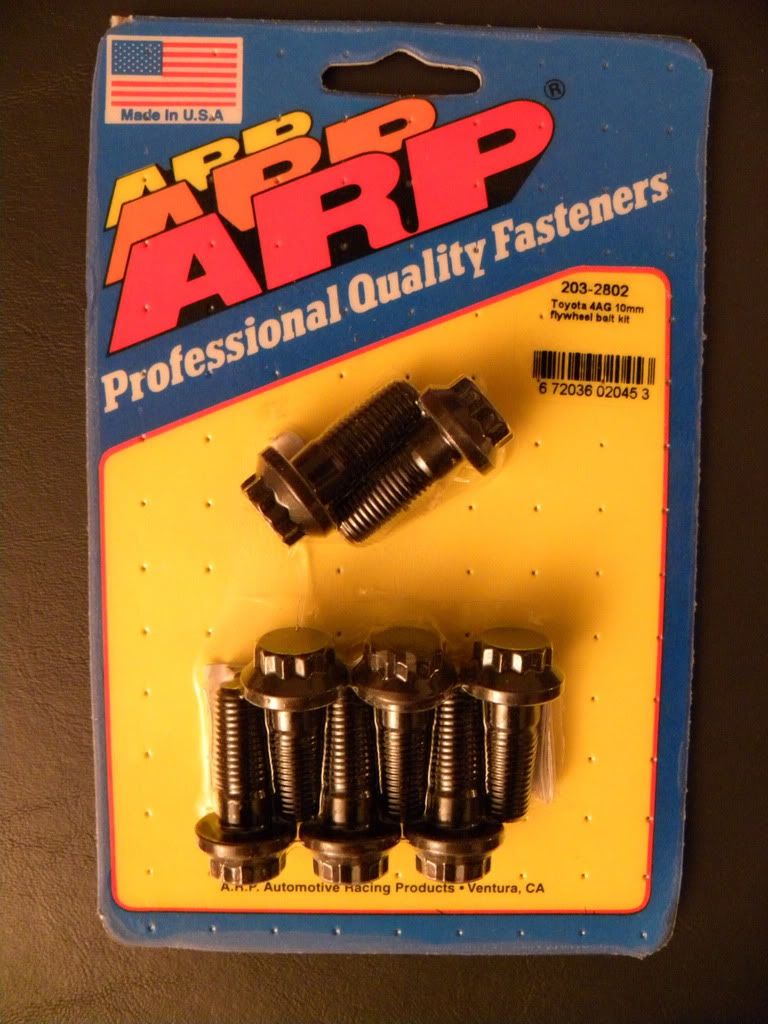
Also got ARP flywheel bolts.
When it comes time to do it I'm definitely gonna need some help, I was thinking about taking it down the weekend of either the 6th or the 13th, take the flywheel in to the machine shop the following Monday, and attempt a reassemble whenever I get it back. I will probably need to borrow an engine hoist to hold my engine while I tilt it down, and I will probably need someone stronger than I am to help me get the transmission on and off, because I doubt I can bench press an E-series tranny.


5/1/12
Changed my oil today. I'll change the filter next oil change.
Odo miles: 249,618
correction: (64,214)
actual miles: 185,404
5/12/12
Transmission is out. It was a MASSIVE pain in the ass. like MASSIVE. getting it back in is going to probably be the hardest thing I've yet done on this car.


5/13/12
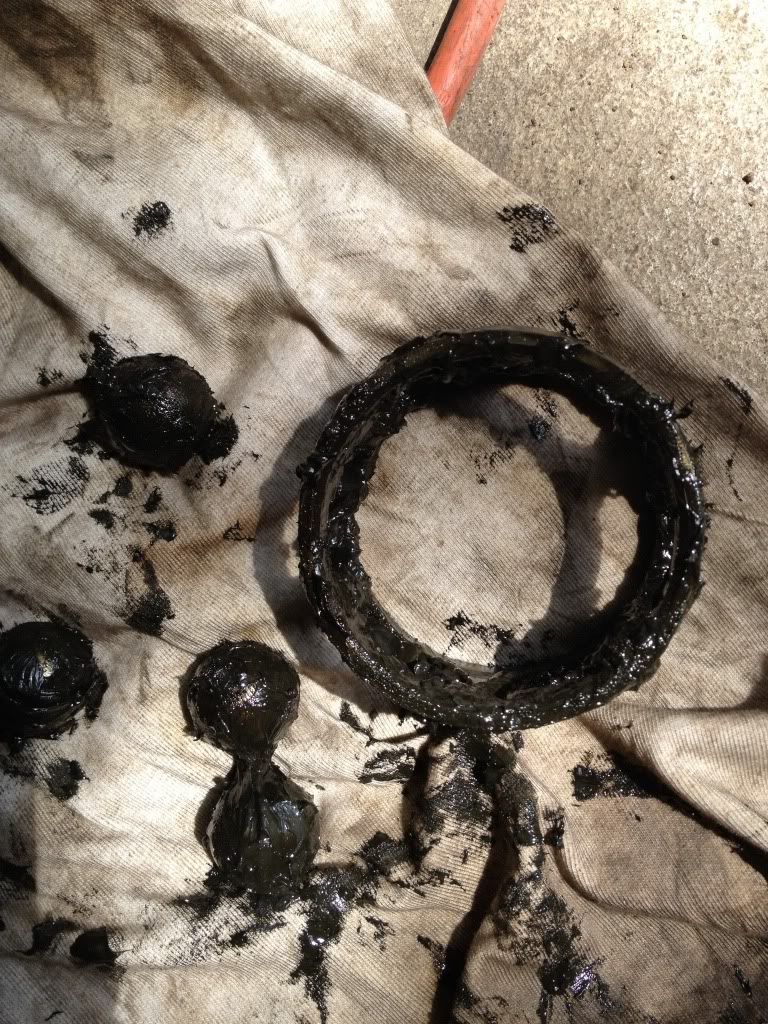
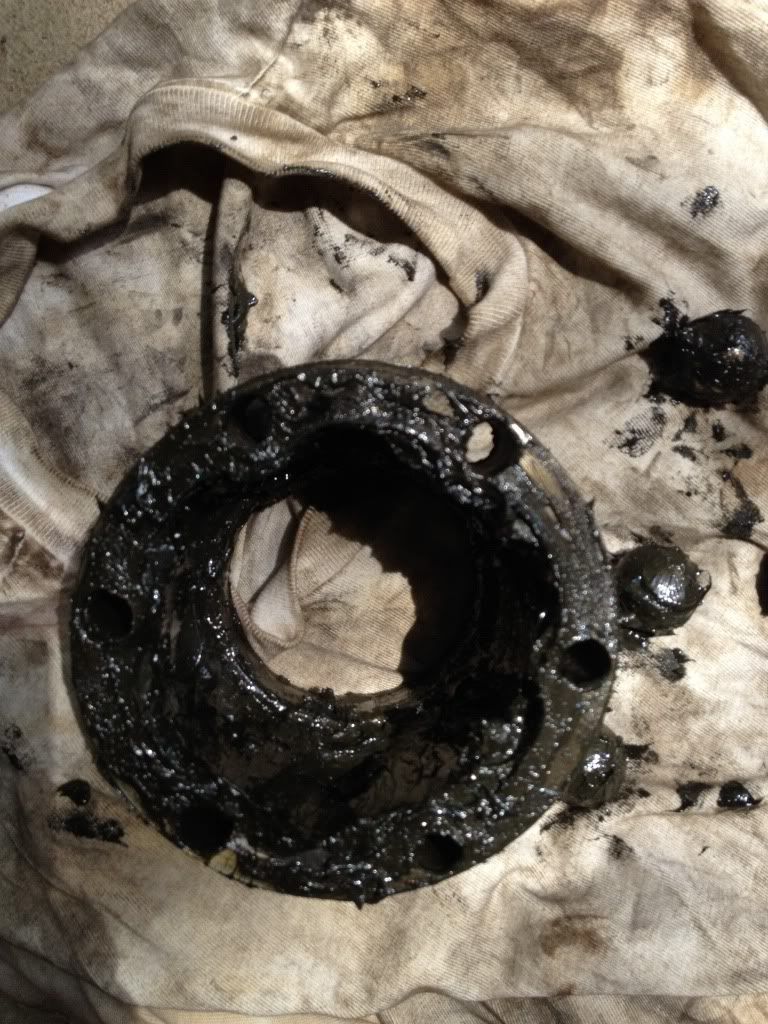
replaced rear main seal

old pressure plate

Clutch was worn nearly to the rivets. Also, the little dampening thingys in the middle were loose and rattle-y

flywheel has a bit of a groove in it, likely from the first clutch (I think this is the second this car has seen). I hope the machine shop can machine it out, since it's not deep, but if not, I may have to end up buying a new flywheel....We shall see

5/15/12
Resurfaced flywheel

5/18/12
Transmission is back in and everything up top is
back together. Tomorrow I need to reinstall the axles and the exhaust
and then theoretically it should be good to go.
Later that day.......
CV joint fell apart. Time to look up how to put it back together. Also
need a new boot and some grease, and what looks like some kind of seal
around where the CV housing meets the axle stub.

5/22/12
Got the CV's reassembled. Just waiting on a boot now. Also need to get grease. may hit up Brandon for that.
5/25/12
All is working great now.
8/10/12
Changed my SC oil today. Car has 188k, so the SC oil should be good till
230k or so. BGB says to change it every 60k, but I think since it's
cheap and I'm running 2 extra psi, a slightly shorter change interval
would be OK.
Also I made a DIY post about it.
http://www.freecandycarclub.com/2012/08 ... -a-4a-gze/
Also I made a DIY post about it.
http://www.freecandycarclub.com/2012/08 ... -a-4a-gze/
8/18/12
Found someone that makes an EGR blockoff plate. Now I can finally be rid of the already-broken crap that is just putting crap into my intake.

8/24/12
Deleted ze EGR. See the front page for my uber awesome write-up. Time-lapse vid to follow shortly.
the bolts were too far apart. I had to slot the holes to be able to put it on.
8/30/12
Dude on the forum gave me a deal on a ST front
sway bar. This will give the same effect as stiffening the front spring
rates (very needed) but will also induce understeer/reduce oversteer.
Given how understeer-prone this car is to begin with, I have a feeling
I'll be playing around with the adjustability on both bars to get a
perfect set-up. Maybe middle setting on the front, stiffest on the rear.
9/1/12
I'm driving out to 64/81 to buy a set of BRAND NEW Toyo Proxes R888
R-compound race tires from a guy on VADriven tomorrow. 205-50-15's. $500
for the full set, $125 less than what it would cost from TireRack. I'm
about to explode from excitement. Look how sexy these things
are:

9/2/12
om nom nom nom

New front sway bar

Set the front to the "middle" setting and the rear to the "stiff"
setting. Also found a nail in one of my rear tires so I got to go over
to Sears. Luckily the manager wasn't there so I patched it my self FO
FREE
This thing tightens up the front very nicely. This car changes direction INSANELY fast now. Interested to see what it does on the track.
This thing tightens up the front very nicely. This car changes direction INSANELY fast now. Interested to see what it does on the track.
10/1/12
put on the R-comps this afternoon and took it to a few empty parking
lots and did circles in both directions to heat cycle them. My "R-Comp
Tire Emotions Cycle" follows:
When you see the price

When you spend the money

When you drive on them for the first time

On the serious.......the grip you guys.........the grip...........I swear they break physics.
10/16/12
Replaced my cruise control computer with one that
was supposed to be working from a guy on the forums. Still nothing. I'm
at a complete loss as to what is wrong with my system. I've checked that
every mechanical component functions properly by themselves, replaced
the switch, replaced the computer. BLARG
10/31/12
My alternator belt has been squeaking like a BANSHEE in the morning, so I
decided to replace it. And since my AC doesn't work I got one that
bypasses the compressor. So then I figured I'd just remove the AC system
and save some weight.

That's the compressor, compressor bracket, the hardlines up to the
steering rack area, and all related hardware. 24lbs. I'll get around to
removing the rest sometime later.
Fun side-effect of removing AC compressor: I can
actually access my oil filter now! No more will I be required to buy
overpriced K&N filters for their coveted welded nut design! Truly
this is the taste of freedom!
Also, picked up a Hella Supertones and harness kit from
Adam. No idea when I'll have time to put them in, but soon enough my
horn will be just as brain-shatteringly loud as Billy's.
11/2/12
Got Supertones installed. Turns out my horns already use a two-wire
setup so I did t need the harness. I just took some 14g wire and spliced
some male and female ends on them to connect the plugs to the terminals
on the horns. They are in the factory locations, one behind the
radiator one in front.


While I was in there, and to get the front horn to fit, I went ahead and
removed the rest of my AC system. Condenser, collector, and evaporator
all came out so my car is 100% AC free. Saved another 16lbs for 40
total.

11/24/12
I think I'm gonna start piecing together bits for a battery relocation. I
think tomorrow I'm gonna go grab like 15 feet of cable, some ring ends,
and some of that black plastic stuff you run wires through and maybe
run the + cable in the car for when I'm ready to go.
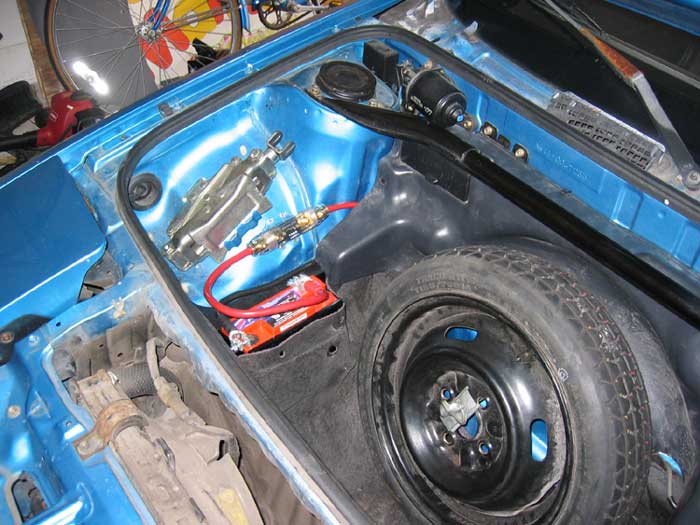
I'd also need to measure the stock battery and make a box so that the OEM tie down stays there (it holds up the intercooler). I'd also need to fab up a tie-down bracket in the frunk. I think I'm gonna get the Braille No-Weight Race & Street Miata battery (part number B2015). It's completely sealed so spilling/venting isn't an issue, it's super light, super small, and has 574 cranking amps/425 CCA. Perfect.
I'd also need to measure the stock battery and make a box so that the OEM tie down stays there (it holds up the intercooler). I'd also need to fab up a tie-down bracket in the frunk. I think I'm gonna get the Braille No-Weight Race & Street Miata battery (part number B2015). It's completely sealed so spilling/venting isn't an issue, it's super light, super small, and has 574 cranking amps/425 CCA. Perfect.
11/25/12
Ran the new battery cable for the relocation. I'll
put ends on it tomorrow and maybe start making the mounts for the new
battery, as well as start planning what to build to replace where the
old battery goes to hold up the intercooler.. I'll probably order the
battery itself tonight.
Later:
Ordered the battery + tie down from newegg, shipped, for less than just the battery from gomiata.com. WIN
Tomorrow I'll probably start making the box to replace the old battery.
Tomorrow I'll probably start making the box to replace the old battery.
11/26/12
Stock battery replacement box complete!

11/27/12
Copy-pasted from a comment I made on facebook:
All I need is something big enough to crush the jacket on the ring end onto the cable. I'll then heat it up with a torch and fill it with solder as well to make a super good connection. Like this:
4:30 in this video:
All I need is something big enough to crush the jacket on the ring end onto the cable. I'll then heat it up with a torch and fill it with solder as well to make a super good connection. Like this:
4:30 in this video:
The cable is wrapped in black wiring loom protector all the way back,
and is routed through holes with rubber grommets in them, under the car
through the central tunnel where it is covered by the plastic underbody
covers. I also just ordered a 150A inline breaker as a failsafe against
catastrophic hot wire grounding. All I need now is for the battery to
come in, and to fab up a mount for the frunk. I'll probably go by Home
Depot again tomorrow and get some sheet metal to make a cradle similar
to this:
Also, there will be a tie-down to hold it in the box, AND I'm going to
get rubber terminal covers so nothing in the frunk can touch the
terminals.
Total cost of this project so far hasn't been cheap, but I'm excited anyway. I've wanted to do this for a long time.
Battery + tie down = $160
cable + insulation + ring ends = $45
metal+bolts to make the box = $9
in-line fuse holder (not sure if it came with a fuse or not) = $7
still have to get terminals, sheet metal, more bolts/nuts/washers, and at least 5 more cable ring ends, as I only have two now (new hot wire to stock hot wire = 2, one for new hot wire to fuse, one for fuse to next section of hot wire, one for hot wire to battery, one for ground to battery, one for ground to chassis for a total of 7)
I'm not going into this half-assed. I'm doing this right.
11/28/12
Got my battery holder-box-thingy mostly done
today. Also the battery itself came in. It looks like I'm going to have
to do more fab work than I thought though, because I'm not happy with
the way it would sit in the frunk as-is. Good thing I got more angle
bracket than I thought I needed.
11/30/12
My side-mount design failed miserably so I ended up putting it dead
bottom center on the front wall of the frunk. It's all hooked up and
works great. I'll have pics next week, I got it finished and immediately
filled the frunk with stuff for this weekend.
Braille battery weighs 15lbs, stock weighs 36 for 21lbs of weight savings, plus the benefits of moving it forward and down in the chassis. So with this plus the AC delete I've saved 61 lbs. Not too shabby.
Braille battery weighs 15lbs, stock weighs 36 for 21lbs of weight savings, plus the benefits of moving it forward and down in the chassis. So with this plus the AC delete I've saved 61 lbs. Not too shabby.
Also here is a pic of Jack helping me solder a ring end to the stock cable.

Fe took the pic.
12/3/12
OK here's the box holding up the stock tie-down/intercooler bracket

And here's the battery in the frunk
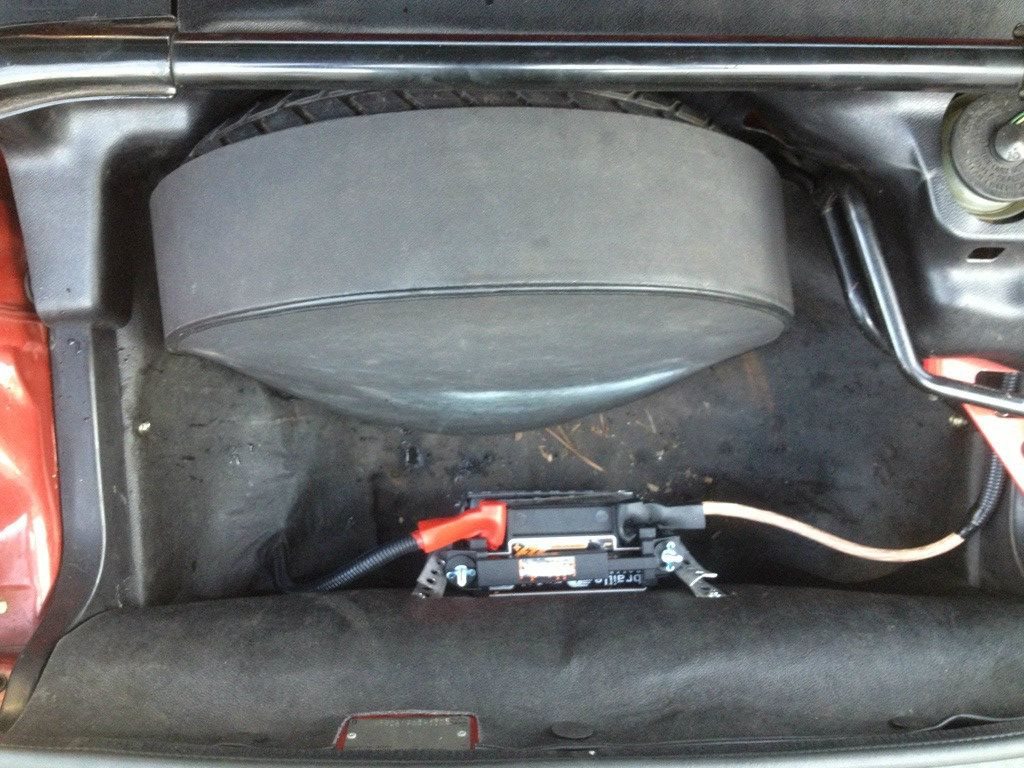
The 150amp fuse is mounted behind the spare near the firewall.