Scored some finds at the junk yard
Less-cracked fan shroud

Door molding in halfway decent shape
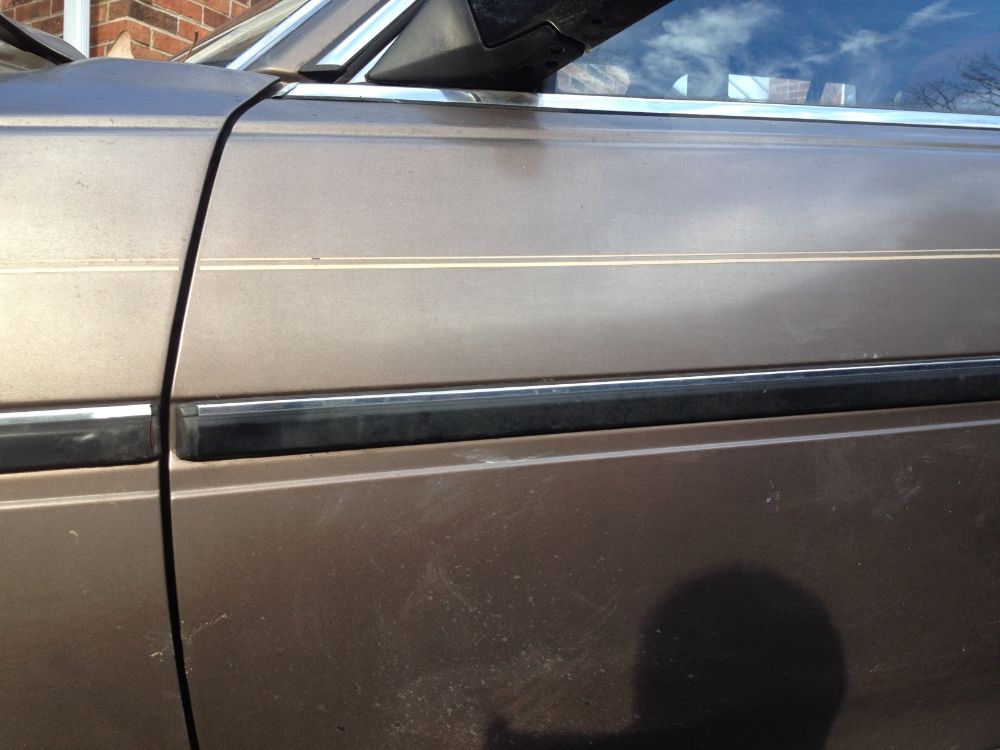
My starter relay had at some point been replaced with a straight jumper wire (probably because they are retardedly expensive from Toyota), so I replaced that with a relay from the junk yard and have had zero starting issues ever since.
Suspension work will begin later this month in all likelyhood, so stay tuned.
12/5/13
Well, that didn't last long. Last night the fan
must have caught part of the shroud, destroying the shroud and breaking a
blade on the fan. Time to make an e-fan setup. Probably gonna get some
universal thermostat controller from Summit and some e-fans off
something in the junk yard that I can ghetto mount.
12/10/13
Yesterday I picked up a Volvo electric fan (same great fan motor as the
Taurus that everybody and their brother uses, but thinner and with a
easy-to-grab relay box) and the front struts off a junked Cressida.
Tonight I began the process of tearing them down and getting them ready
for the coilover conversion.
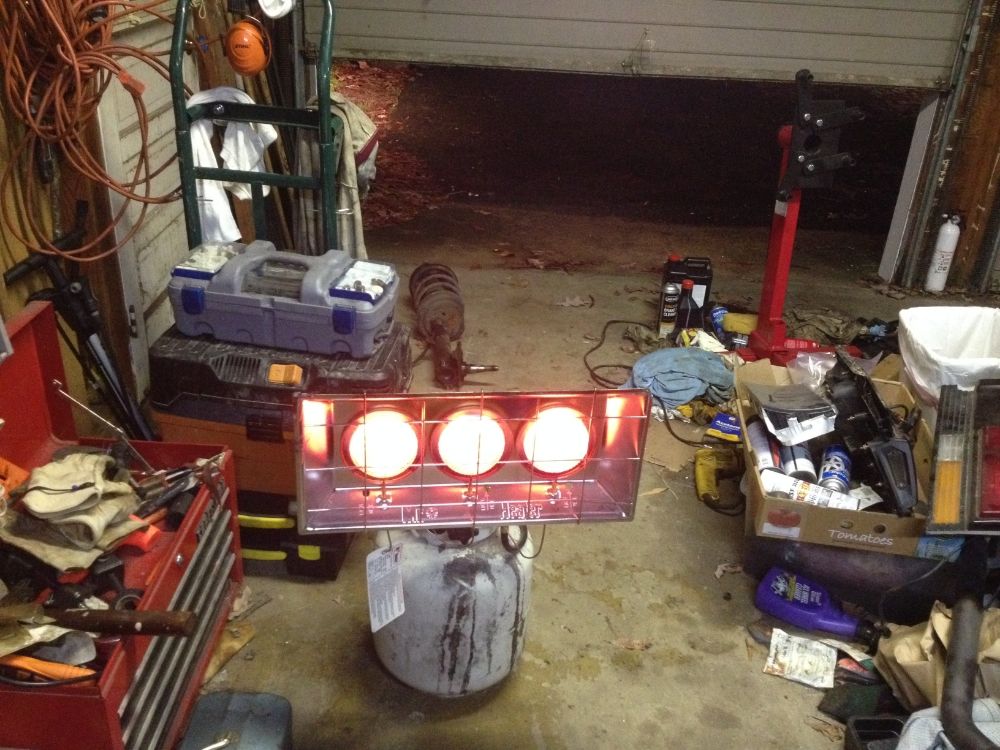
First I set up some heat in the garage so I didn't freeze
First I set up some heat in the garage so I didn't freeze
Complete stock strut:
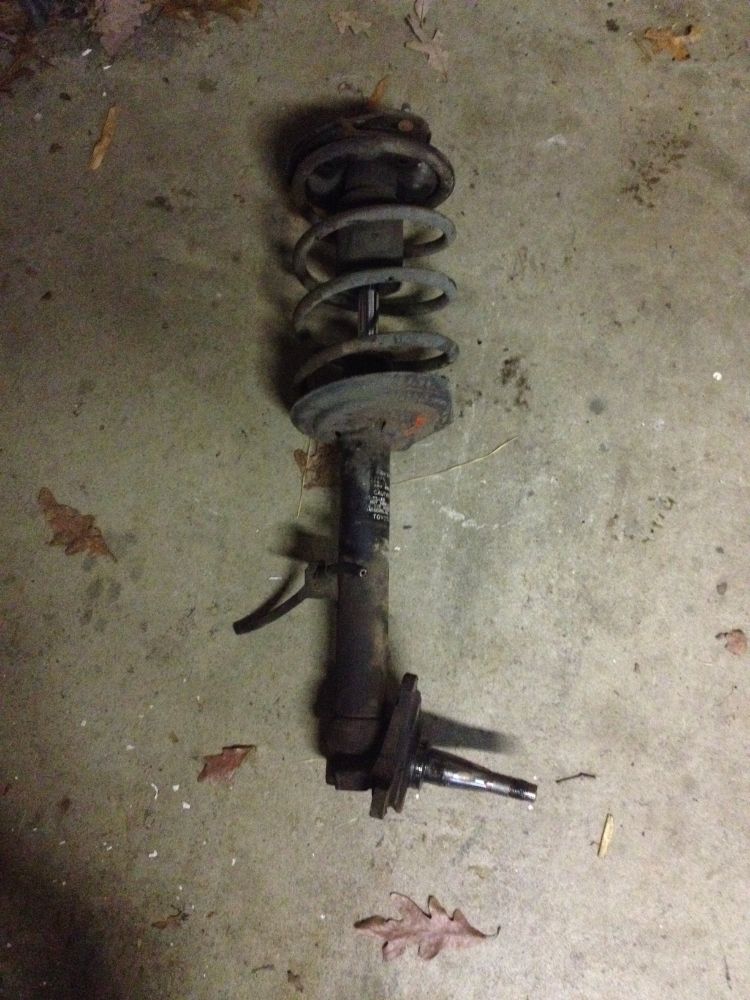
Spring removed
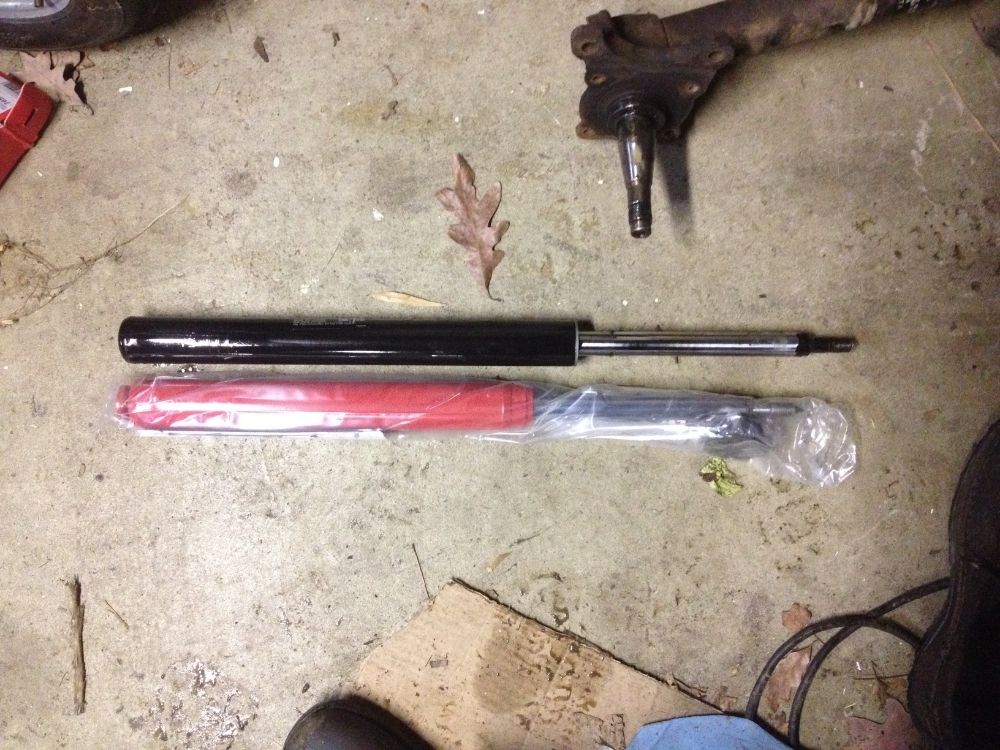
Here's the stock-sized Sensatrac shock that came out next to the SW20 MR2's KYB AGX (for the MR2 rear) that will be going in.
The stock shock has a body length of 15.5", whereas the MR2 shock is 14 3/8" long, so the housings will need to be shortened 1 1/8". Also, the gland nuts that come with the MR2 shocks are a much coarser thread than the Cressida ones, so I'm going to have to reuse those.
The stock shock has a body length of 15.5", whereas the MR2 shock is 14 3/8" long, so the housings will need to be shortened 1 1/8". Also, the gland nuts that come with the MR2 shocks are a much coarser thread than the Cressida ones, so I'm going to have to reuse those.
Here's the housings with the stock spring seats removed. I didn't bother grinding the weld flat since I'll probably be removing that section of the tube to shorten it, so as to keep the brake line tabs in the same place.

12/16/13
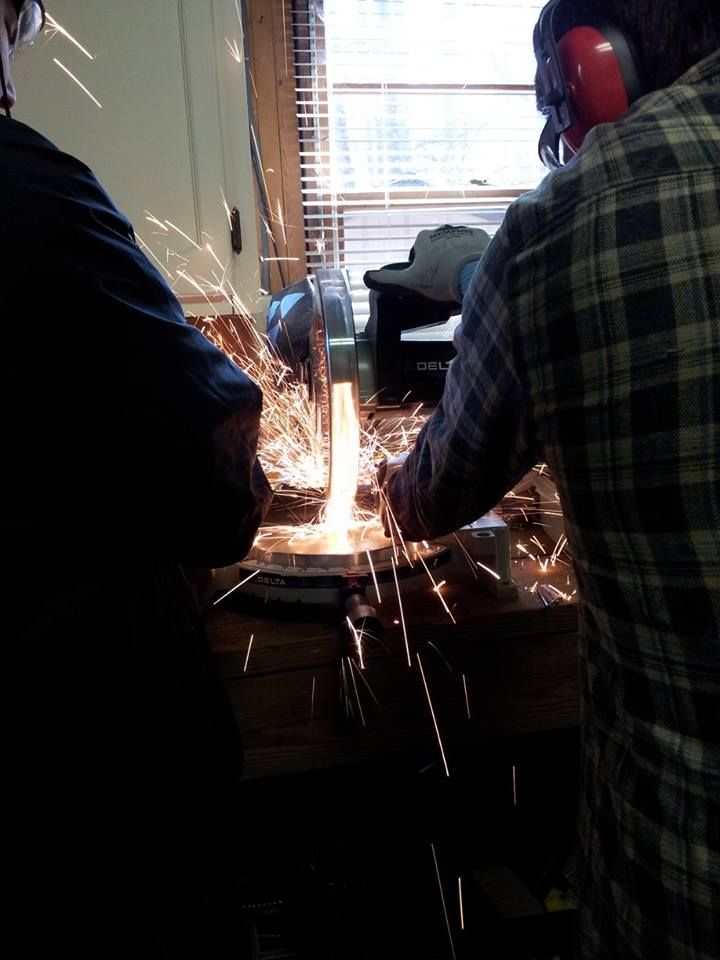
Ground off the welds from the stock spring seats. Currently looking for somebody with a miter saw to cut a section out of the housings.
I'm also currently emailing back and forth with a representative from CoilSprings.com about getting custom springs made. This will be roughly comparable in price with my previous idea of using Volvo parts. However, due to the fact that Rsport International has not been responding to my emails in over a month while most of my emails to CoilSprings.com are replied to within a matter of hours, I think CoilSprings.com may be the way to go. The only issue with the custom route is that I have to send in one of my stock springs, so downtime and shipping cost are a factor. However since I was planning on making my own urethane bushings for the four axle links, I suppose the timing could work out.
Oh and I forgot to mention that I picked up a fan controller, though I'm still unsure as to how the wiring is going to work. It's a Flex-a-lite model #31147.

Here's a link to the instructions pdf with the wiring diagram
LINK
My issue is the way the Volvo fan is wired. It has one large + wire going into the relay block, one chassis ground, and two wires activate the fan when they are grounded. One is high speed (probably for when the AC is activated on the Volvo) and one is low speed. I will only be using low speed right now. This controller, as with pretty much every controller I've seen, switches hot wires, not grounds, so I'm just not clear on how I'm supposed to wire this.
12/17/13
Confirmed: the controller works by connecting the
two terminals at a certain temperature. I can just use it to control the
fan ground. This should work great.
So I removed the mechanical fan and broken shroud,
and tried to see how things fit. It's going to take a LOT of work to
get this setup to fit. I'm still not sure how I'm going to do it. This
fan, though thin by OEM standards, is still quite thick. And the Volvo
radiator is quite different in dimension to the Cressida one, so getting
everything to fit is turning out to be a real chore. I was getting some
ideas until it started raining >.<
12/21/13
Fan is installed and wired and works perfectly as I
planned, comes on and turns off appropriately all by itself. Except for
one tiny detail. I forgot that I should be pulling power from a
switched source, because when I turn the car off and the radiator stays
hot for a little while, the fans still turn on and off while the car is
off, which will probably end up draining my battery.
12/23/13
My problem now is that the car won't start. I think I either blew my
starter relay or my wiring for my neutral safety bypass is messed up
because I don't even get a click even though the battery is fine. And I
don't think it has anything to do with the fan, the only wiring on the
car I had to touch was just connecting the power wire to the battery,
and it started fine multiple times with the fan working, but yesterday
morning it wouldn't and I had to push start it.
12/29/13
It wasn't the neutral safety wiring, it was the starter relay going bad
(the one I pulled out of the junk yard) so I replaced it with a jumper
wire like it was before. Less than ideal, but whatever.
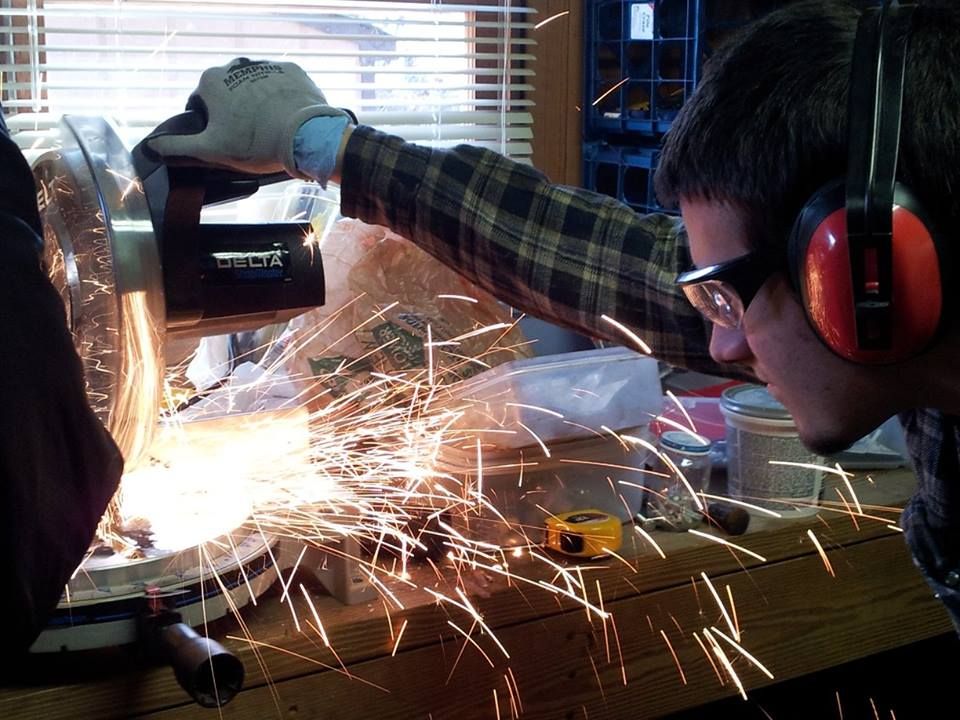
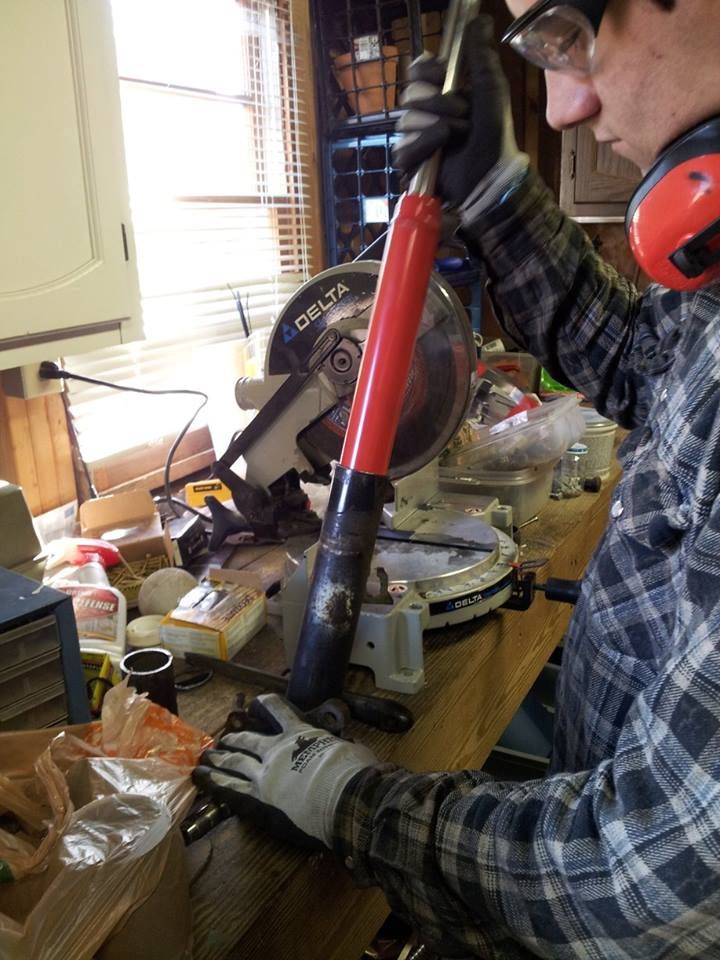
Today I finally got the front coilovers built. Lots of pics below, so slow connections or mobile users beware...
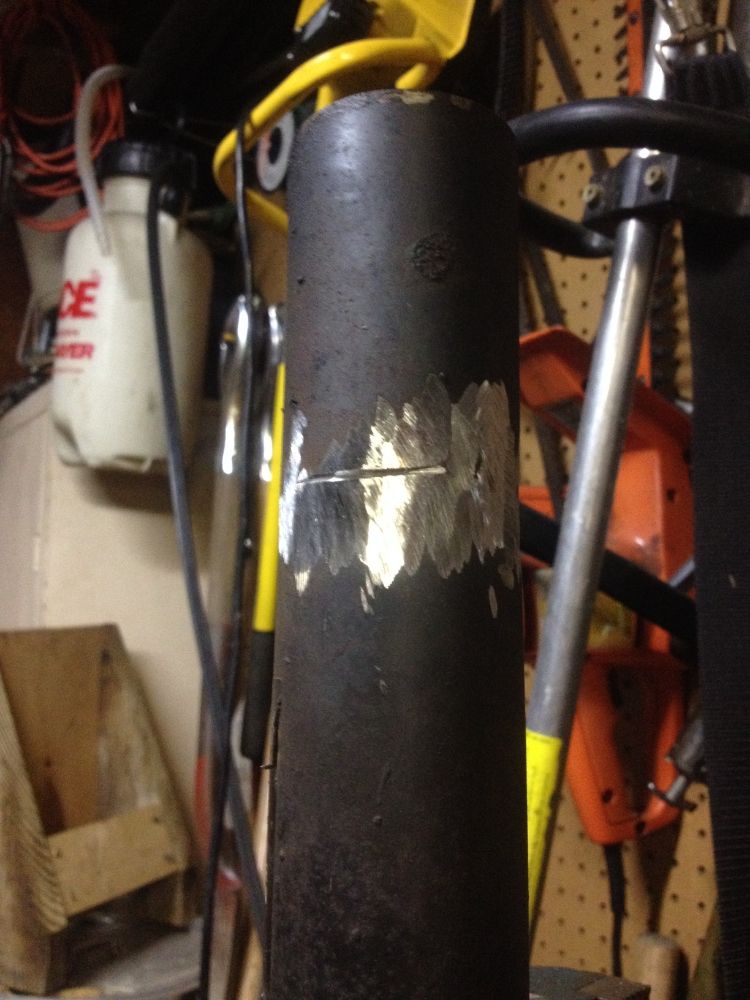
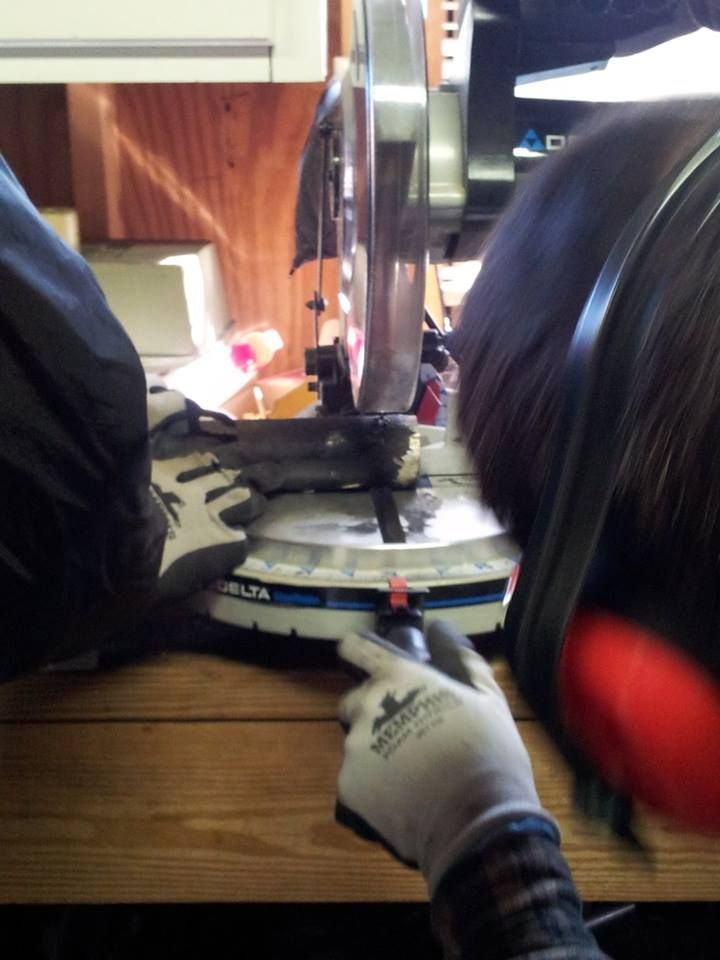
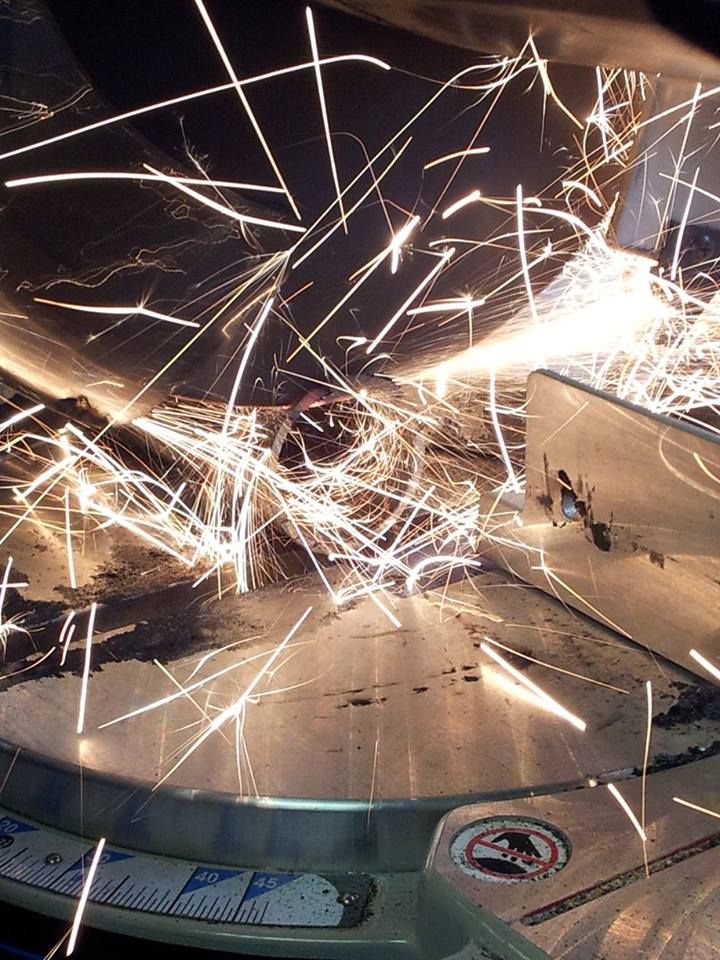
Started by making a cut in the housings
Started by making a cut in the housings
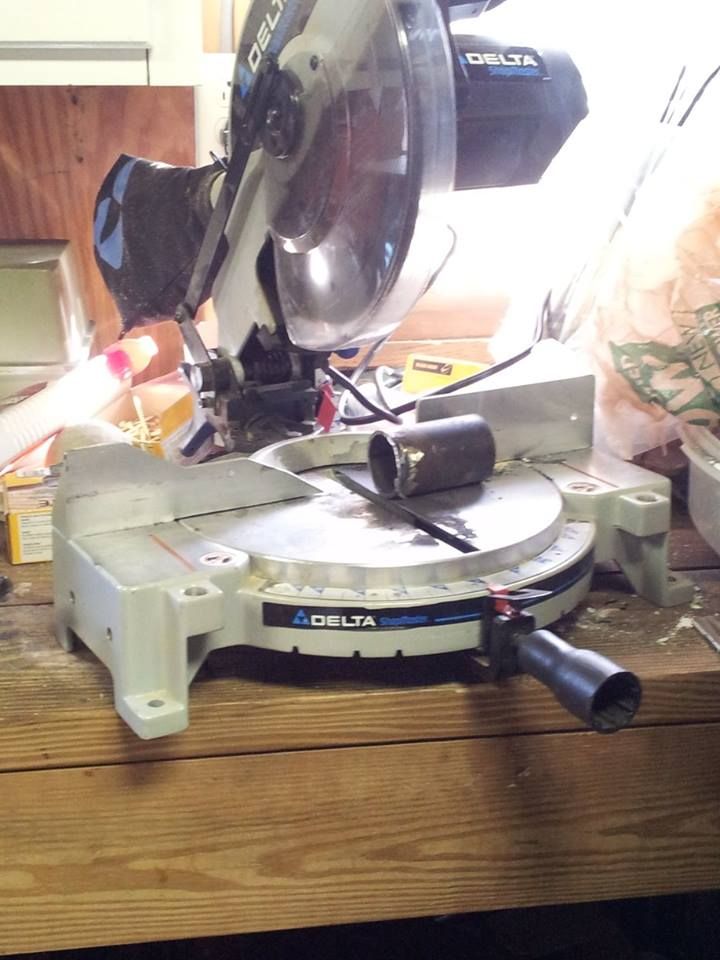
The housings needed to be shortened about 1 1/4". Measure twice, cut once.
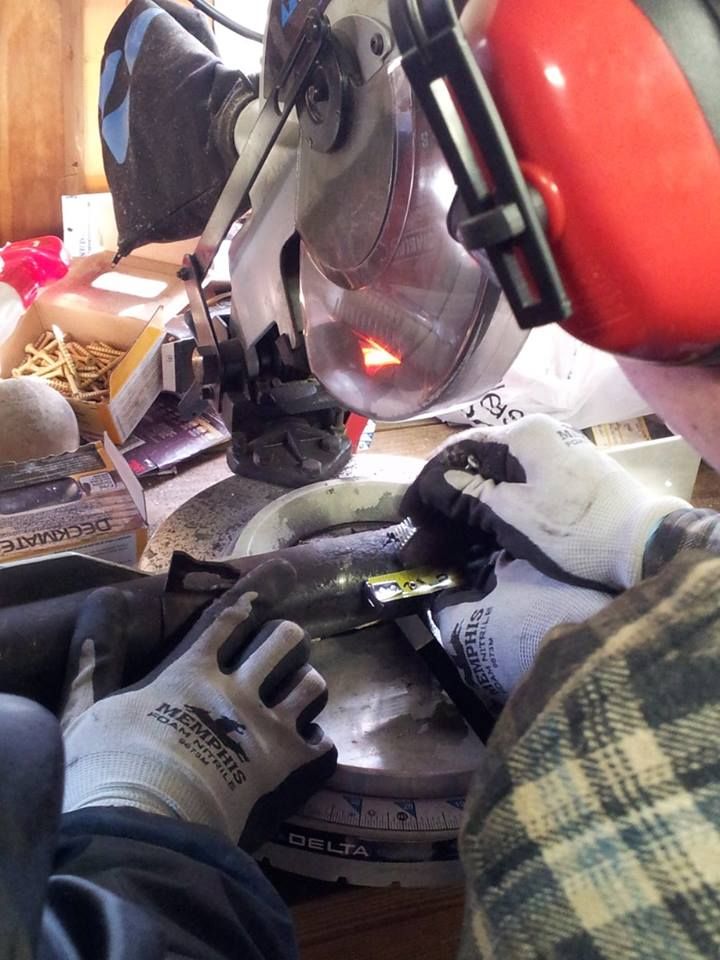
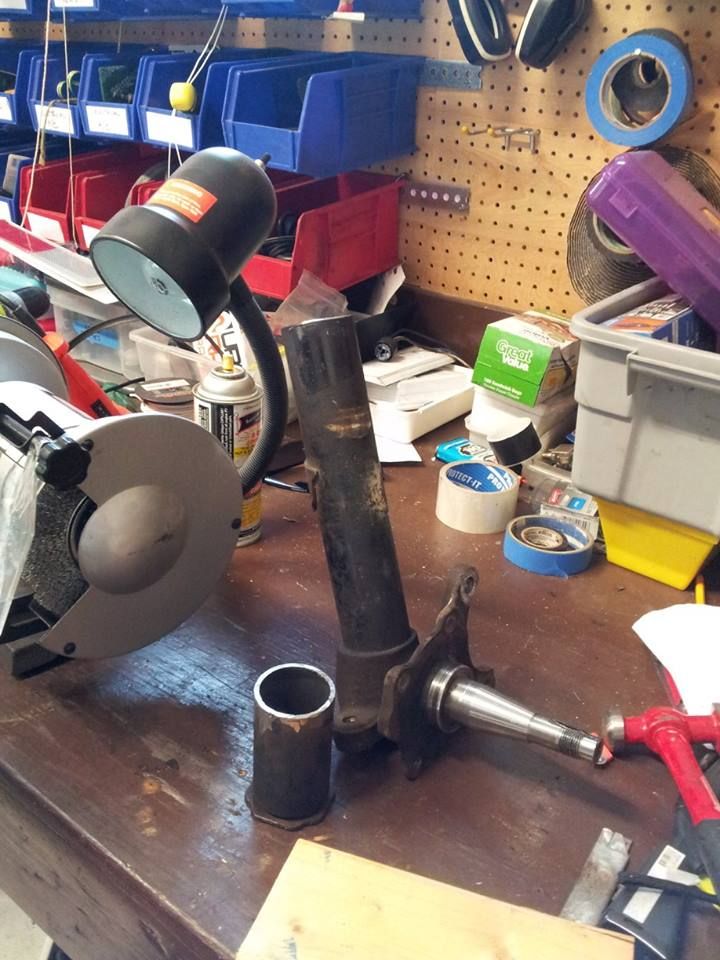
A little de-burring

Test fitting
Needed a little extra trimming
That'll do

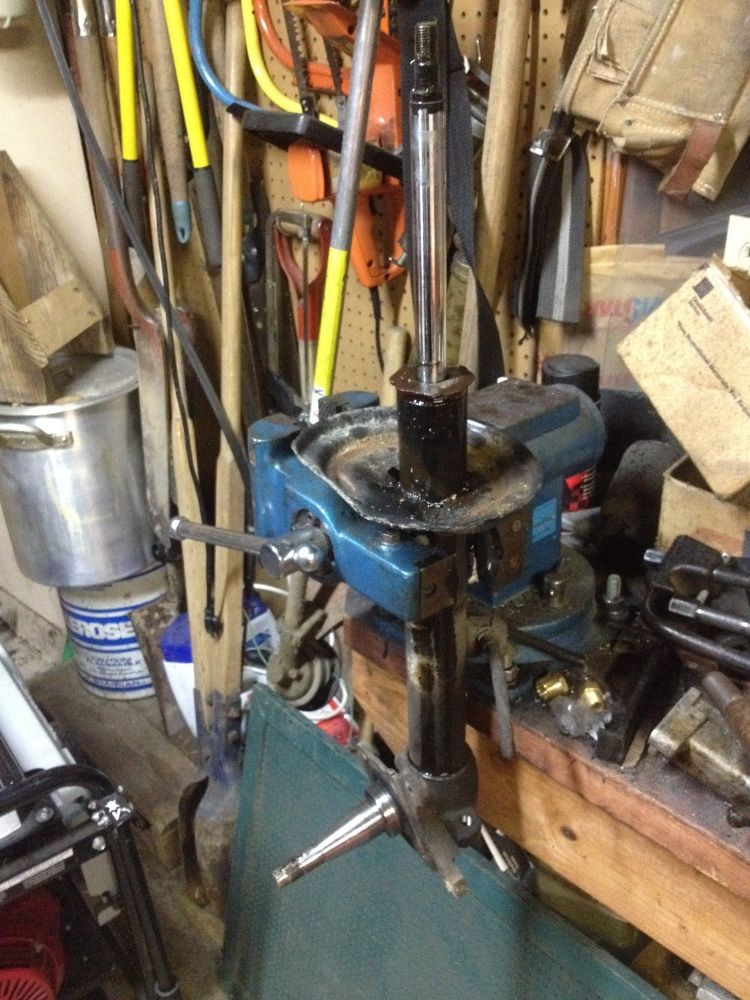
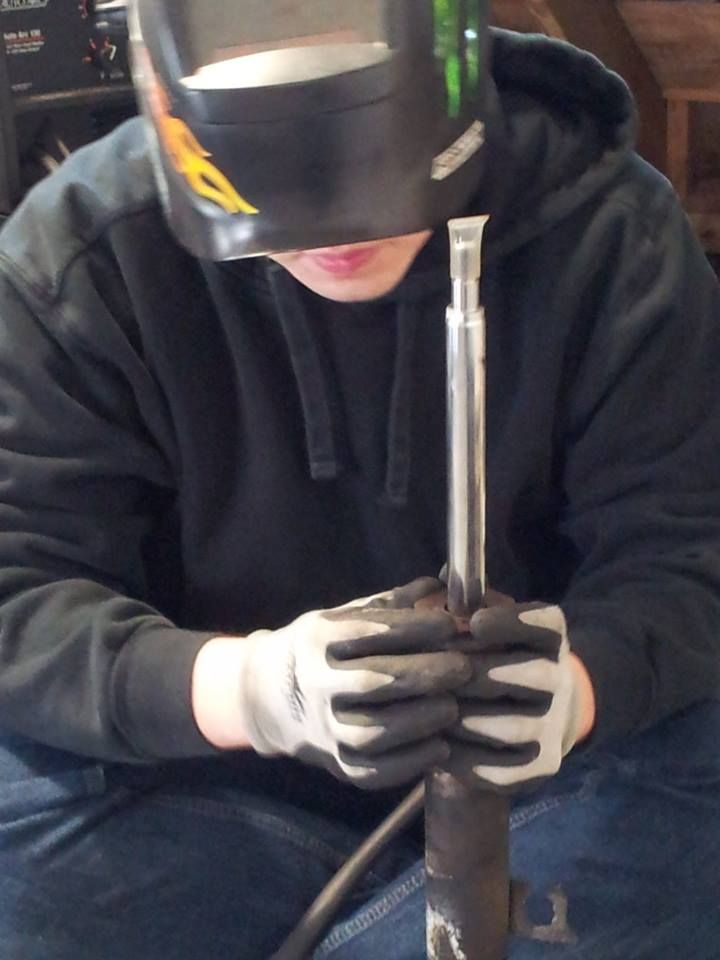
Getting prepped for welding
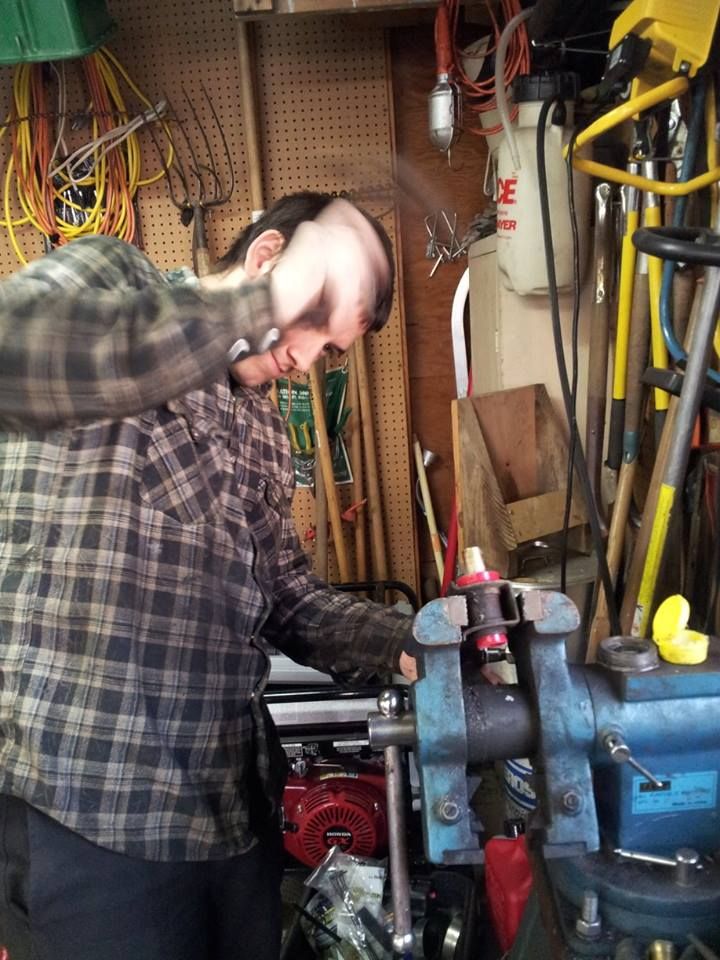
Mitchell getting it ready to tack
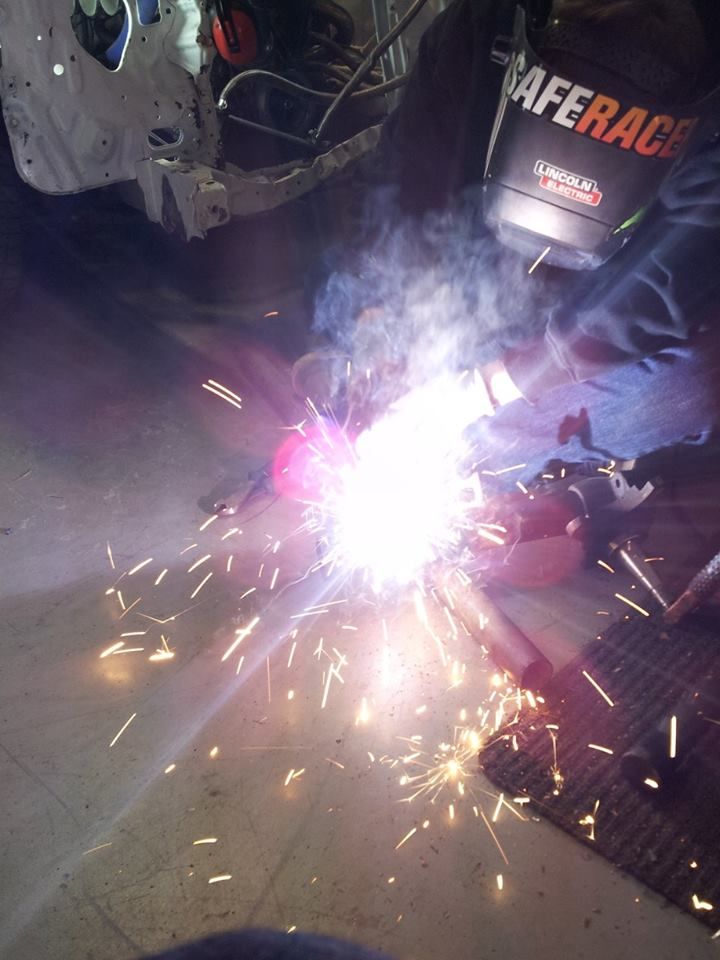
Mitchell did a great job welding them up. Note: the shocks were not in
the housings for the welding. It's a good way to ruin your brand new
KYB's.
Primered
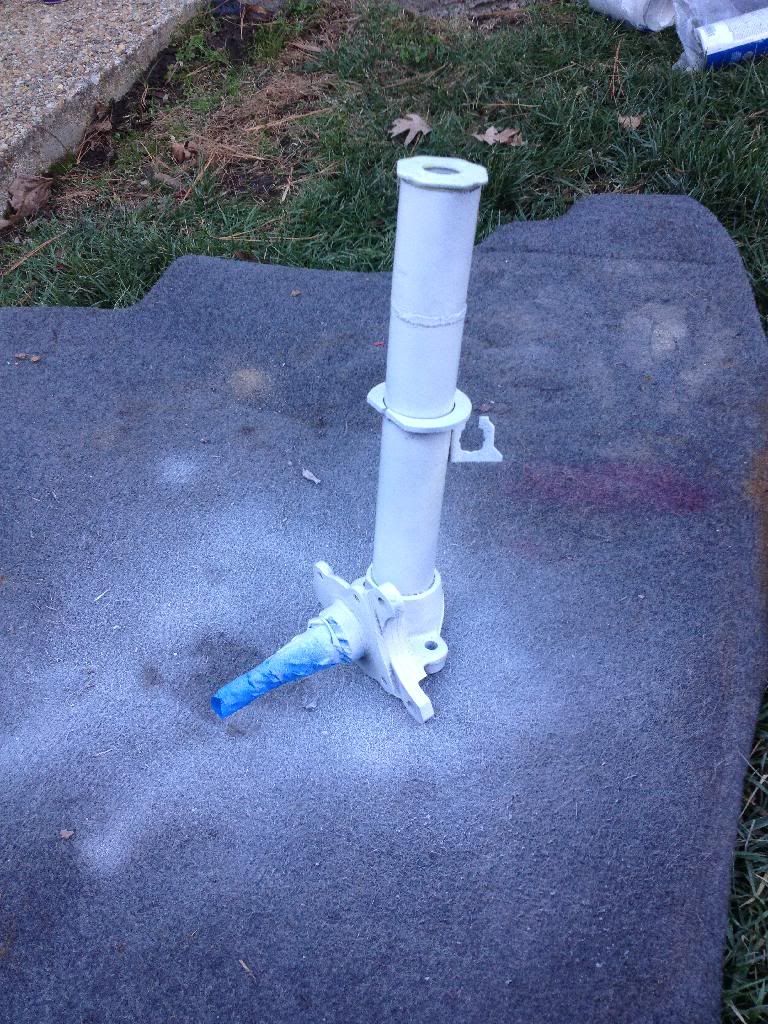
Painted and assembled!
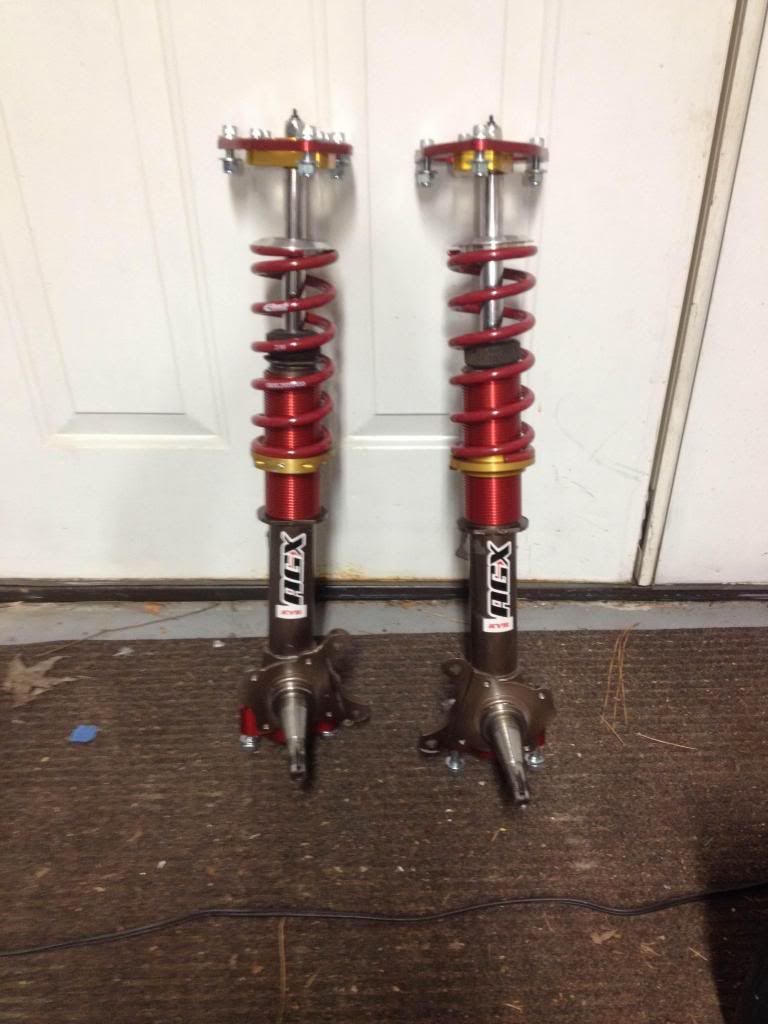
Now for a non-rainy day to put them on!
1/9/14
The intermittent starting problem reared its ugly head again today. It
started up great this morning, but when I tried to go to lunch it just
gave me the "click" and wouldn't turn over. I was so pissed I may or may
not have punched the rear quarter, and then subsequently had to push
the dent back out lol. Anyways, when it came time to go home after work
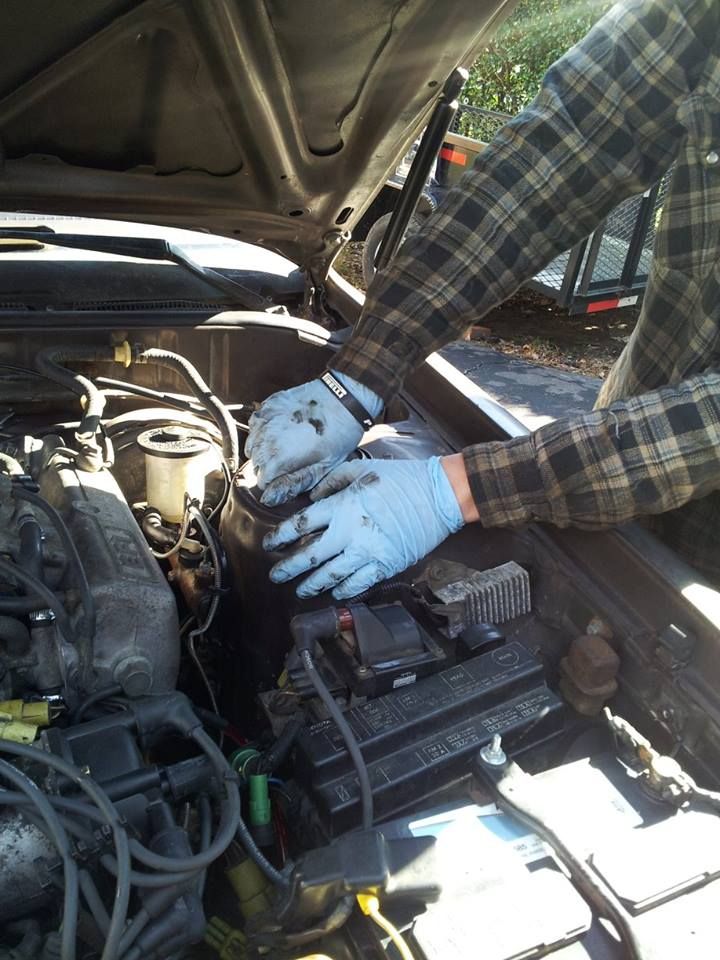
it fired up fine first try. So tonight I went through and cleaned the -
cable end and battery terminal as well as the existing chassis ground
and added an extra ground to the intake manifold. I also cleaned the +
terminal and cable end at the battery and at the starter. Hopefully this
will fix my issue. Hopefully.
Either way, reving that big old 2.8L six up to 6500rpm on the way home TOTALLY makes up for any electrical frustrations. Good lord, dat noise.....
Either way, reving that big old 2.8L six up to 6500rpm on the way home TOTALLY makes up for any electrical frustrations. Good lord, dat noise.....
1/10/14
The other night when I was under the car cleaning up the wiring, I also
added a heat shield sleeve to the speedo cable, since it's sorta
touching the exhaust. I used a spark plug heat sleeve like these

I think it must have already been brittle from the heat, because last
night my speedo stopped working. I put it up on a lift after work today
and found that there was a break somewhere in the short cable. (The
speedo cable is two pieces, a short section about a foot long connects
the transmission to the long cable that goes up to the dash)
So I ordered a new short section for like $12 and it will be here on Tuesday or Wednesday.
Also, I got my urethane from McMaster-Carr in today. Pretty much ready to take this thing down for suspension overhaul as soon as I get the MR2 fixed.
So I ordered a new short section for like $12 and it will be here on Tuesday or Wednesday.
Also, I got my urethane from McMaster-Carr in today. Pretty much ready to take this thing down for suspension overhaul as soon as I get the MR2 fixed.
1/13/14
I got the car up in hover mode today, all 4 corners on jackstands. My
awesome girlfriend was nice enough to take some pics while she helped me
out.
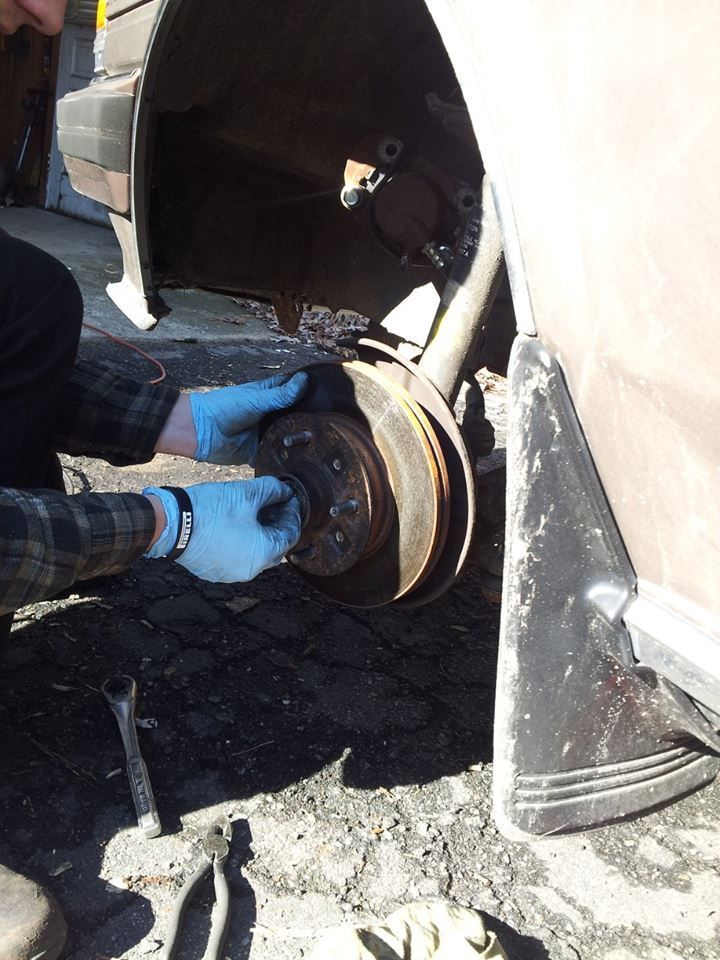
I held the brake caliper up out of the way with a bungie cord and removed the hub
I held the brake caliper up out of the way with a bungie cord and removed the hub
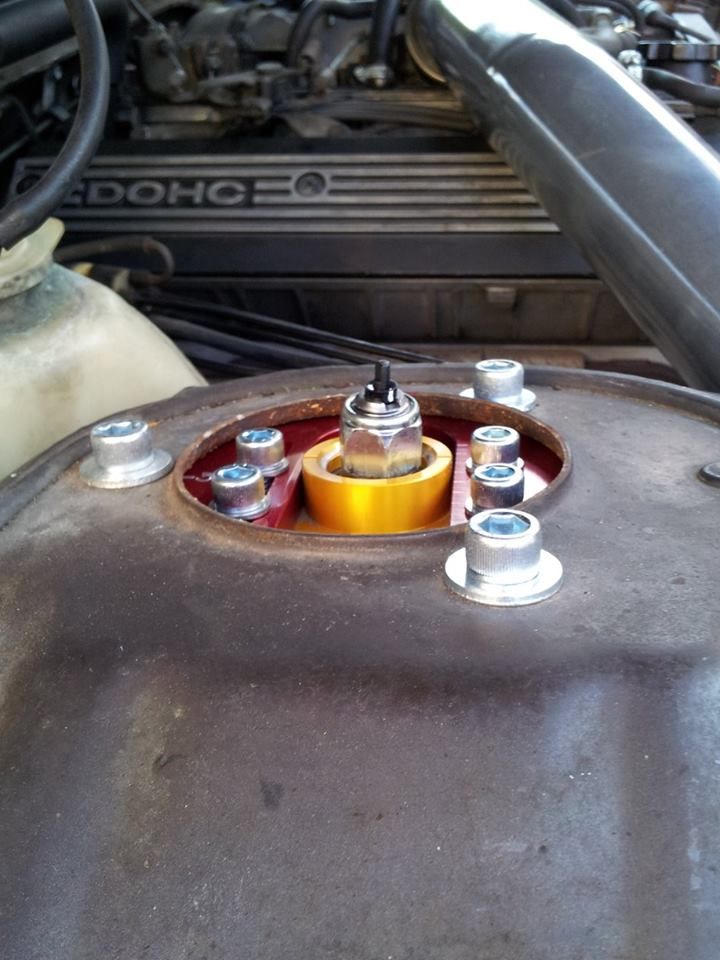
Removing the upper strut mount bolts
Ready to come out
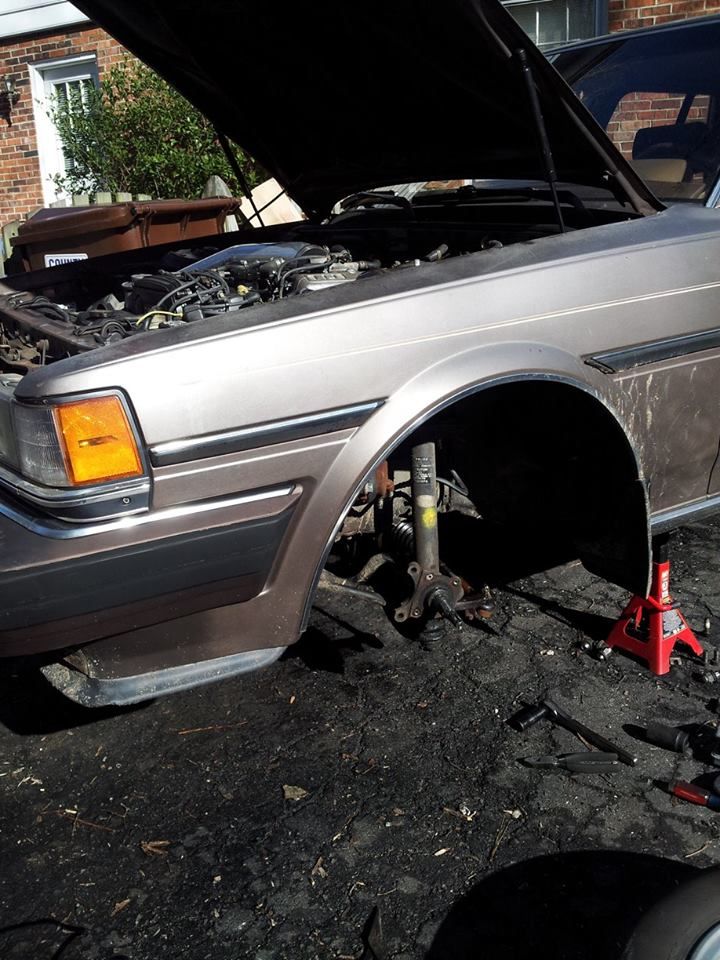
Gone!
Adios, POS.

So pretty!!!!
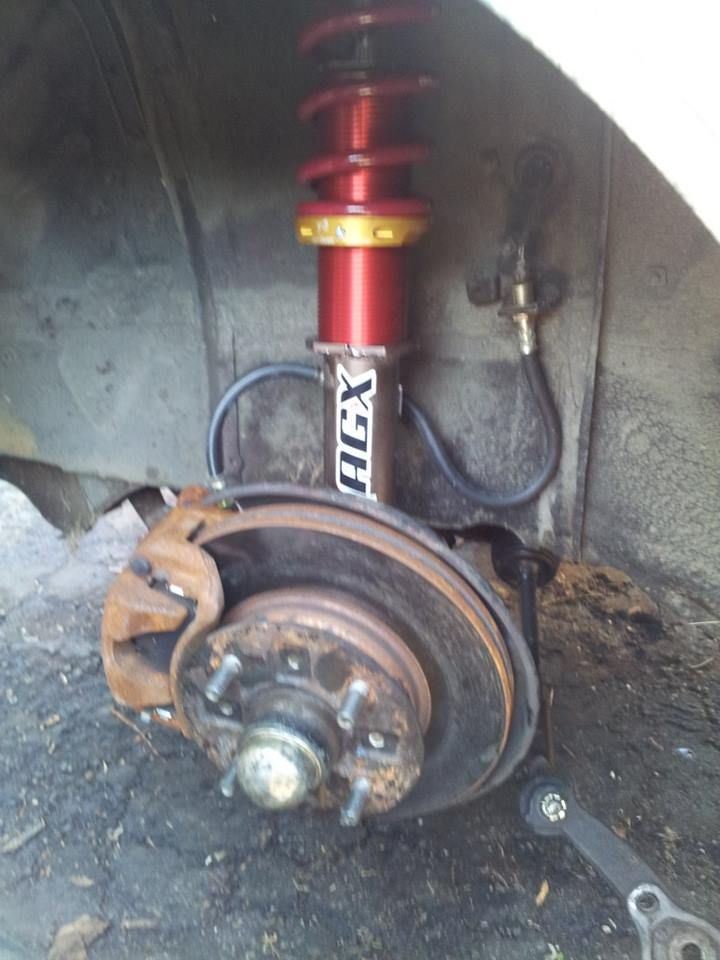
Mmmmm T3 goodness
Old rubber bushings out, new urethane bushings in
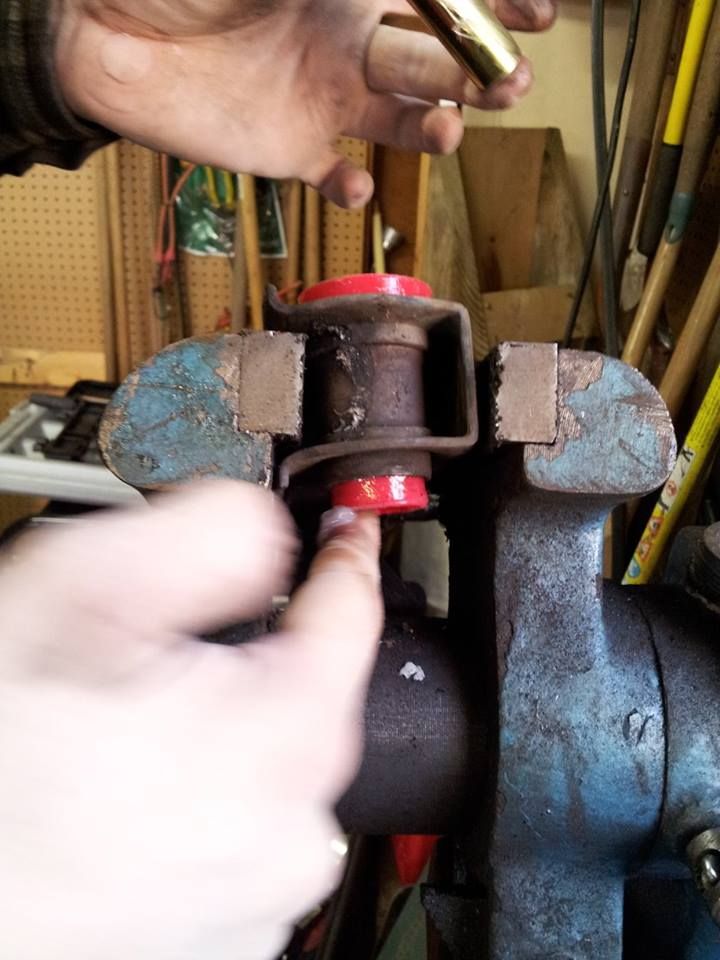
Turns out it's way easier to put the bushing in and THEN the metal sleeve
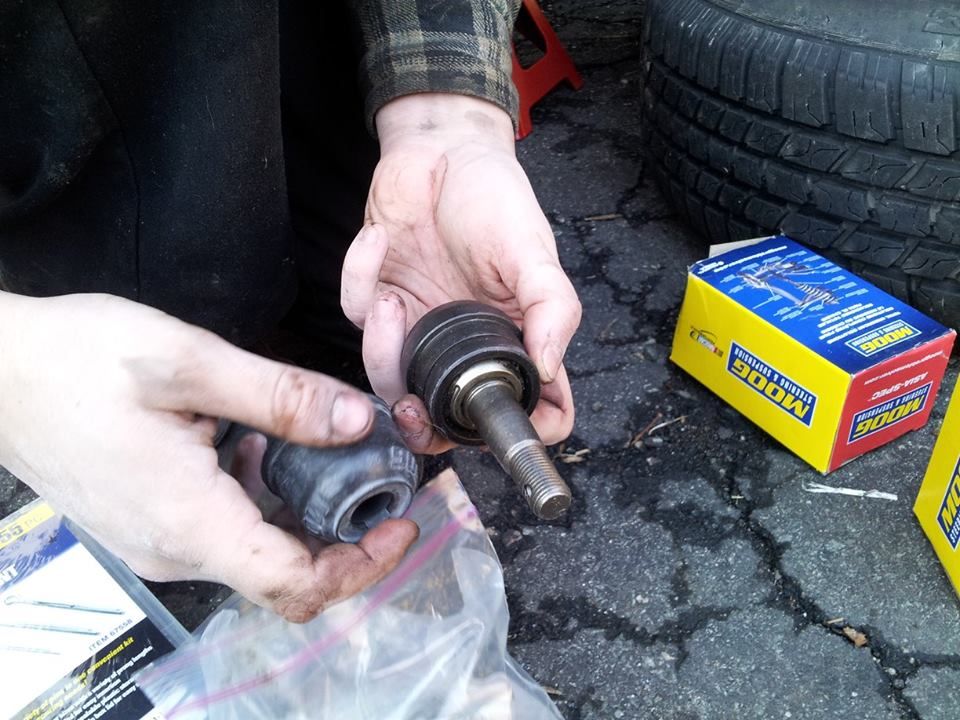
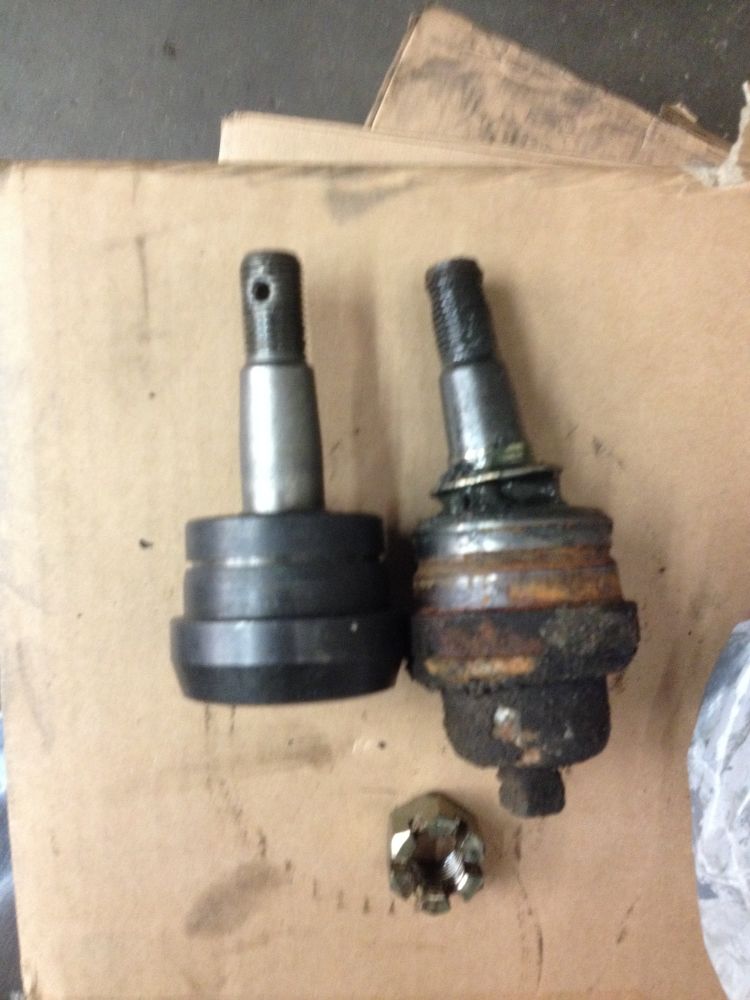
Bushings in, taking the arms with me to work tomorrow to get the old ball joints pressed out
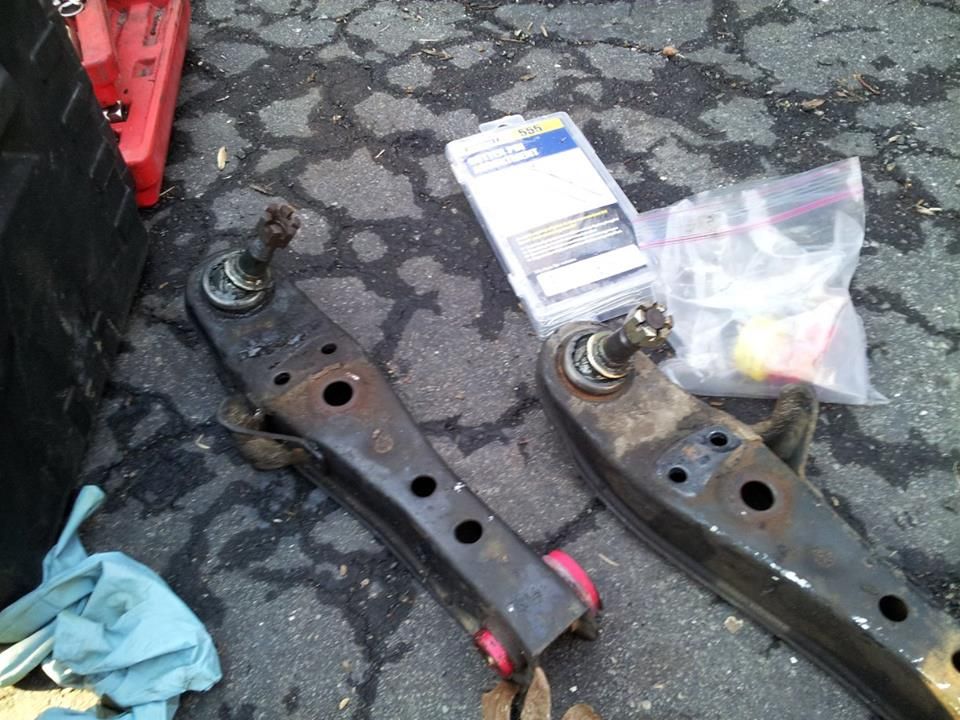
And have new Moog ball joints to press in
On to the rear end

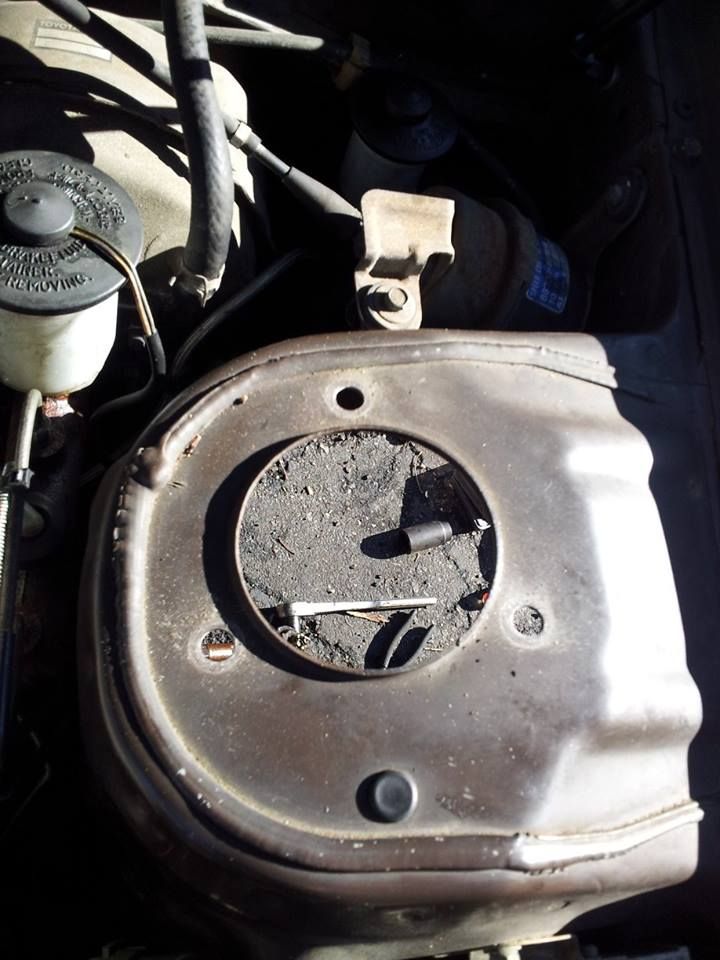
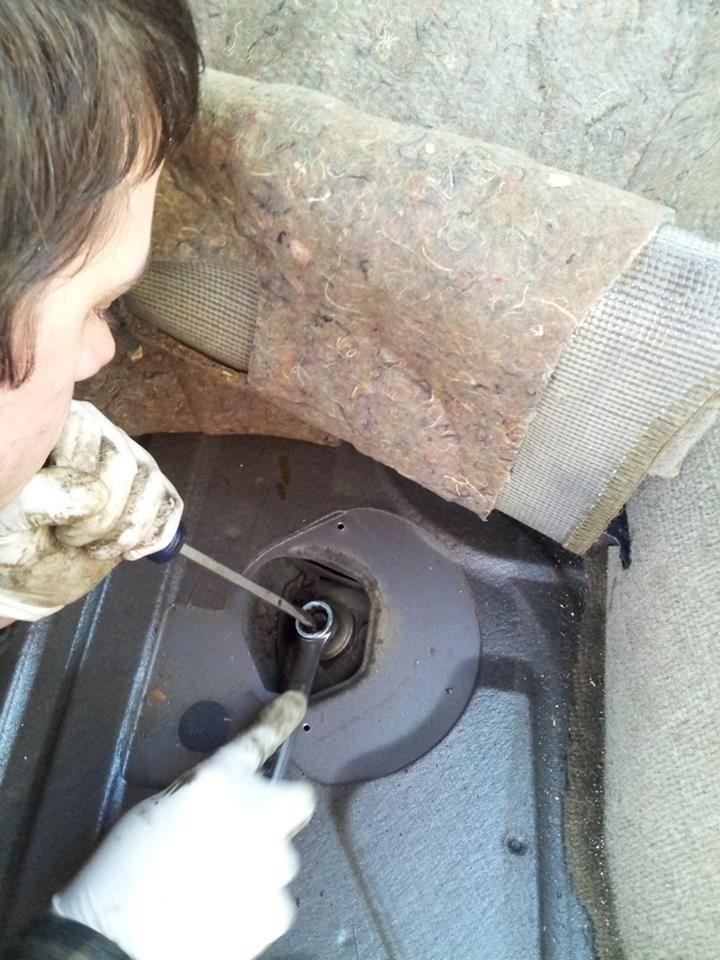
Access panels for the top of the rear shocks

Not a whole lot of luck with the screwdriver holding the shock still.......

I got the Camaro KYB AGX's in but I didn't take any pics. Here's one of
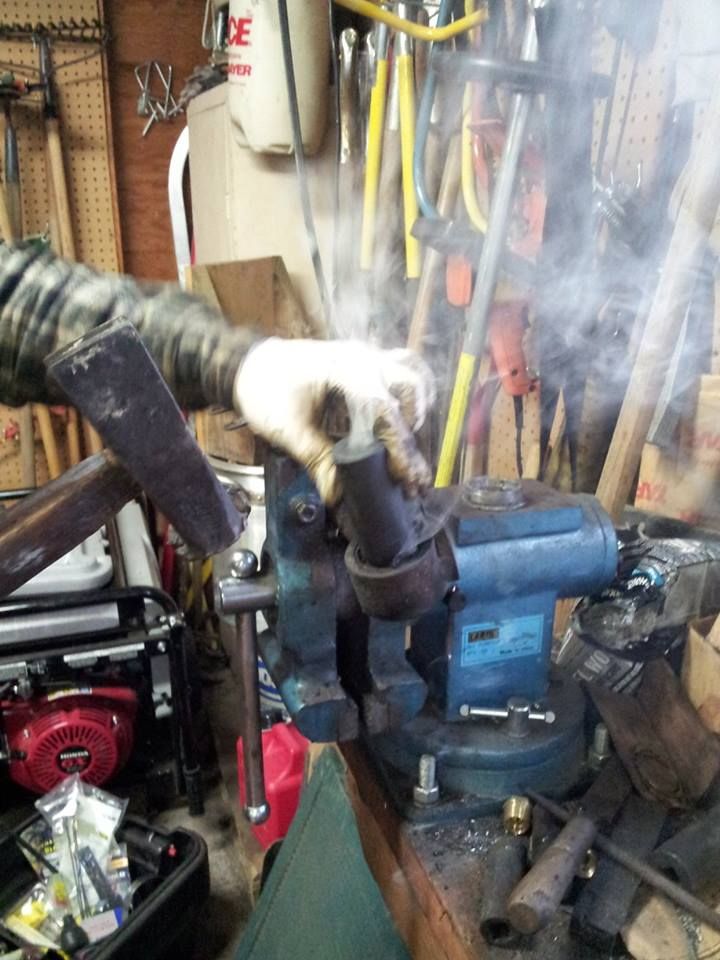
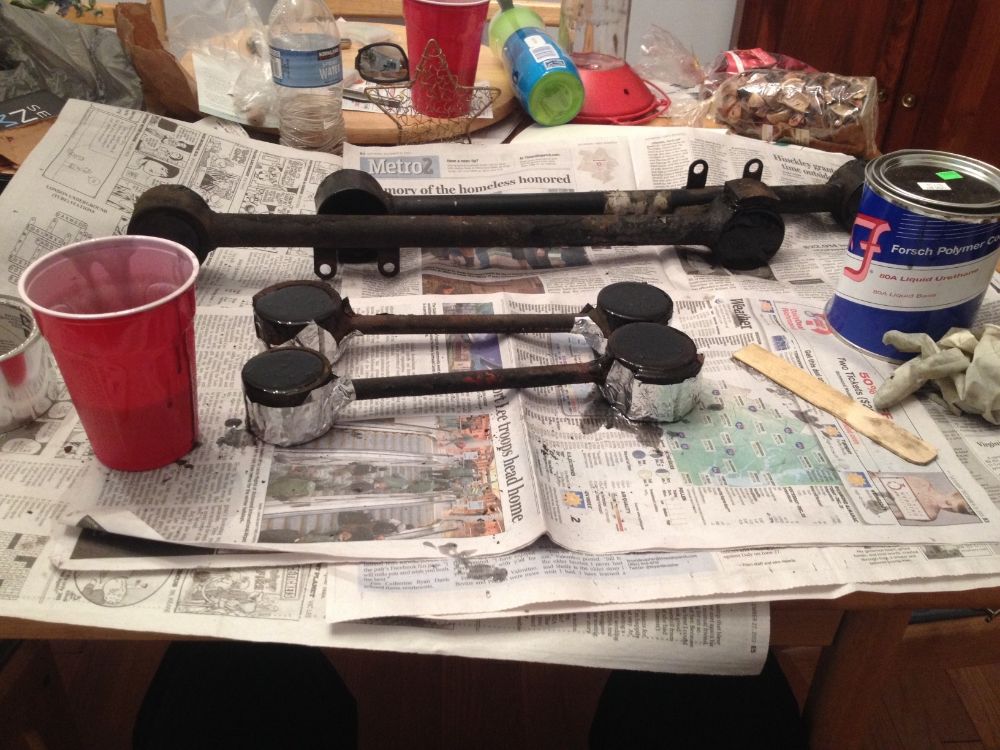
the four axle links getting its bushings removed WITH FIRE
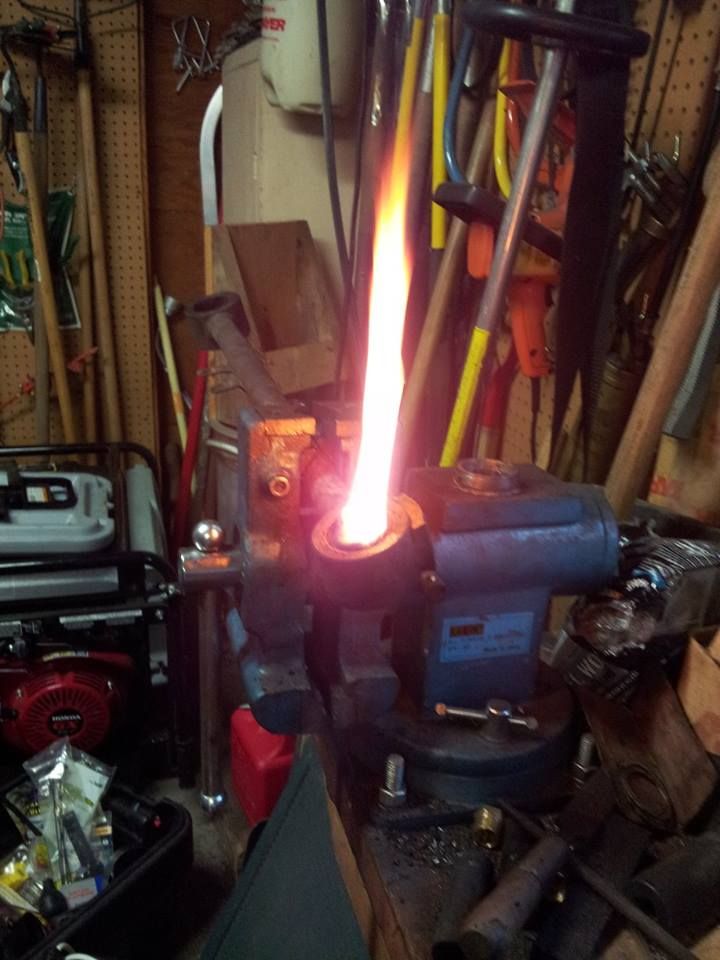
When all else fails, fire and a BFH should get the job done
Aluminum tape on one side to hold the urethane
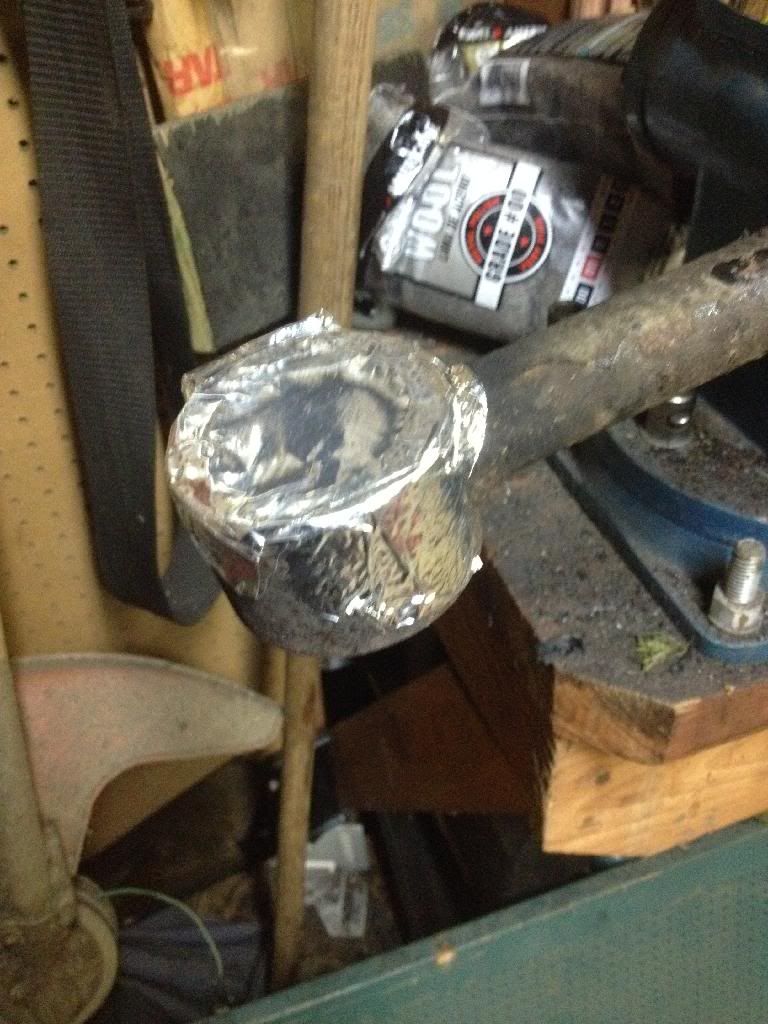
And here's the urethane poured into the arms. I'm only doing two at a
time and poured the rest of the urethane into a solo cup. I'll probably
use sections of the remaining cylinder as side pieces to keep the arms
from sliding laterally on the metal sleeves. Holes will be drilled in
the bushings for the sleeves to fit through, obviously.
1/14/14
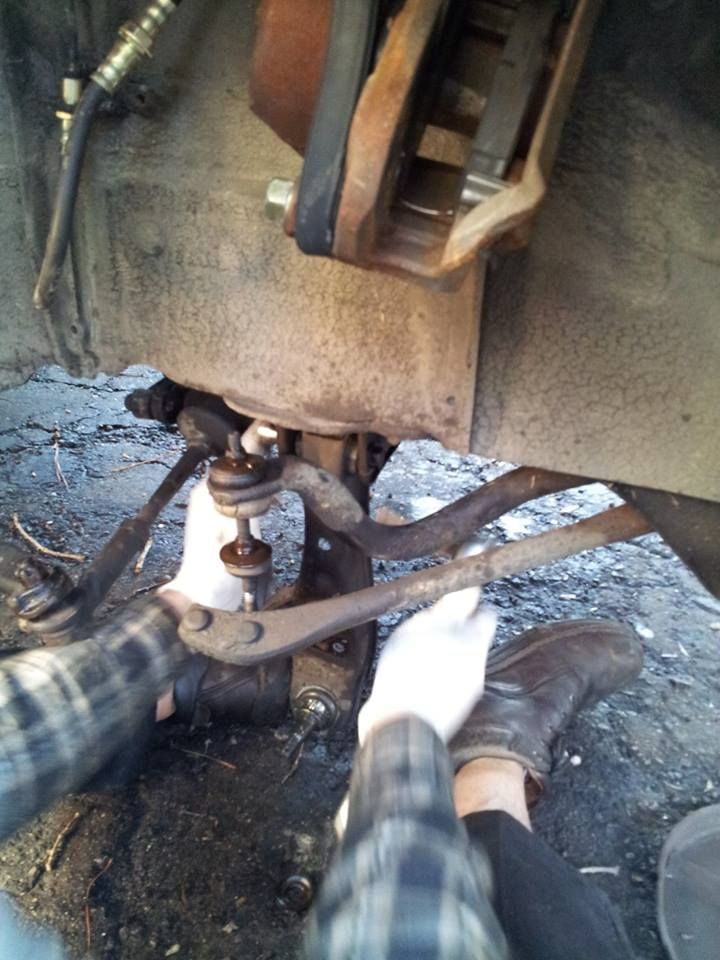
I took my control arms to work with me yesterday and used the press in the shop to pop out the old ball joints.

Old vs. new
So after work I got home, reinstalled the control arms (now with
urethane bushings and new ball joints), and now the front end is done.
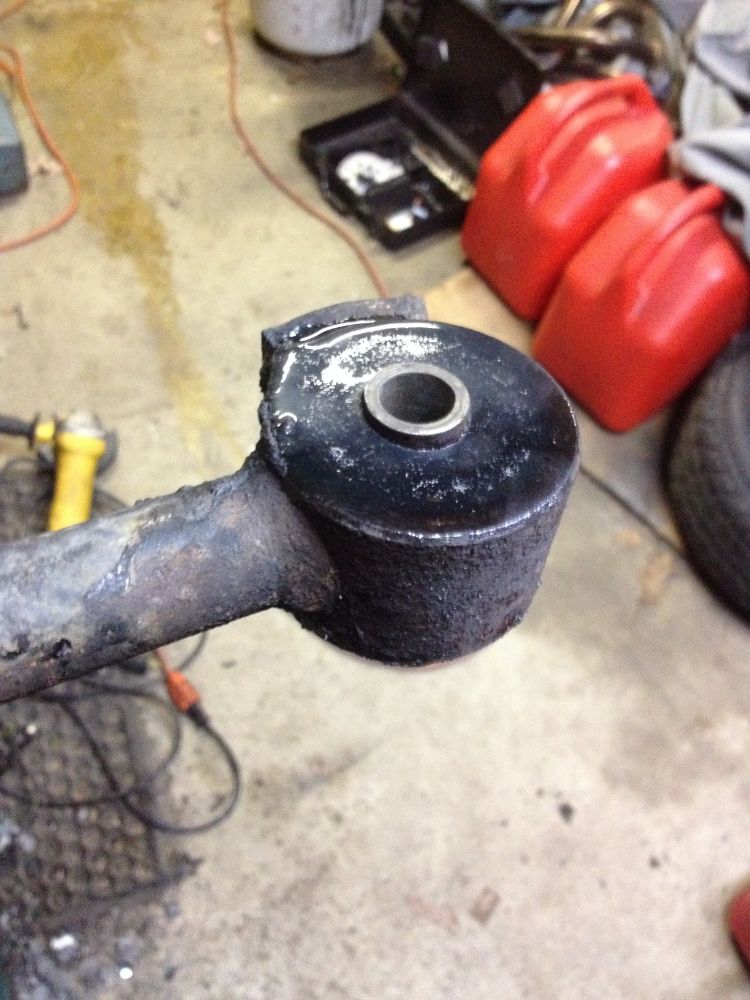
I also removed the upper rear axle arms, burned/chiseled, and otherwise removed the old rotten squishy bushings and filled them with urethane as well.
I also removed the upper rear axle arms, burned/chiseled, and otherwise removed the old rotten squishy bushings and filled them with urethane as well.
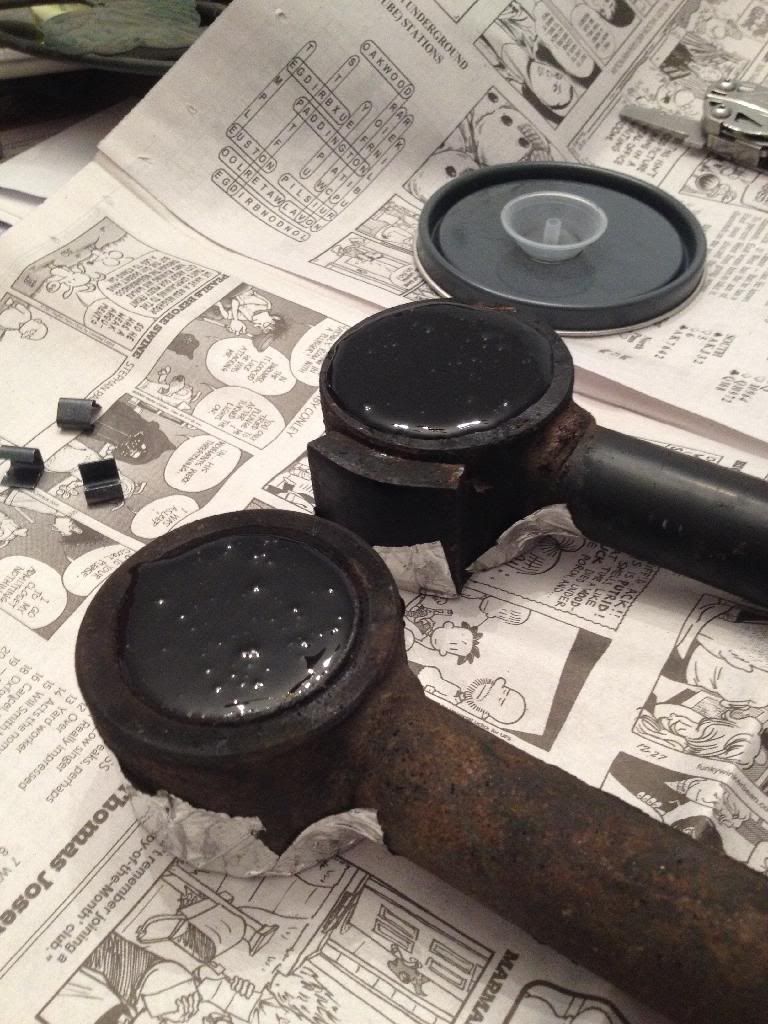
Today, I took the lower rear arms I did two days ago and finished them
up so they are ready to go on the car. According to the literature that
came with the urethane, it reaches 90% of it's final physical properties
in 2 days assuming 70-something degree temperatures, so I just left
them inside for two days to cure.
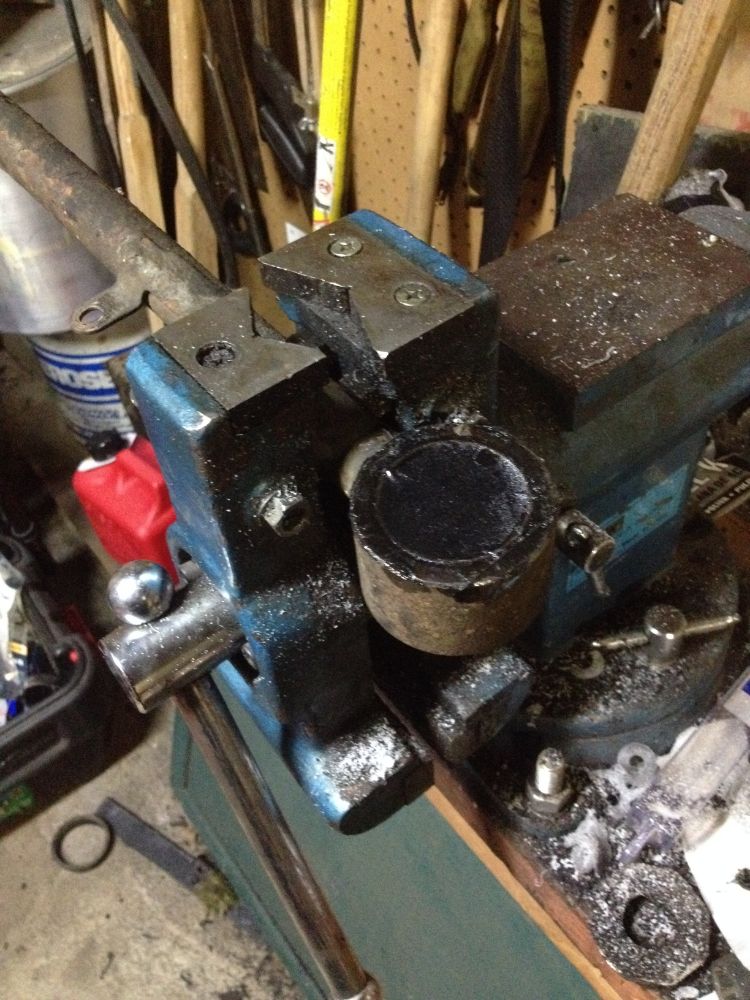
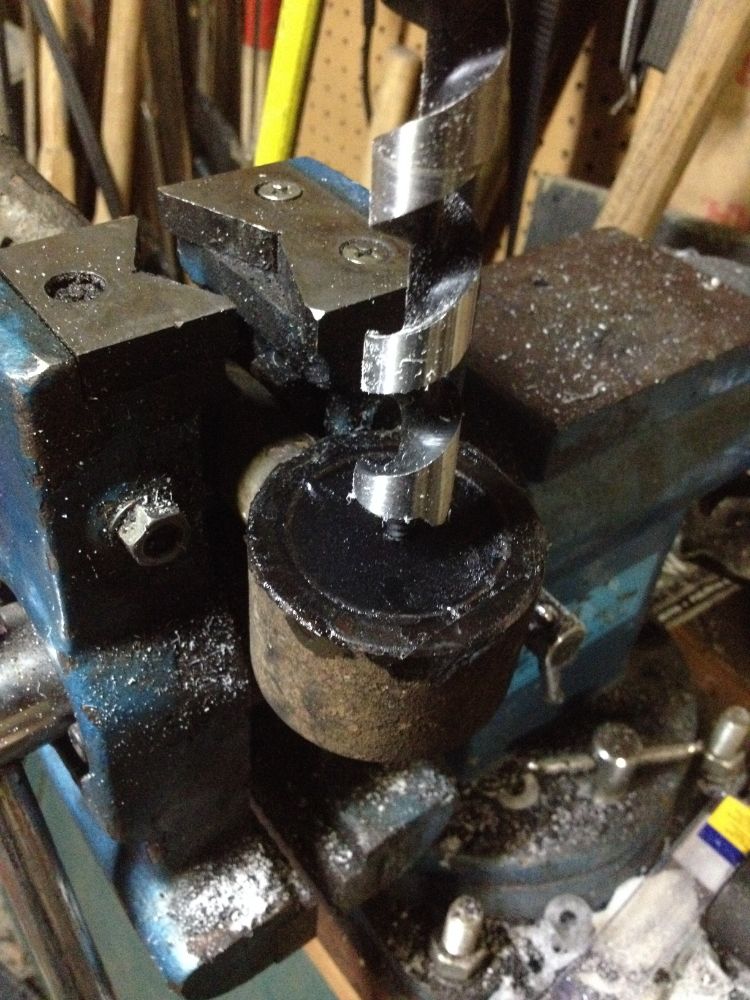
I used a 3/4" auger drill bit. It worked beautifully.
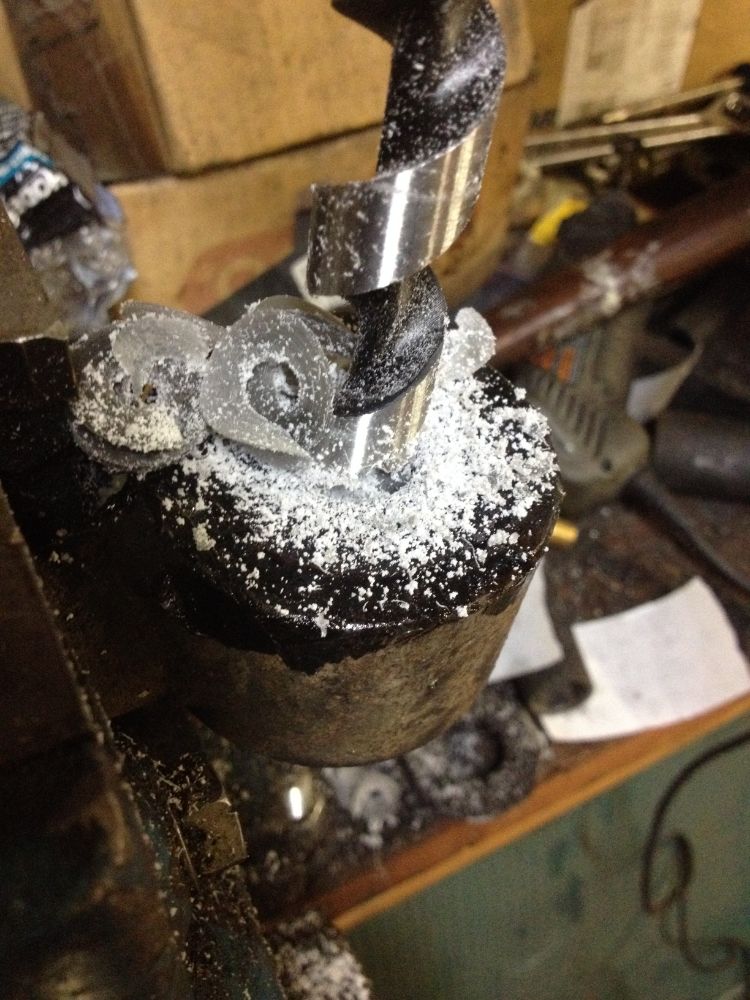
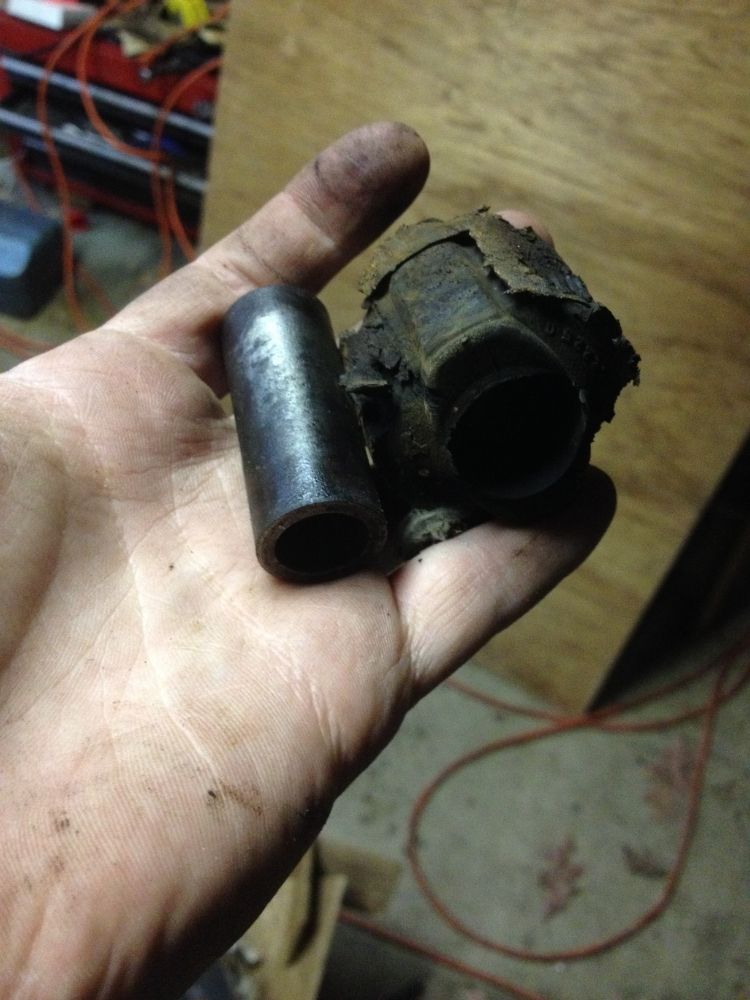
Then the metal sleeve from the original bushing goes in. Here it is next
to one of the old bushings. Some I could just push out with my bare
hands. Others stuck to the bushings and had to be cut out and cleaned
up.
The sleeves were like 1mm over 3/4" so I purposefully used the 3/4 bit
so as to make it a tight fit. I just hammered them down into the holes
and they are in there nice and snug
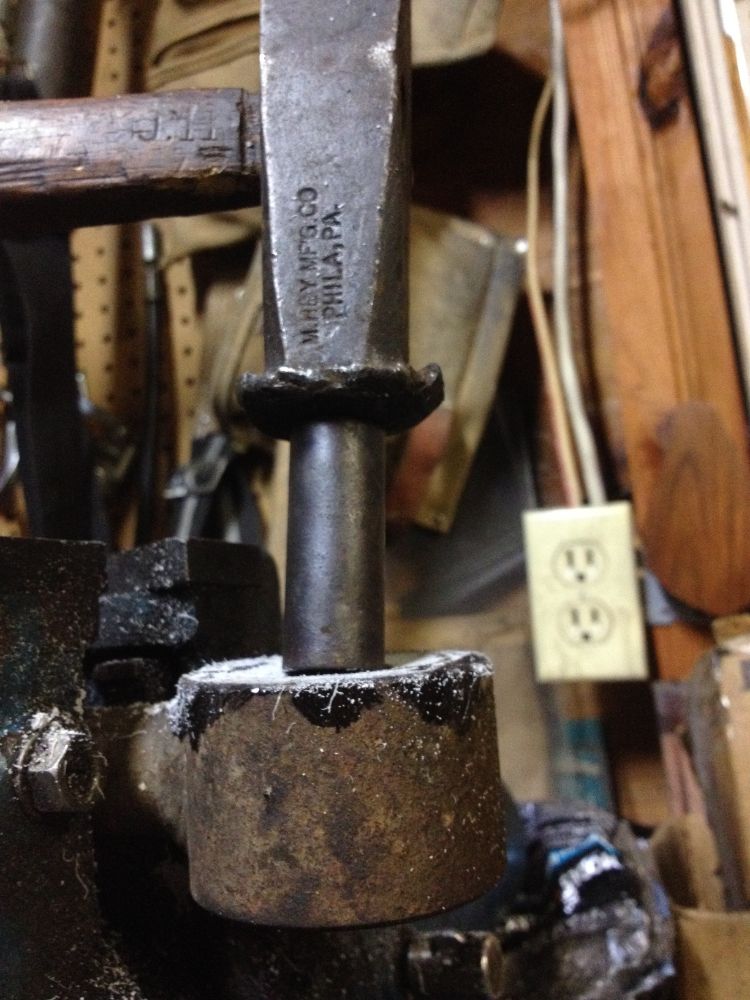
And there you have it. Custom home-made poly bushings ready to go back on the car.
1/15/14
Borrowed Mitchell's spare AE86 sway bar to see if
it would work on this. The answer is "sort of". It bolts to the axle ok,
but the ends don't extend forward enough by about an inch. This is good
and bad. I can probably get a huge aftermarket AE86 rear bar, but I
will have to make custom end links and/or brackets on the chassis. Not
impossible or particularly difficult, just another thing to have to do.
Good to know though. A Godspeed AE86 bar can be had for like $100 on
ebay, I can hit up McMaster for hardware to make my own adjustable
links, and chassis bracketry can be modified/reinforced or replaced with
a custom piece pretty easily.