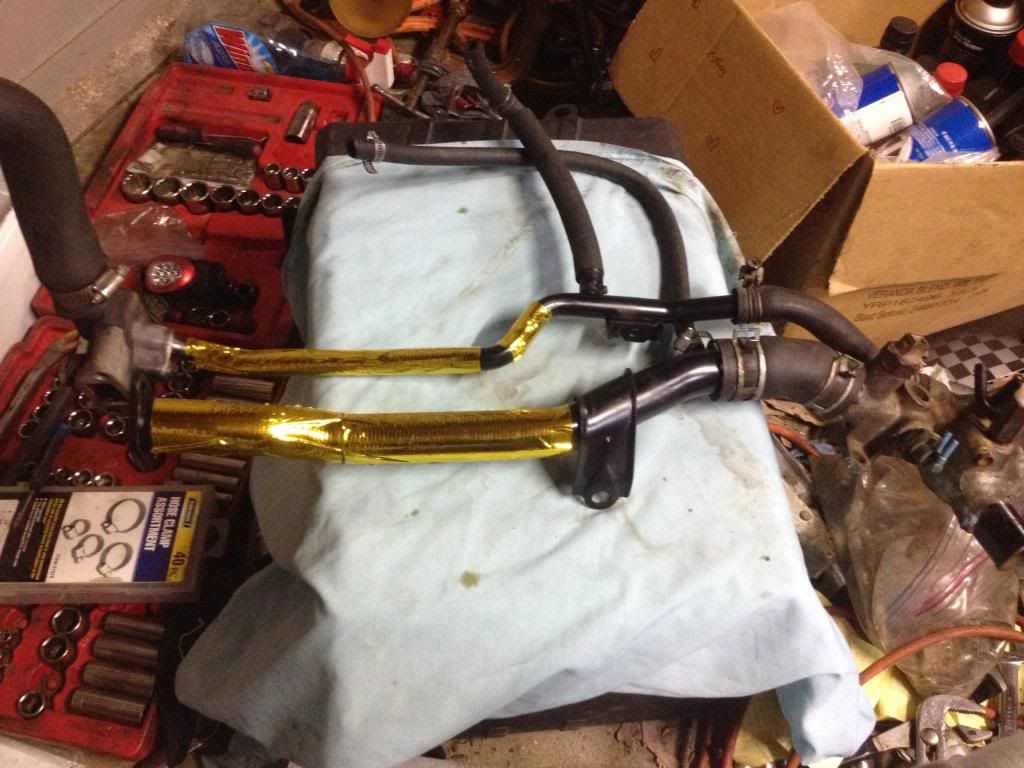
A couple days ago I was bored and decided to clean up the old, corroded water pipes. Here's a little in-progress shot.

After all the corrosion was wire-wheeled off, I hit it with some paint I had laying around, then wrapped it in some DEI gold heat reflective tape. This pipe sits right next to the block between the supercharger and the intake manifold. Who knows if it will do anything, but it makes me feel better.
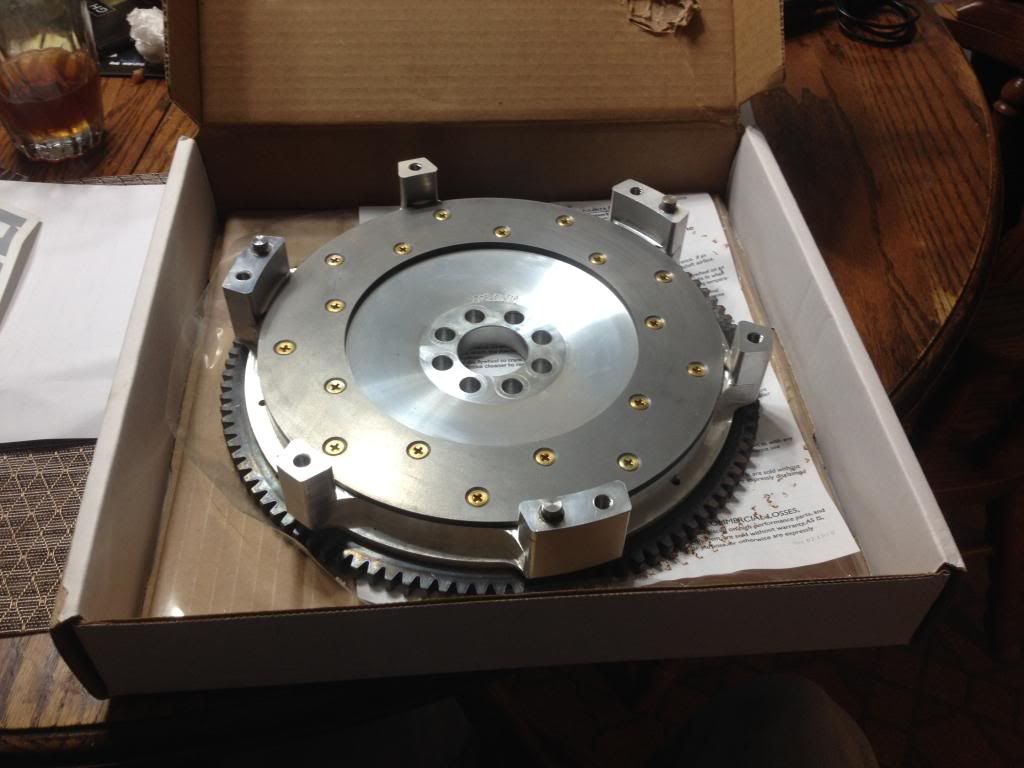
Also, the flywheel came in today which is cool.
5/8/14
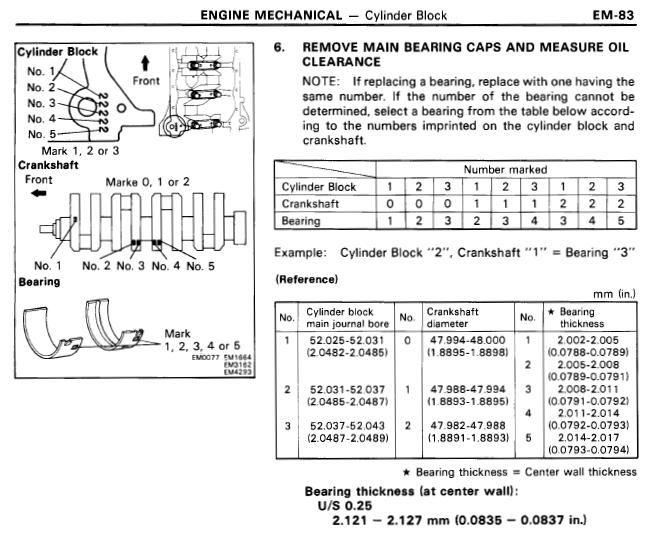
Turns out I ordered the wrong size main bearings (the parts catalog at work can be super confusing), so those will get returned when they come in. Apparently when you look up the full set in the catalog it's "U/S" for undersize journals if you had to get the crank machined. What I need to do now is look for numbers stamped on the block and crank and match them up through a little chart in the repair manual to determine what bearing size I need. Fortunately I have a picture of said markings on the block from a few years ago (mine is 33332). Unfortunately, my crank is still at the machine shop and I can't get it till Monday.
Here's the chart for reference.
5/13/14
Got off work early today because I had to go to some kind of inventory class training thing, and stopped by the machine shop to have a look at the numbers on the crank so I could order main bearings. I was delighted with some good news.
1. Giving the crank a light polish won't effect the bearing tolerances in any kind of significant amount
2. Everything should be done tomorrow or Thursday
3. The bill will be significantly less than I anticipated
Anyways, the marks on the crank read 00001. Using the chart posted previously that works out to all 5 main bearings in size "3". They should be here Monday at the latest I think. I have also ordered appropriately sized plastigauge (every kind you can get readily in the US doesn't go to tight enough tolerances) from a guy on MR2OC that has some he presumably got from a UK supplier. I'm so psyched to start putting this thing back together!
5/14/14
I ordered another McMaster urethane kit to fill my side motor mounts. Win.
Got everything back from the machine shop today.
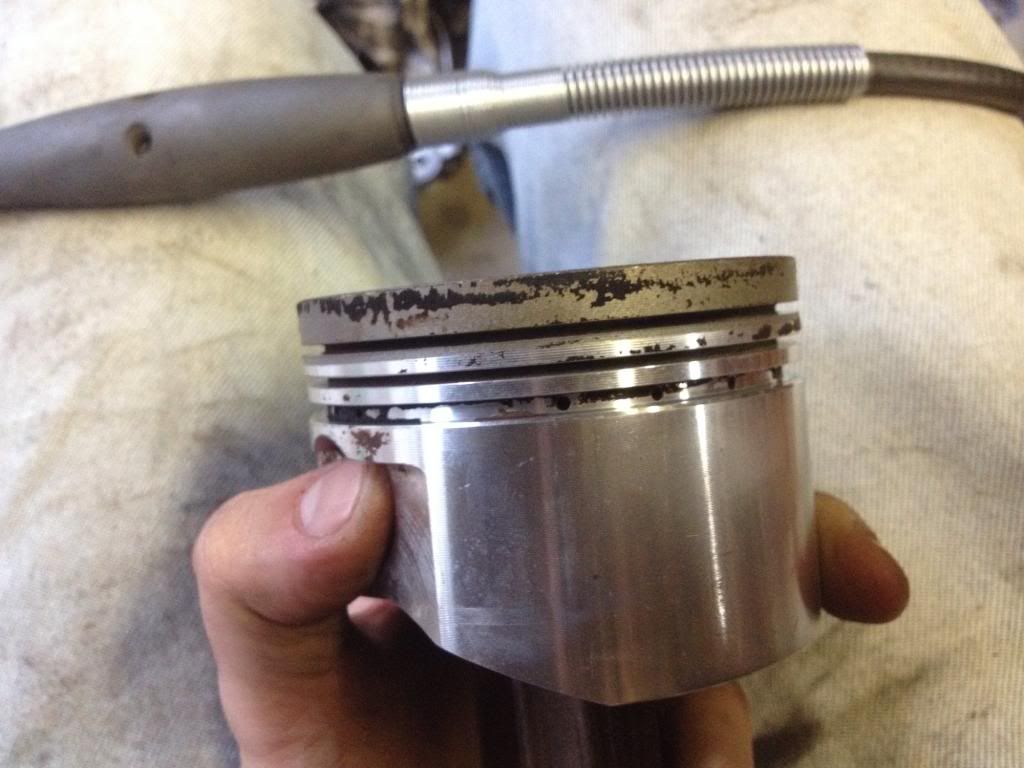
They washed everything, honed & resurfaced block, resurfaced the head, polished the crank, and cleaned the pistons. The guy that did the work (Frank) said that there was some pretty good pitting between the cylinders and the water jacket on the gasket surface which were most likely the cause of my issues. He says he sees it a lot on iron block/aluminum head old Toyotas. So, mystery solved.
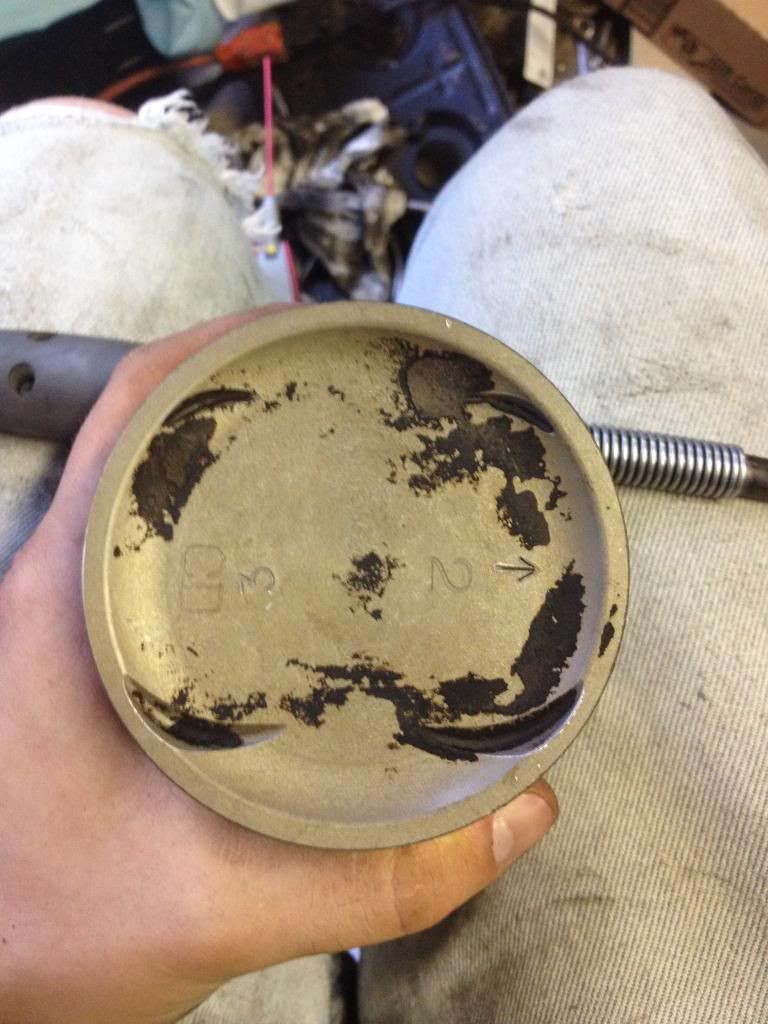
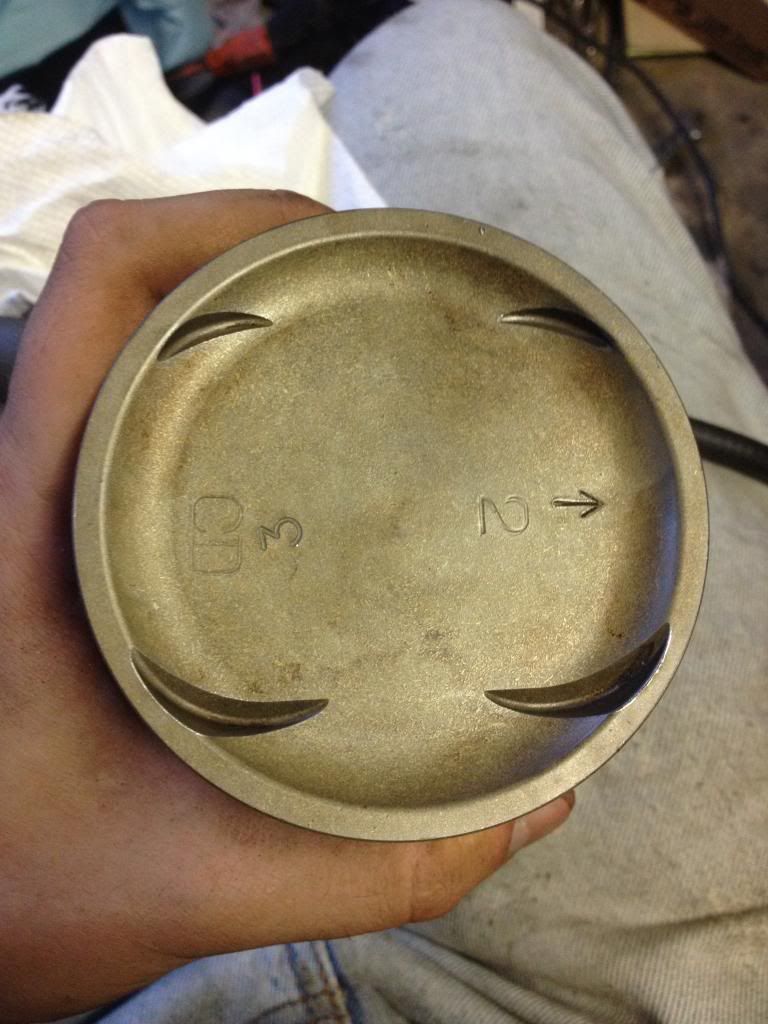
I got to work cleaning the burnt carbon off the pistons this evening. Fine wire wheel on the dremel with a very light touch and a steady hand did the trick. I need to get a fresh wheel to get down in the ring lands better, but I'm pretty happy with how they turned out.
Before:
After:

Before:
After:
I also wire wheeled (big one on a power drill this time) the windage
tray to get all the old RTV off it. I also straightened it out from
where it got a little bent up from removal. The oil pan flange will be
getting the same treatment soon.
5/17/14
Alrighty time to update. I've been posting more on
MR2OC and DoriKaze to glean info from the 4AG Yoda's that dwell in
those parts. I followed the stampings on the block and crank and came up
with all size "3" bearings. I installed them and plastigaged them to
measure the clearances. They are all a bit loose (not crazy loose, just a
little over spec). I then ordered one "5" and one "4" so I can use
those to test before I order more bearings (because they are expensive
and non-returnable once opened >.<) and It looks like If I use
four "5"s and a "4" I should be good to go.
5/19/14
Finished smoothing out the intake ports in the
head today, as well as filling my side mounts with urethane. It's
probably the worst results of all my poly projects, but that's kinda my
fault for not doing a good job with the aluminum tape on the bottom. Oh
well, still better than nothing.
I didn't seal the tape that well on the bottom, so
it was leaking and the level dropped. By the time I caught it, the
urethane was already pretty tacky, so I kinda just used the wooden
stirrer and pushed it in the abscesses like wall spackle/bondo. It was
still gooey enough that it kinda blobed down in there and made itself
even though so that's nice.
5/22/14
Main bearings are in spec, crank is in, rod bearings are in spec, pistons are in.
6/3/15
Unfortunately I don't have any of the cool step-by-step stuff you all
have come to expect from my project posts, mostly because at this point I
just desperately want this car to run again. The interesting point I'm
at right now is that with the engine on the stand I can't put the rear
crank cover on, which is part of the oil pan mating surface. So
basically I have to build most of the motor sans oil pan so that I can
use the engine crane to hold the engine while I remove the stand,
install the backing plate, and then put it back on the stand to do the
oil pan. Kinda bass-ackwards but oh well.

6/4/14

Timing gear, timing belt, timing belt tensioner, cam gears, cam seals,
rear and all front timing covers are on, distributor, spark plugs, plug
wires, alternator bracket, SC bracket, motor mount bracket, water pump
pulley, intake manifold, water pipes, and valve covers are all on.
Tomorrow I'll be installing the rear crank cover/rear main seal,
prepping the oil pan (cleaning the surface, and fixing any bends I may
have put in it from prying it off) and hopefully installing it as well.
Then the SC, exhaust manifold, wiring harness, and alternator can be
installed.
6/8/14
The engine assembly was completed a few days ago, and today I got over
to help (big thanks to Shannon, Corey, Mitchell, and Billy). We got the
motor off the stand, flywheel and clutch mounted, and transmission mated
the the motor. The motor/trans were placed on a tire on a furniture
dolly while we lifted the back of the car with the engine hoist, just
like we did to remove it. However a combination of factors are making it
impossible for this to work at my house, not the least of which is the
poor quality of the pavement in my driveway. The wheels of the furniture
dolly were digging into the driveway and it was frankly a miracle we
got it back out from under the car at all.
So at this point it looks like Mitchell is going to borrow a truck from his work and tow the car over to his house so we can install the drivetrain there. That will probably be either Thursday or Friday evening. Assuming all goes well there, I can probably get the car in running shape by Sunday, and hopefully driving by next Monday or Tuesday. Then it's a matter of putting on the miles so I can have it broken in by the autocross test & tune on July 12 and/or the race on July 13.
So at this point it looks like Mitchell is going to borrow a truck from his work and tow the car over to his house so we can install the drivetrain there. That will probably be either Thursday or Friday evening. Assuming all goes well there, I can probably get the car in running shape by Sunday, and hopefully driving by next Monday or Tuesday. Then it's a matter of putting on the miles so I can have it broken in by the autocross test & tune on July 12 and/or the race on July 13.
6/15/14
The engine is in. After taking it to Mitchell's garage for the use of
his nice floor and also the ceiling I-beam-mounted chain hoist. I still
have loads of work to do connecting things and getting it back up and
running, but the hardest part (I hope) is over.


6/15/14
All wiring is connected other than the battery itself, fuel lines are
connected with new crush washers, cooling system has been initially
filled but will need to be bled after the car is started for the first
time. Shifter cables and slave cylinder are all mounted. Oil cooler
connected. Left axle is installed. Gruntbox has been rewired. Belts have
been tensioned.
Work remaining:
Right axle
Exhaust system (will be reprinted with better paint before install)
Torque crank pulley bolt fully
Install intercooler
Add Seafoam to gas tank
Fill engine with break in oil
Remove EFI fuse and prime the engine
Startup
Drive moderately hard for 30 min
Change oil to conventional and drive easy for the next 500 miles.
6/16/14
It runs and drives. The engine is still breaking in, the cold start
injector is disconnected so the ECU will 'learn' without it so the
Gruntbox will work when I plug it in. I still need to set timing and
make sure nothing leaks, but it seems to run just as well as it did
before.
6/17/14

Put like 56 miles on the car tonight. I went to the car wash and to fill
up with some fresh 93 octane Shell. The motor drives perfectly. Idle is
a tad rougher than I remember, but I wonder if that's just from a
combination of higher compression, lighter flywheel, now-solid side
mounts, and just being generally new. The rear brakes are making some
noise which is annoying. I wonder if the ebrake seized while it was on
blocks (they aren't seized anymore) and messed up the rotors. I think I
may do pads and rotors before the next autocross anyway. It also needs
an alignment pretty badly.
Odo read 274149 at the beginning of the night, which means the car had roughly 209,935 miles on it when the motor was rebuilt.
Odo read 274149 at the beginning of the night, which means the car had roughly 209,935 miles on it when the motor was rebuilt.
6/20/14
Now that I'm a little farther into the break-in I've been giving it a
little more gas every now and then and I've discovered that there's
definitely something up with the SC system. You can see here:
When I put my foot down it should go up to 5-7ish psi immediately.
Instead what happens is I get about 2-3psi for a second, then it jumps
up to where it should be. My pulley clutch seems fine, the belt isn't
slipping, and after spraying around with starter fluid I didn't find any
vacuum leaks. I'm thinking the vacuum lines for the various vacuum
switching valves (VSV's) may be mixed up, since this is how the ABV (air
bypass valve) is controlled. The ABV basically allows the intake air to
bypass the supercharger when it's not on. I think I need to retrace all
my vacuum lines in that area and make sure they are going where they
are supposed to go.
Here's stock routing

Here's routing for the ABV VSV bypass that you do when you run more boost than stock

And here's the routing that HKS has in the instruction manual for their
overboost pulley (that I have), which is basically the ABV mod.
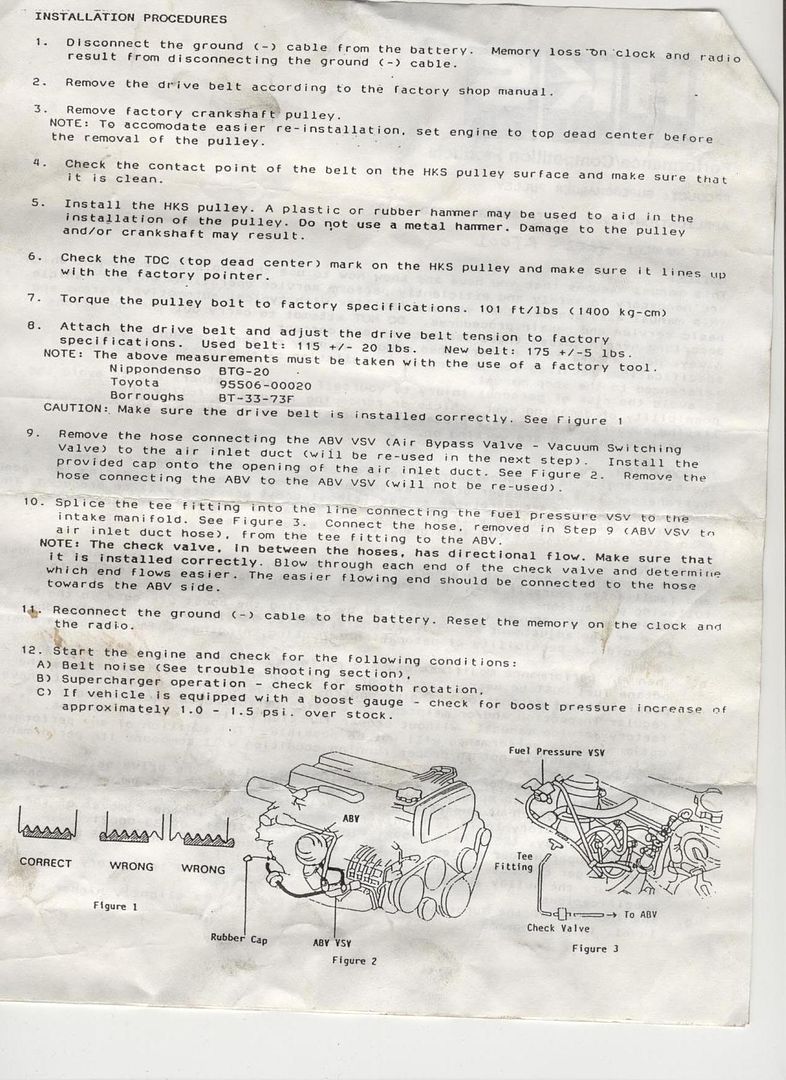
I'm going to try and reroute it so it lines up with the HKS manual
because I'm pretty sure that's how it was before. I hope that fixes the
issue, otherwise I could have a faulty VSV or ABV, neither being cheap
or easy to find.
6/21/14
I removed the check valve, teeing the ABV straight into the line and everything is well with the world. Hooray for boost!
No comments:
Post a Comment